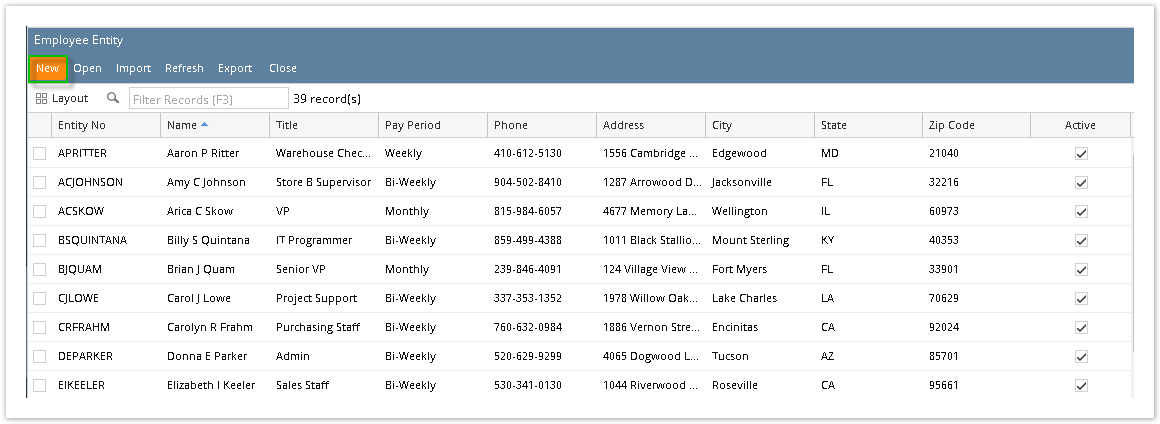
- Click Employees from Payroll module.
- If there are no employee records yet, the Create New Entity screen will be displayed directly. Otherwise, a list of existing employees will be displayed.
- Click New toolbar button.
- Set the value of the following fields:

- Name
Contact
Contact refers to contact name.
- ZIP/Postal
- Country
- Phone
- Address
- Click Find Duplicates toolbar button.
If some values are the same to other employees, it will be displayed in Duplicate Entities
- To create new employee, Click Add button
- To merge new employee to an existing record, select employee with duplicate data and click Merge button
- The information from Create New Entity screen will reflect on their respective fields in Employee Entity screen.
Fill in other fields as necessary.

In Entity tab, the required fields are Entity No, Location Name, and Timezone.
Setup employee details in Details tab under Employees tab.

- Input data on required fields:
- Pay Period
- Last Hire Date
- Workers Comp
- Social Security
- Set Time Entry Password
- Select Department/s
- Select Supervisor/s
Set GL Location Distribution
GL Location Distribution is optional
Percent should always equal to 100%
- Input data on required fields:
Setup employee details by using template
- Click Template button

- Select template and click OK button
- Click Template button
Setup employee details manually.
- Set up taxes in Taxes tab under Employees tab.

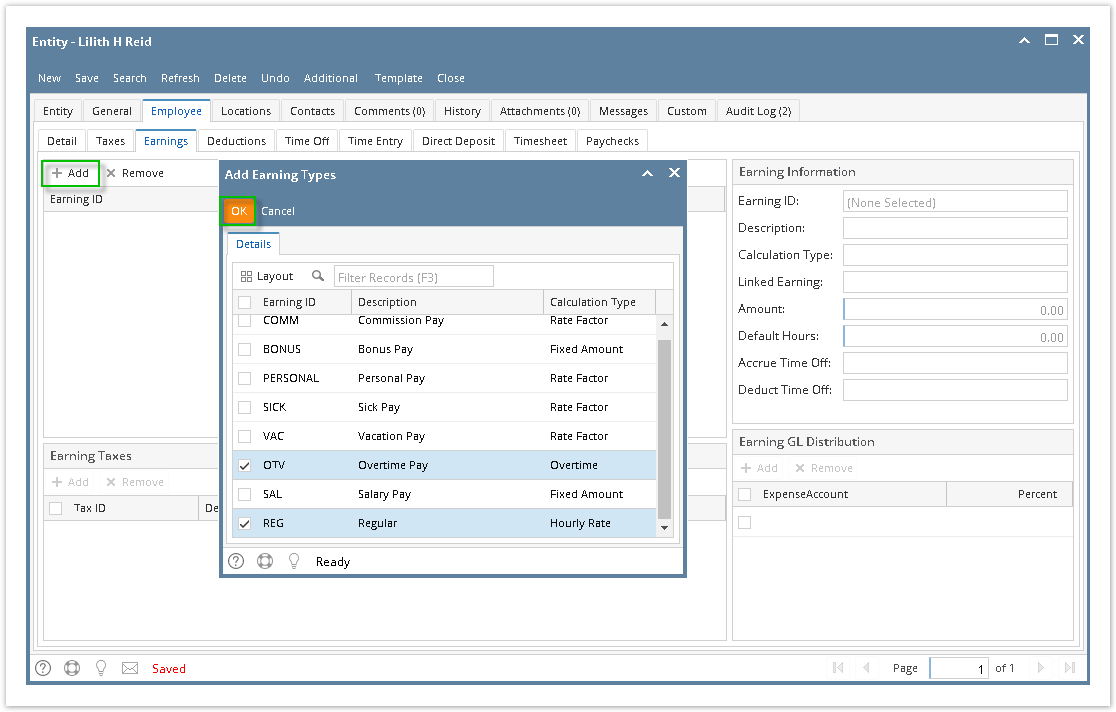
- Set up earnings in Earnings tab under Employees tab.
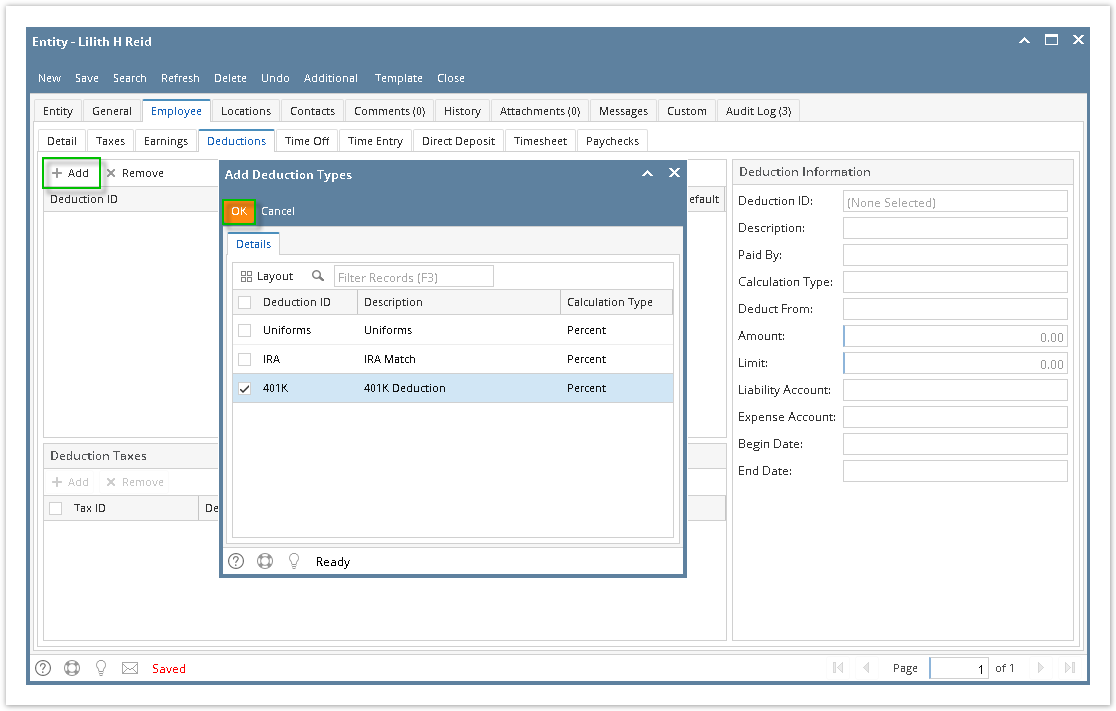
- Set up deductions in Deductions tab under Employees tab.
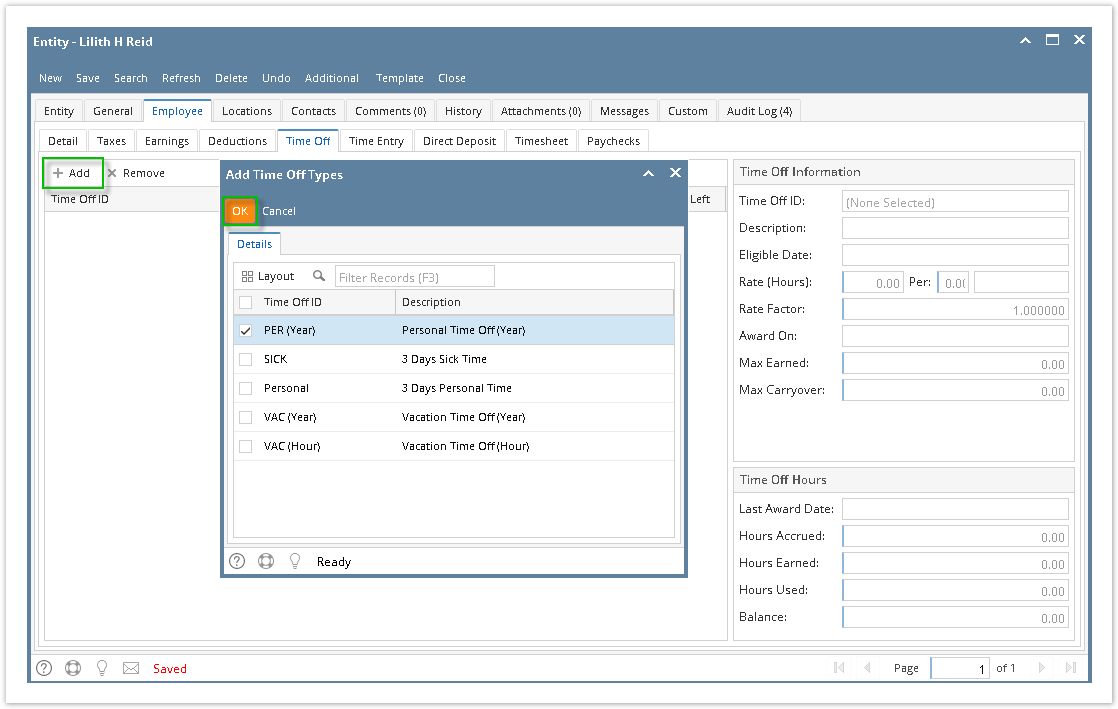
- Set up time offs in Time Off tab under Employees tab.
- Set up taxes in Taxes tab under Employees tab.
- Click Save toolbar button to create employee record.

- Newly created employee should appear in the grid.
- Click Employees from Payroll module.
- If there are no employee records yet, the Create New Entity screen will be displayed directly. Otherwise, a list of existing employees will be displayed.
- Click New toolbar button.
- Set the value of the following fields:
- Name
Contact
Contact refers to contact name.
- ZIP/Postal
- Country
- Phone
- Address
- Click Add toolbar button.
- The information from Create New Entity screen will reflect on their respective fields in Employee Entity screen.
Fill in other fields as necessary.
In Entity tab, the required fields are Entity No, Location Name, and Timezone.
Set up employee details in Details tab under Employees tab.

In Details tab, the required fields are Pay Period and Last Hire Date.
- Set up taxes in Taxes tab under Employees tab.
- Set up earnings in Earnings tab under Employees tab.
- Set up deductions in Deductions tab under Employees tab.
- Set up time offs in Time Off tab under Employees tab.
- Click Save toolbar button to create employee record.
- Newly created employee should appear in the grid.
- From Payroll module > single click the Employees
- If this is the first record you are to create, it will open directly the Employee screen where you can add the Employee information. Otherwise, it will open the Employee screen where existing Employee details are displayed. Click the New toolbar button to open new Employee screen.

- Fill in the Employee information:
- Enter the Employee No which is a required unique Employee ID
- Enter the additional Employee Details on the available fields like Full Name, Address, Email, etc.
- In Payroll Details, select the Pay Period and Pay Group of the Employee. See Employee Pay Groups.
- Under Taxes tab, click the Quick Add grid button to add Employee and Company Taxes that will be taxed.
- Select the Tax Types and click the OK button to populate the selected Taxes

- Select the Federal Tax and change the Federal Filing Status to automatically compute the Taxes

- Select the Tax Types and click the OK button to populate the selected Taxes
- Under Earnings tab, click the Quick Add grid button to add the Earnings.
- Select the Earning ID's and click the OK button to populate the selected Earnings.
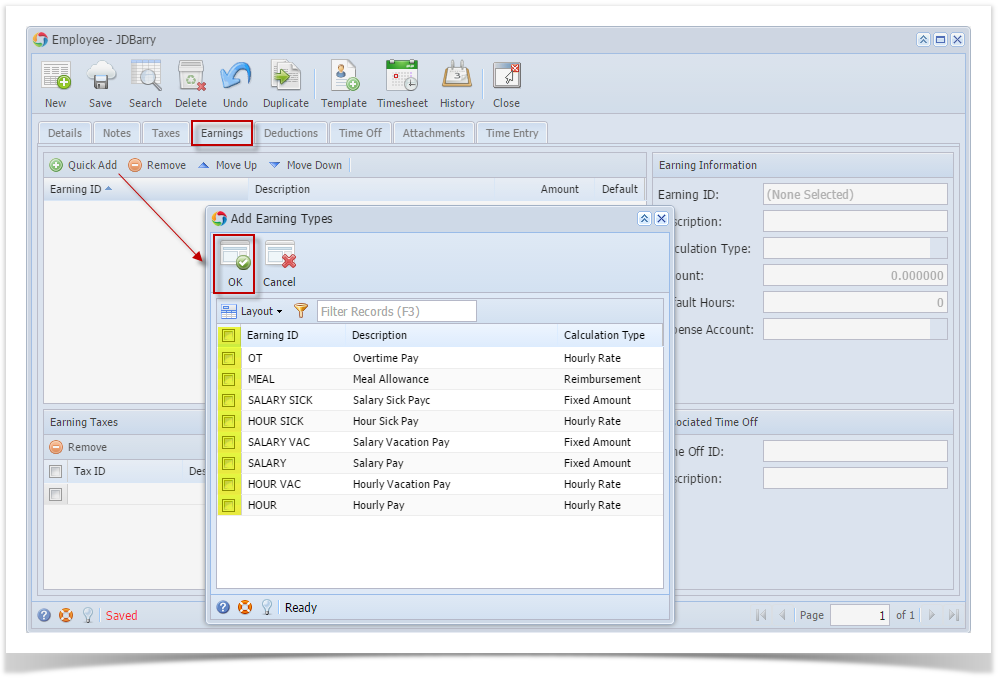
- Select the Earning ID's and click the OK button to populate the selected Earnings.
- Under Deductions tab, click the Quick Add grid button to add Deductions
- Select the Deduction ID's and click the OK button to populate the selected Deductions.
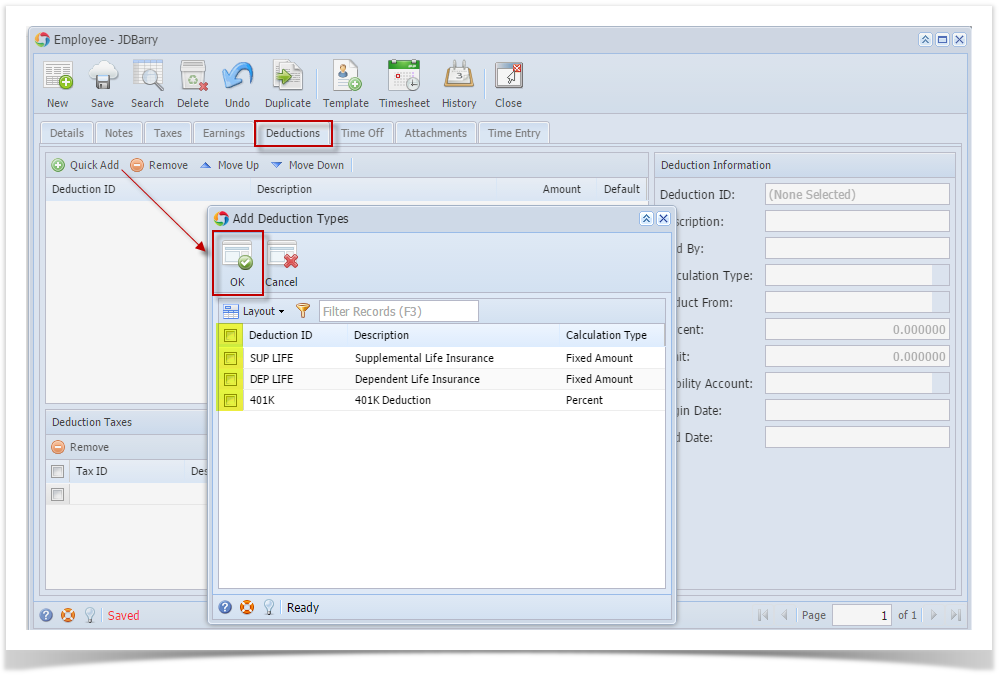
- Select the Deduction ID's and click the OK button to populate the selected Deductions.
- Under Time Off tab, click the Quick Add grid button to add Time Offs.

- Select the Time Off ID's and click the OK button to populate the selected Time Offs.

- Select the Time Off in the associated Earning ID by clicking on the drop down combo box button.
- Select the Time Off ID's and click the OK button to populate the selected Time Offs.
- Click the Save toolbar button to save the added Employee.
- Click the Close toolbar button to close the Employee screen
Overview
Content Tools