- Select a column in the Column Name field.

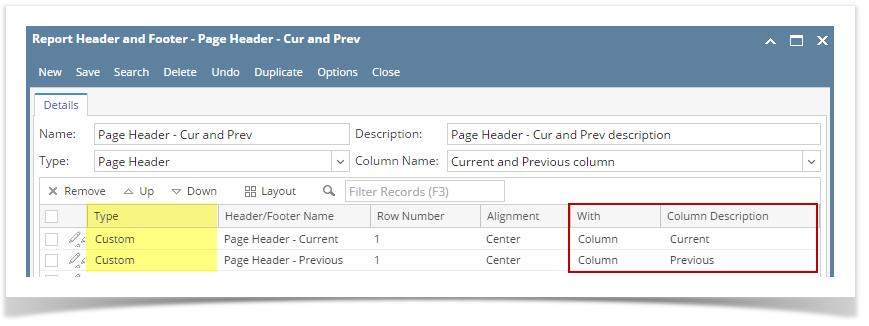
- Add custom type header/footer. See How to Add Custom header/footer. In the With field select Column. Click the dropdown button in the Column Description field to show all the columns available for column designer record selected in Step 1. Then select the Column Description you want the page header be placed to.

See here, the columns added (highlighted in yellow in the Column Designer screen) for the selected column name in the Column Name field of Report Header and Footer, are the same columns shown when Column Description dropdown combo box is shown (grid section, highlighted in yellow in the Report Header screen).
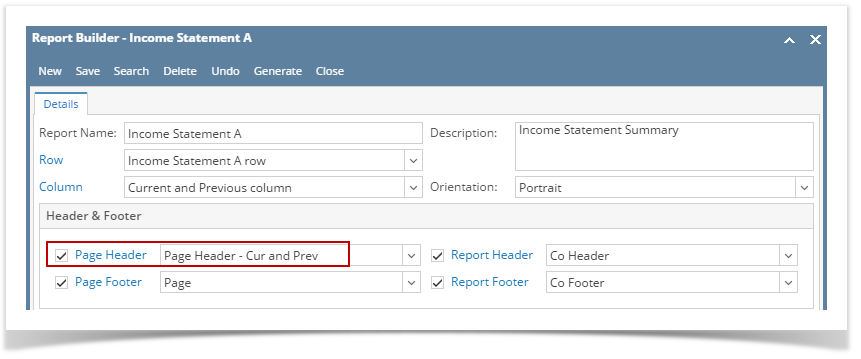
- Print a financial report with the selected Page Header and Page Header checkbox is checked.

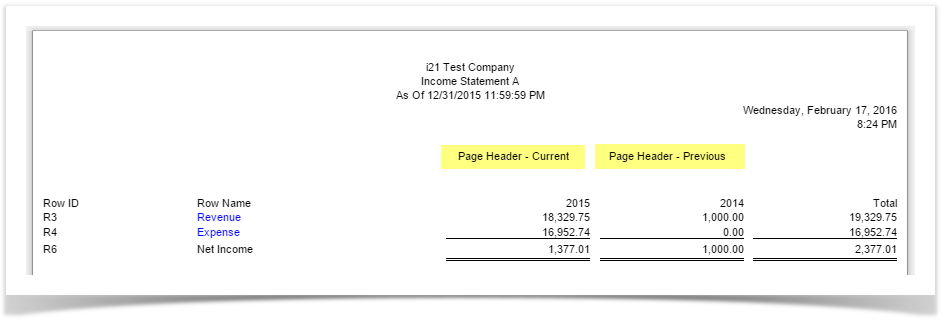
- This is how it will look like when printed.


- Select a column in the Column Name field.

- Add custom type header/footer. See How to Add Custom header/footer. In the With field select Column. Click the dropdown button in the Column Description field to show all the columns available for column designer record selected in Step 1. Then select the Column Description you want the page header be placed to.

See here, the columns added (highlighted in yellow in the Column Designer screen) for the selected column name in the Column Name field of Report Header and Footer, are the same columns shown when Column Description dropdown combo box is shown (grid section, highlighted in yellow in the Report Header screen).
- Print a financial report with the selected Page Header and Page Header checkbox is checked.

- This is how it will look like when printed.


- Select a column in the Column Name field.

- Add custom type header/footer. See How to Add Custom header/footer. In the With field select Column. Click the dropdown button in the Column Description field to show all the columns available for column designer record selected in Step 1. Then select the Column Description you want the page header be placed to.
See here, the columns added (highlighted in yellow in the Column Designer screen) for the selected column name in the Column Name field of Report Header and Footer, are the same columns shown when Column Description dropdown combo box is shown (grid section, highlighted in yellow in the Report Header screen).
- Print a financial report with the selected Page Header and Page Header checkbox is checked.
- This is how it will look like when printed.

- Select a column in the Column Name field.
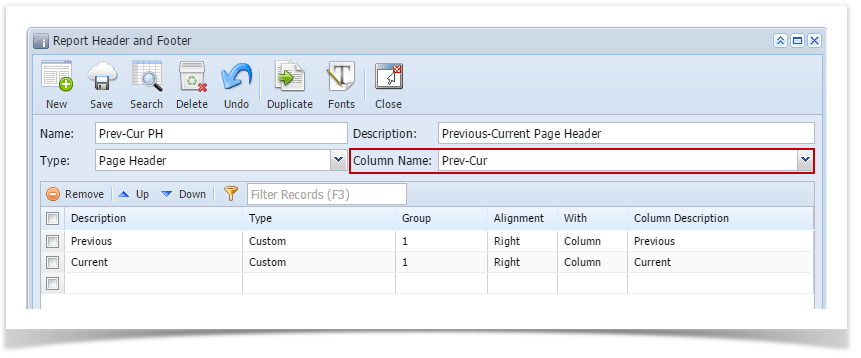
- Add custom type header/footer. See How to Add Custom header/footer. In the With field select Column. Click the dropdown button in the Column Description field to show all the columns available for Prev-Cur column designer record selected in Step 1. Then select the Column Description you want the page header be placed to.

See here, the columns added (highlighted in yellow in the Column Designer screen) for the selected column name in the Column Name field of Report Header and Footer, are the same columns shown when Column Description dropdown combo box is shown (grid section, highlighted in yellow in the Report Header screen).
- Print a financial report with the selected Page Header and Page Header checkbox is checked.
- This is how it will look like when printed.

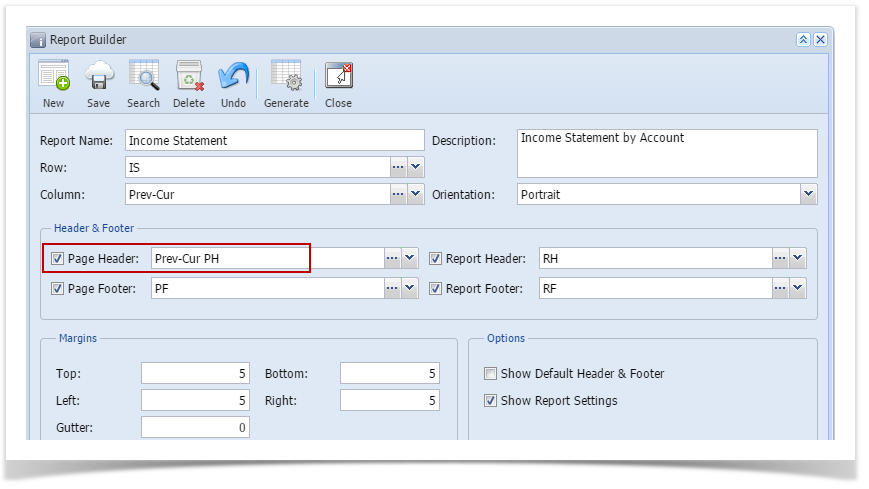
- Select a column in the Column Name field.

- Add custom type page header. See How to Add Custom header/footer. In the With field select Column. Click the dropdown button in the Column Name field to show all the columns available for Prev-Cur column designer record selected in Step 1. Then select the Column Name you want the page header be placed to.

See here, the columns added (highlighted in yellow in the Column Designer screen) for the selected column name in the Column Name field of Report Header and Footer, are the same columns shown when Column Description dropdown combo box is shown (grid section, highlighted in yellow in the Report Header screen).
- Print a financial report with the selected Page Header and Page Header checkbox is checked.

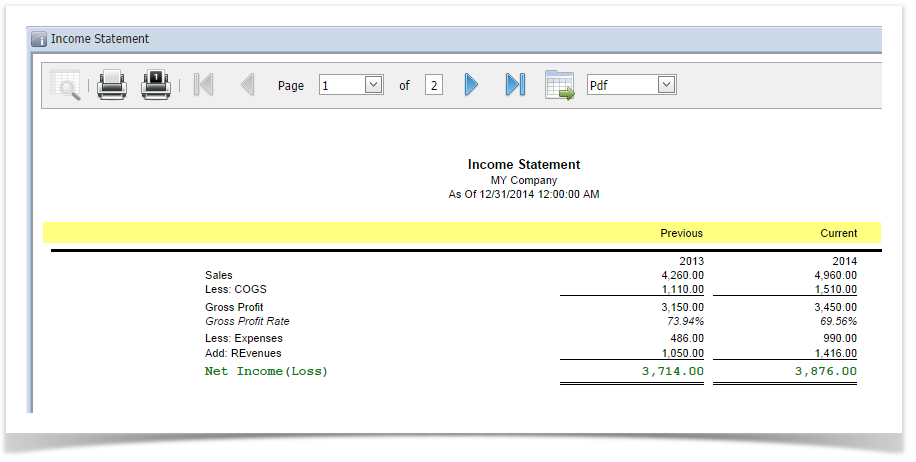
- This is how it will look like when printed.
Overview
Content Tools