Below are the steps to batch post Sales transactions.
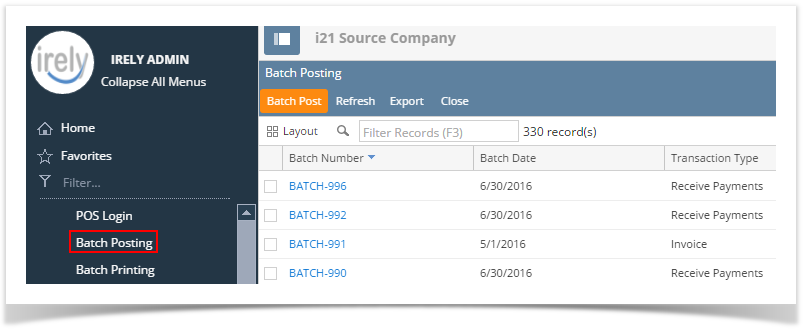
- Open the Batch Posting integrated search grid from Sales | Batch Posting menu. This search grid will show by Batch Number all the previously batch posted transactions. Clicking the Batch Number hyperlink will bring you to the transaction's search grid pre-filtered by records included in the batch.
- Click the Batch Post button to open the Batch Posting screen. The screen is pre-filtered to show sales transactions only.
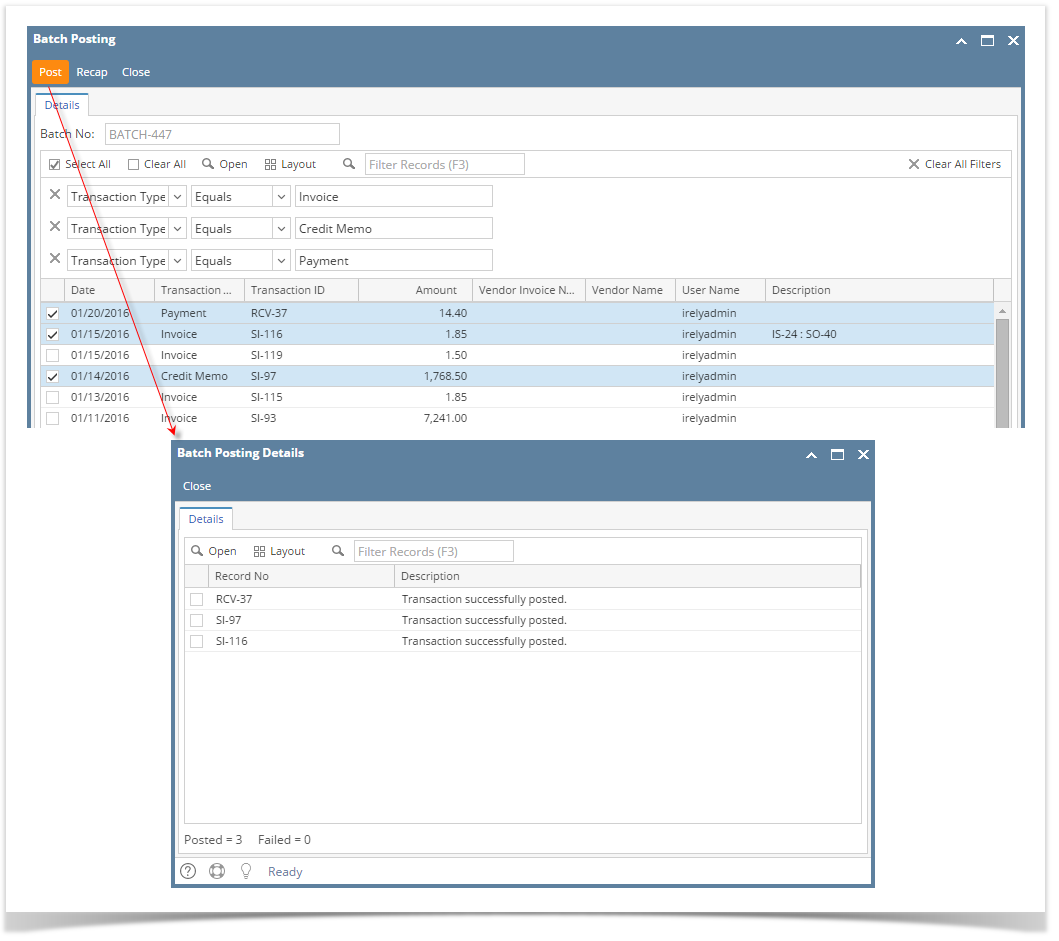
- On grid area, select the transactions to be posted.
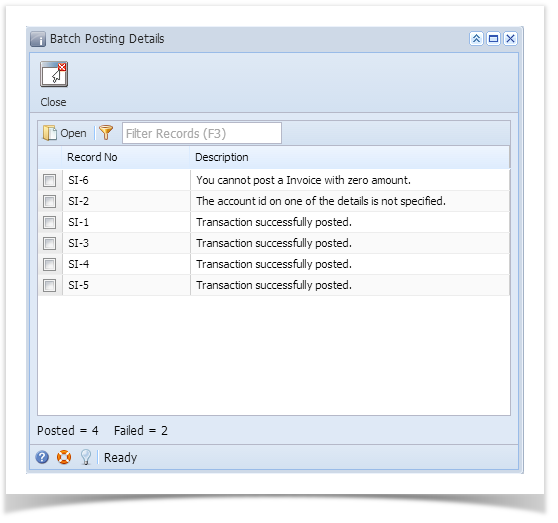
Click the Post button. Once batch posting has been completed, the Batch Posting Details screen will be displayed to give a summary of the result. Some transactions may not get posted for a number of reasons.

You can also post a transaction from the Recap Transaction screen. To do this, click the Recap button to open the Recap Transaction screen and then click the Post button.
Below are the steps to batch post Sales transactions.
- Open the Batch Posting integrated search grid from Sales | Batch Posting menu. This search grid will show by Batch Number all the previously batch posted transactions. Clicking the Batch Number hyperlink will bring you to the transaction's search grid pre-filtered by records included in the batch.
- Click the Batch Post button to open the Batch Posting screen. The screen is pre-filtered to show sales transactions only.
- On grid area, select the transactions to be posted.
Click the Post button. Once batch posting has been completed, the Batch Posting Details screen will be displayed to give a summary of the result. Some transactions may not get posted for a number of reasons.
You can also post a transaction from the Recap Transaction screen. To do this, click the Recap button to open the Recap Transaction screen and then click the Post button.
Below are the steps to batch post Sales transactions.
- Open the Batch Posting integrated search grid from Sales | Batch Posting menu.

- On grid area, select the transactions to be posted.
Click the Post button. Once batch posting has been completed, the Batch Posting Details screen will be displayed to give a summary of the result. Some transactions may not get posted for a number of reasons.

You can also post a transaction from the Recap Transaction screen. To do this, click the Recap button to open the Recap Transaction screen and then click the Post button.
Below are the steps to batch post Sales transactions. Refer to Sales Batch Posting for the definition of each field.
- Open the Batch Posting screen from Sales | Batch Posting menu.
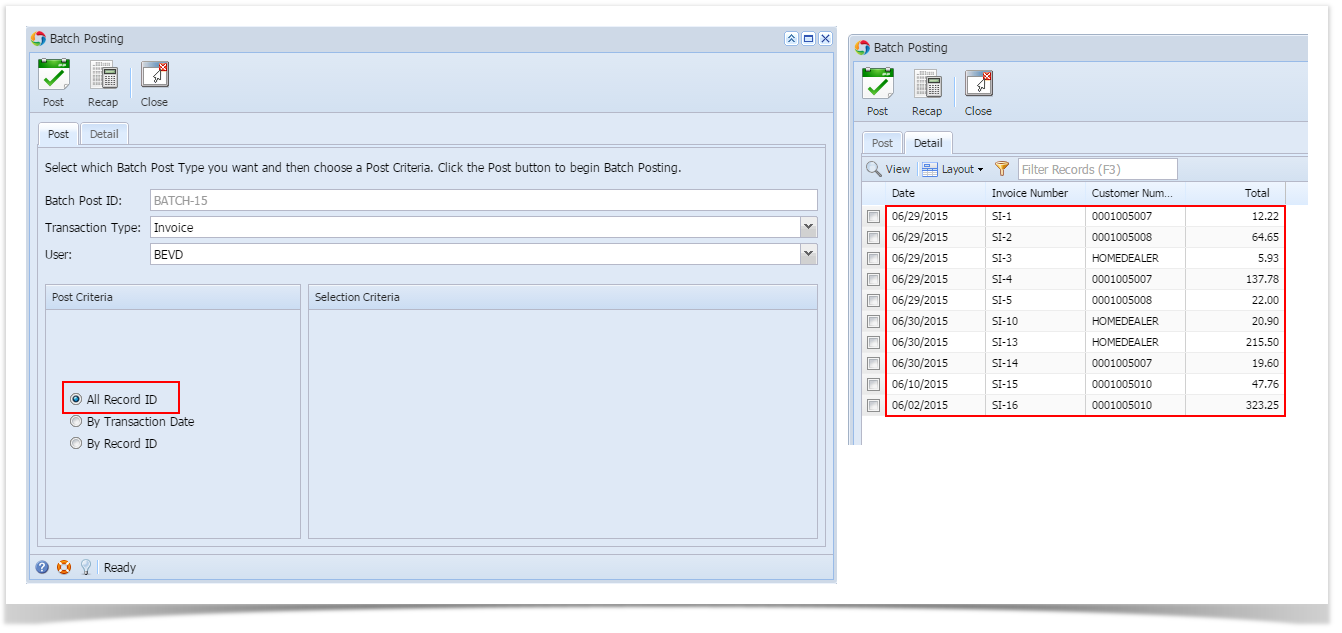
- Click the Transaction Type combo box button and select the transaction you want to post.
- If necessary, click the User combo box button and select another user from the list.
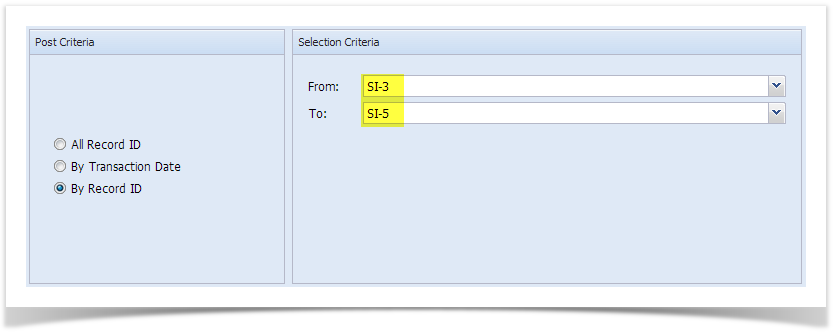
- Set the Post Criteria and Selection Criteria. You can post All Record ID, By Transaction Date, or By Record ID.
- All Record ID. When this option is selected, the Selection Criteria section will remain blank. This option will post all transactions, based on the set transaction type, that are not yet posted.
- By Transaction Date. When this option is selected, the Selection Criteria section will display a From and To date field. Select the date range of the transactions that you want to post.

- By Record ID. When this option is selected, the Selection Criteria section will display a From and To combo box field. Select the transaction number from the combo list box.

- All Record ID. When this option is selected, the Selection Criteria section will remain blank. This option will post all transactions, based on the set transaction type, that are not yet posted.
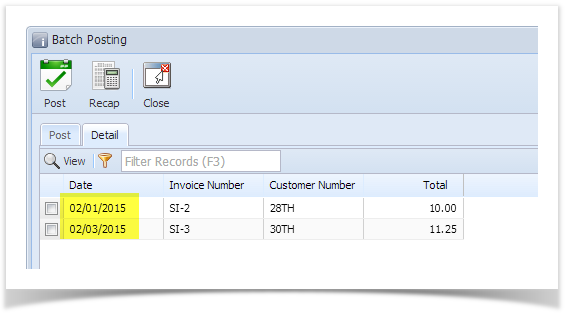
- Go to the Detail tab to review the list of transactions based on the set Post Criteria and Selection Criteria.
Click the Post button.
You can also post a transaction from the Recap Transaction screen. To do this, click the Recap button to open the Recap Transaction screen and then click the Post button.
- If you are currently on the Post tab, this will post all the transactions listed in the Detail tab.
- If you are currently on the Detail tab, first, check the transactions you want to post before clicking the Post or Recap button.
Below are the steps to batch post Accounts Receivable transactions. Refer to Sales Batch Posting for the definition of each field.
- Open the Batch Posting screen from Accounts Receivable > Activities > Batch Posting menu.
- Click the Transaction Type combo box button and select the transaction you want to post.
- If necessary, click the User combo box button and select another user from the list.
- Set the Post Criteria and Selection Criteria. You can post All Record ID, By Transaction Date, or By Record ID.
- All Record ID. When this option is selected, the Selection Criteria section will remain blank. This option will post all transactions, based on the set transaction type, that are not yet posted.

- By Transaction Date. When this option is selected, the Selection Criteria section will display a From and To date field. Select the date range of the transactions that you want to post.

- By Record ID. When this option is selected, the Selection Criteria section will display a From and To combo box field. Select the transaction number from the combo list box.

- All Record ID. When this option is selected, the Selection Criteria section will remain blank. This option will post all transactions, based on the set transaction type, that are not yet posted.
- Go to the Detail tab to review the list of transactions based on the set Post Criteria and Selection Criteria.
Click the Post button.
You can also post a transaction from the Recap Transaction screen. To do this, click the Recap button to open the Recap Transaction screen and then click the Post button.
- If you are currently on the Post tab, this will post all the transactions listed in the Detail tab.
- If you are currently on the Detail tab, first, check the transactions you want to post before clicking the Post or Recap button.
Overview
Content Tools