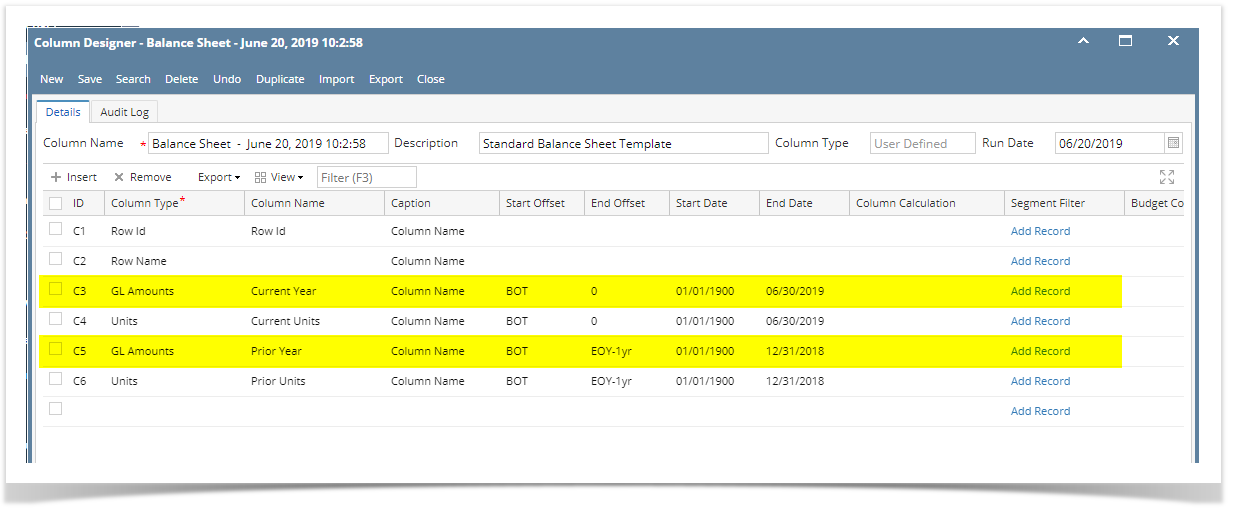
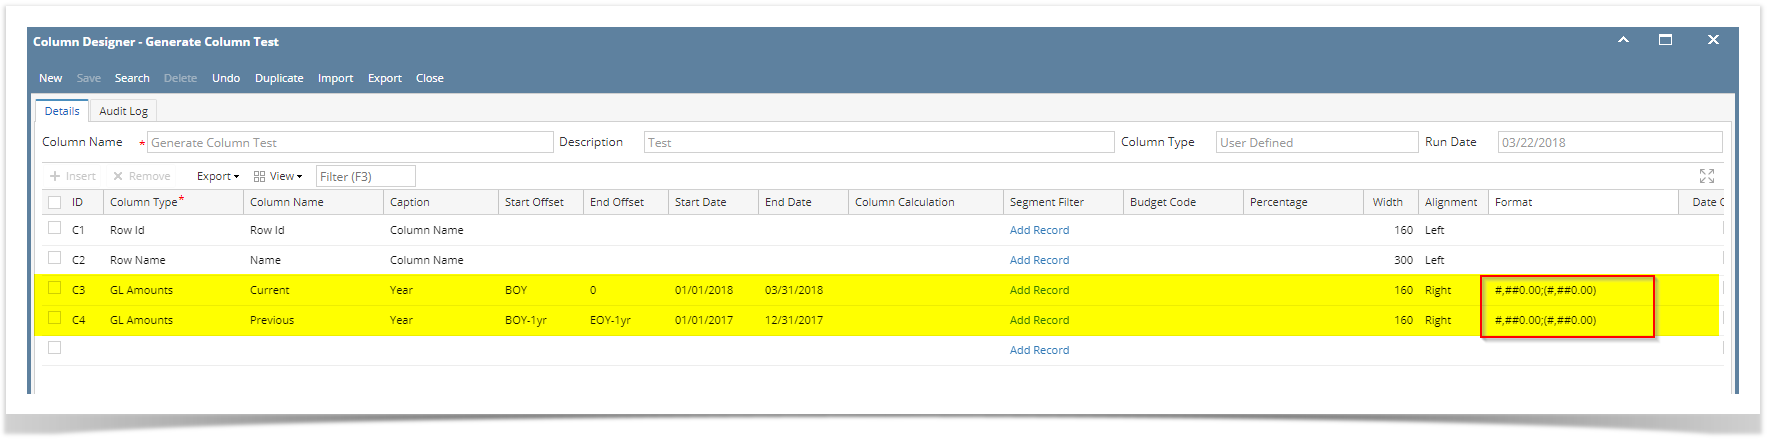
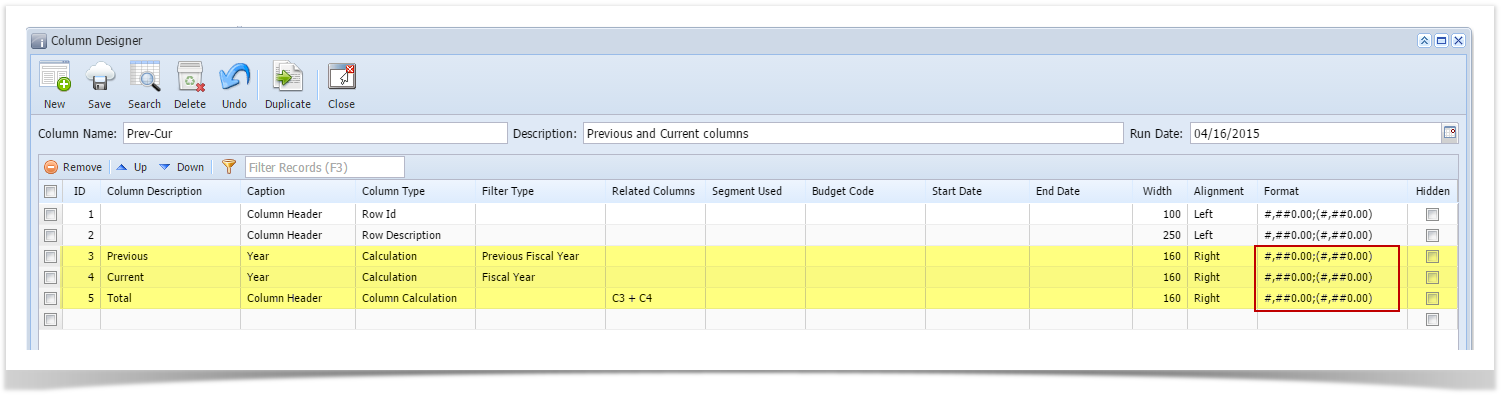
It is on Column Designer screen where you setup amount or percentage format for your financial reports. But there will be some instances where you will want a specific row/s to show other format. This is where Override Column Mask is being used. As the name implies, it overrides the format of your report columns for the selected row/s.
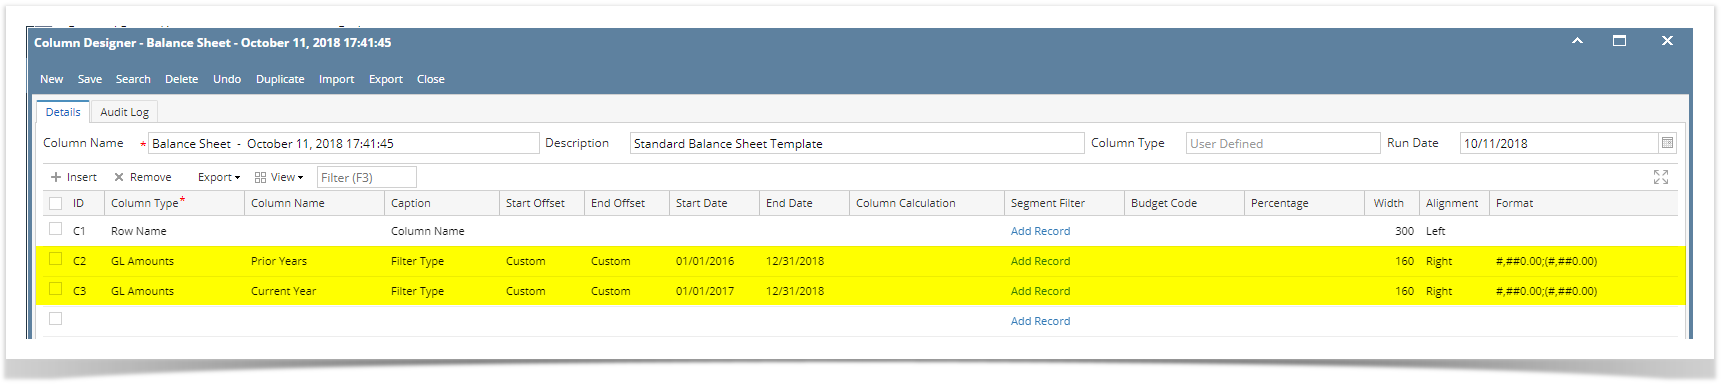
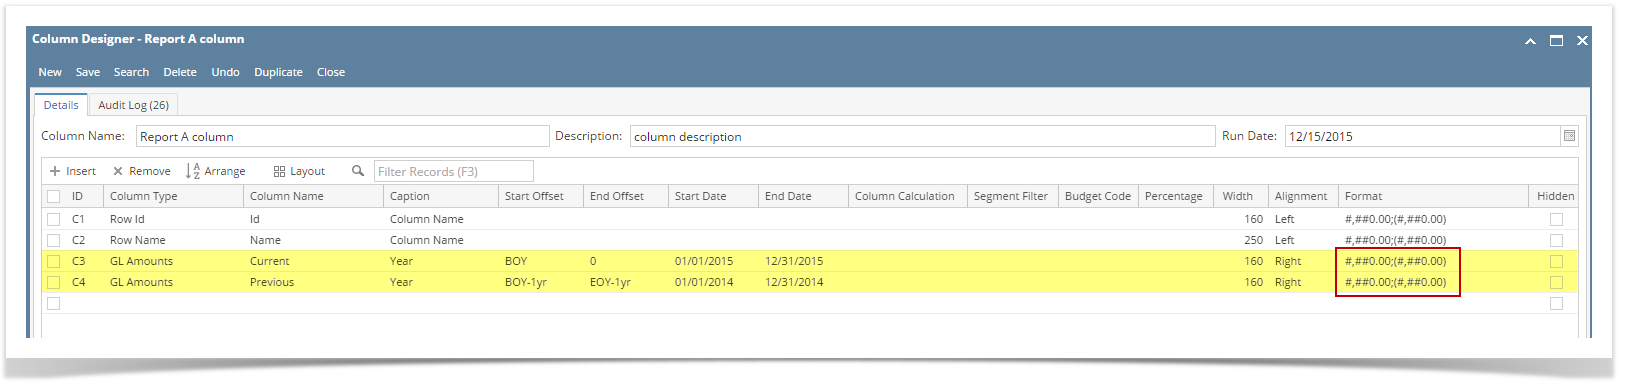
If these are your columns that show amounts,
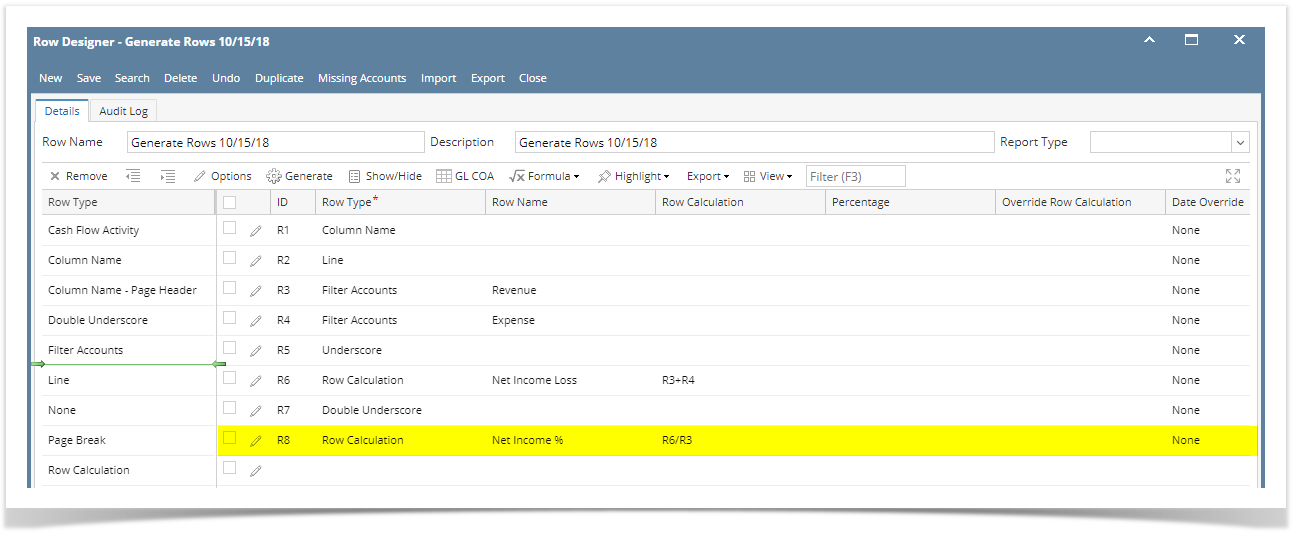
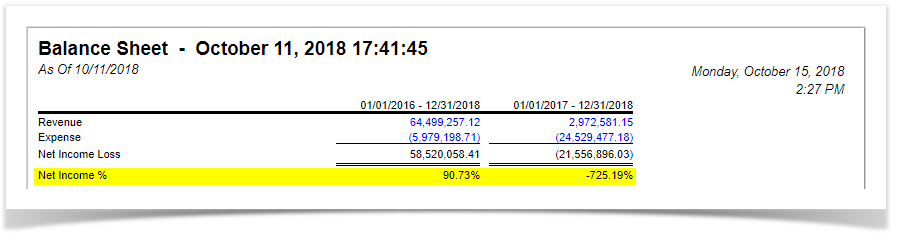
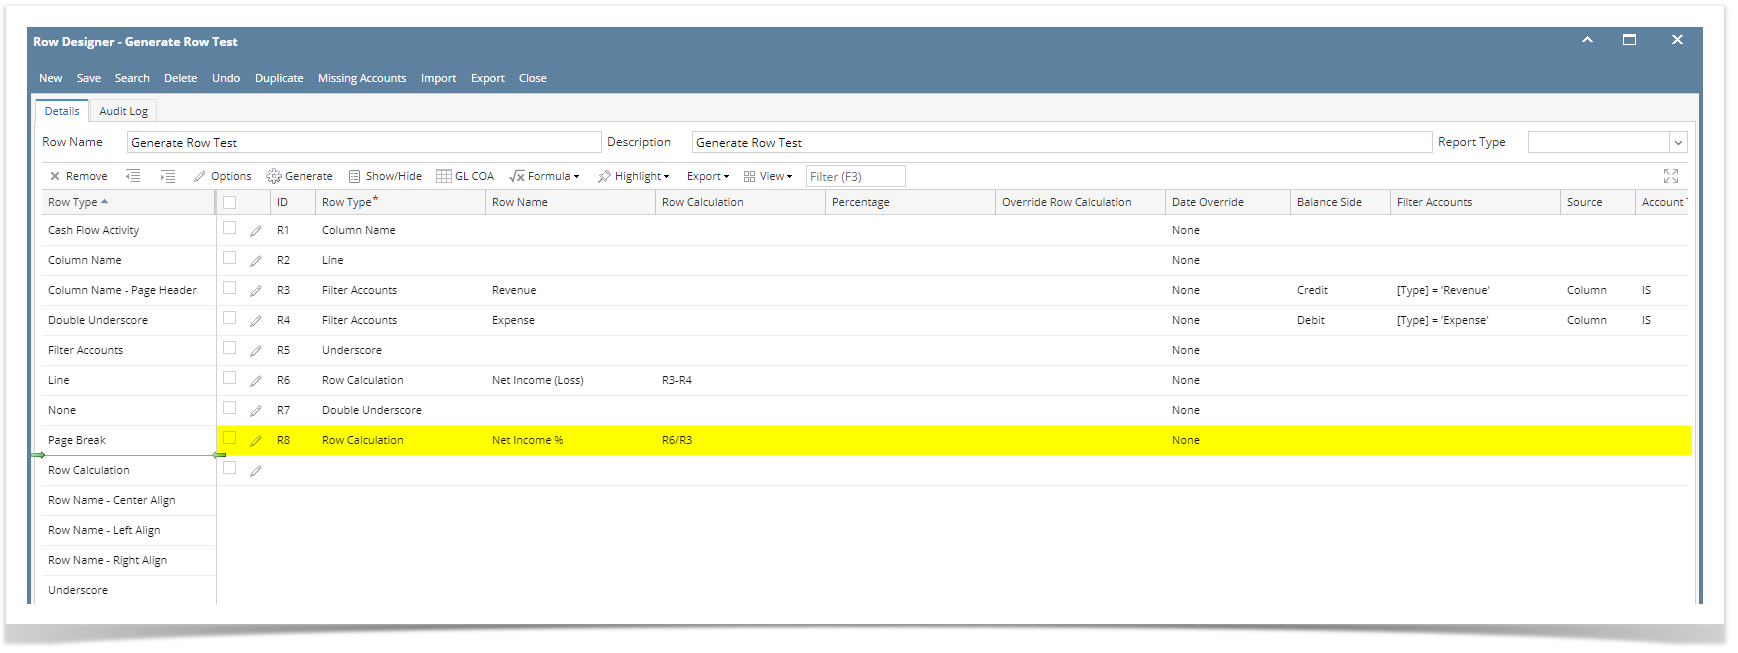
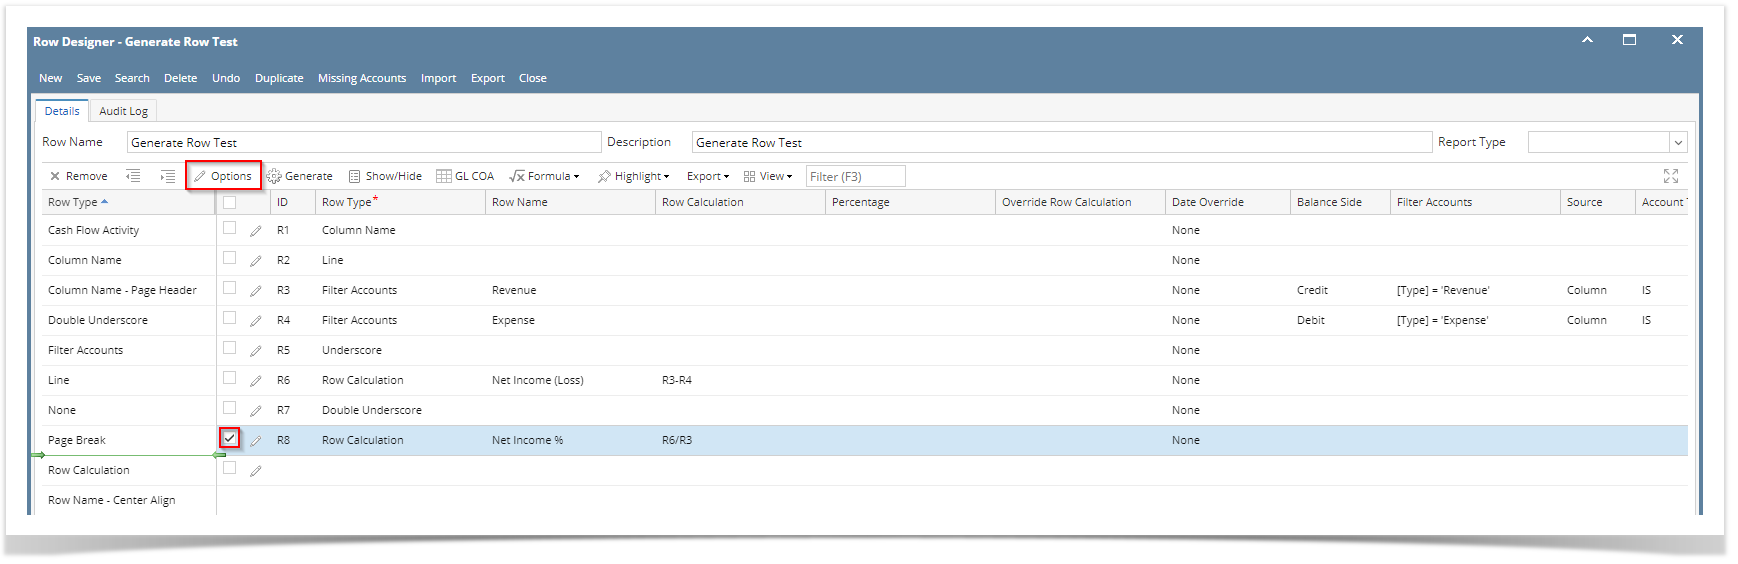
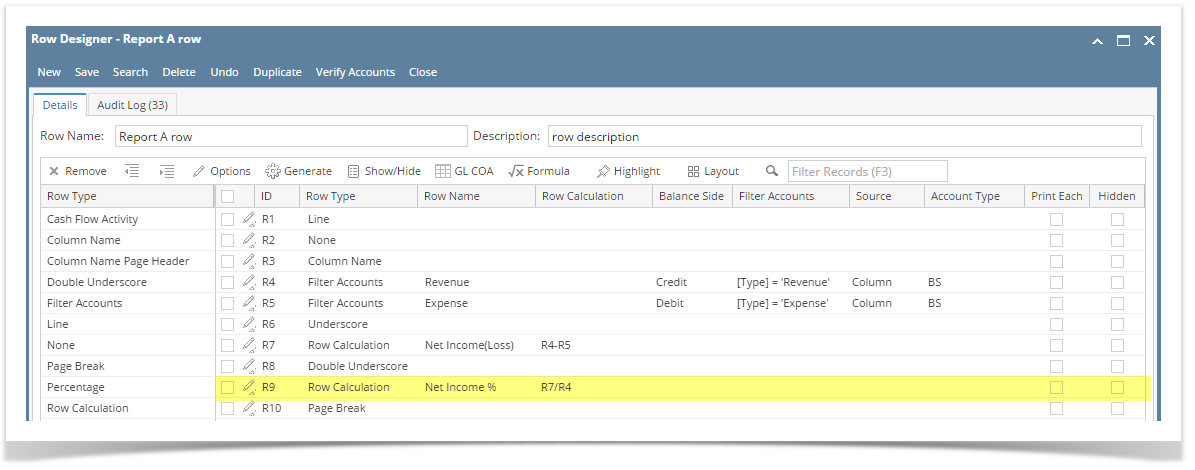
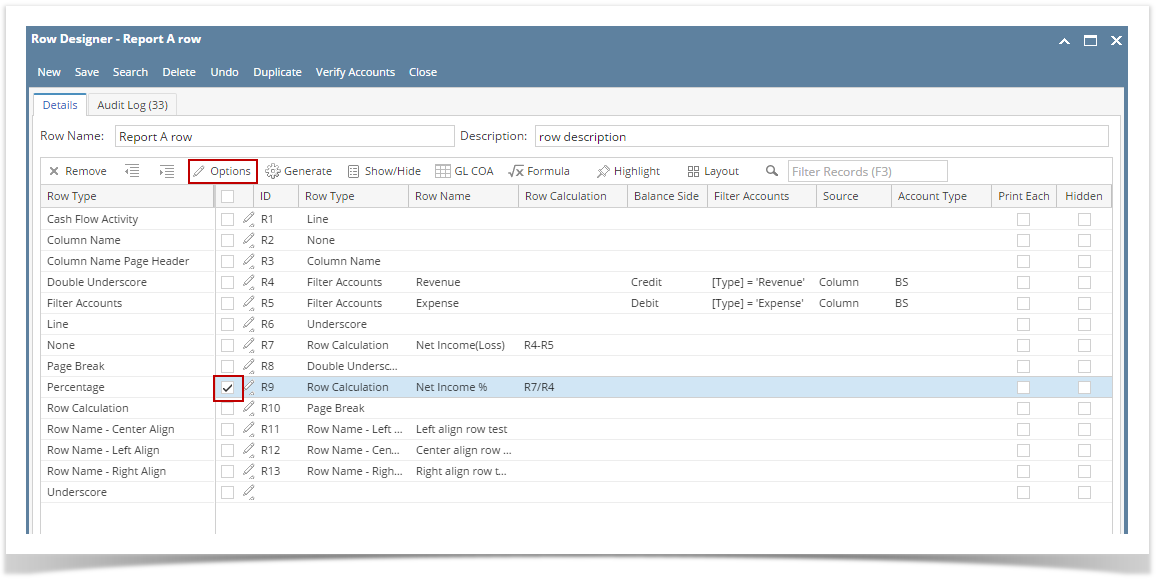
And you want a specific row in your report to have other format/mask, example for this highlighted row, instead of having the amount format as configured on the column designer (see screenshot above), you wanted this to show in percentage format. Follow the steps below.
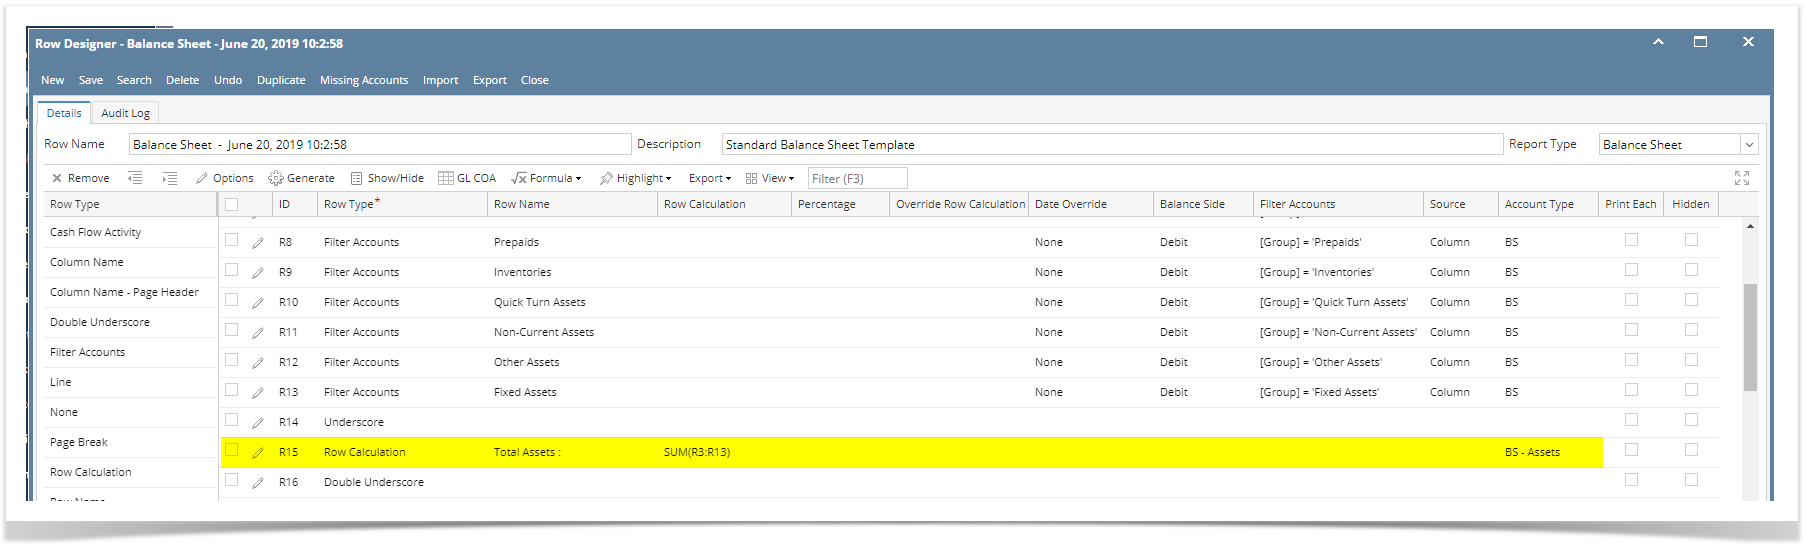
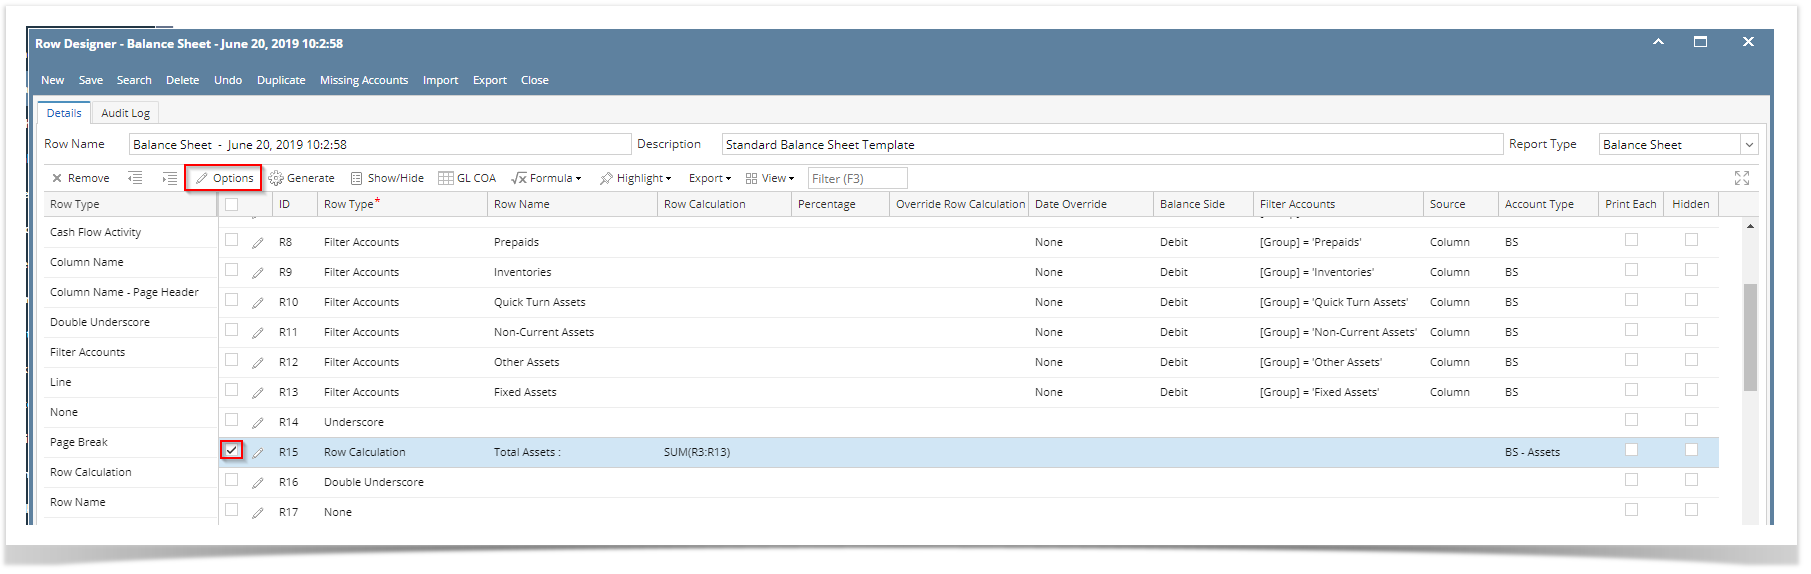
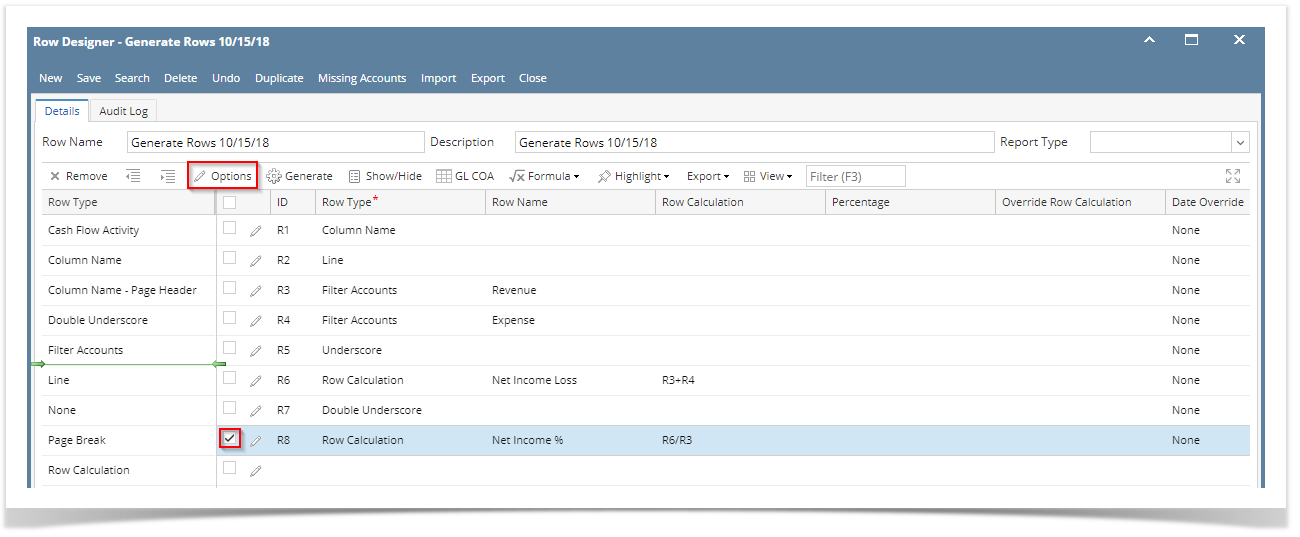
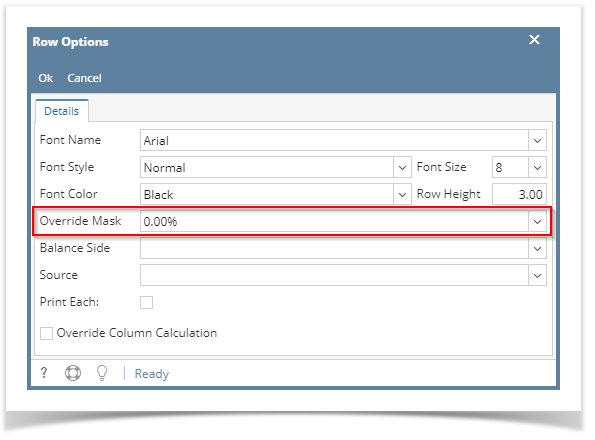
- In the Row Designer record, select the row/s you want to change/override the masking and click Options button.
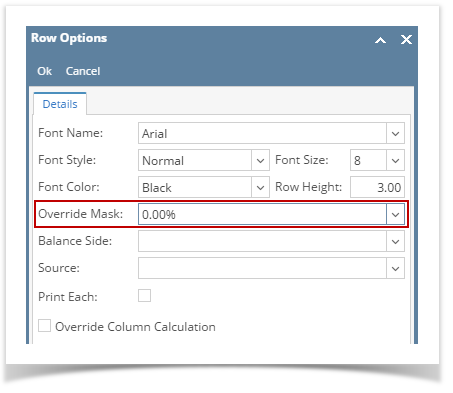
- The Row Options screen will open. In the Override Mask field, select the new format or mask.
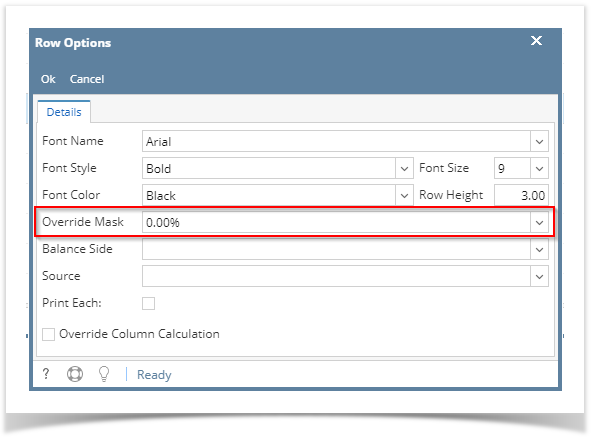
- Click the Ok button to close the screen and apply the row masking.
- You will be back in the Row Designer screen. Save the record and click the Close button or the x button at the top right corner of the screen to close the screen.
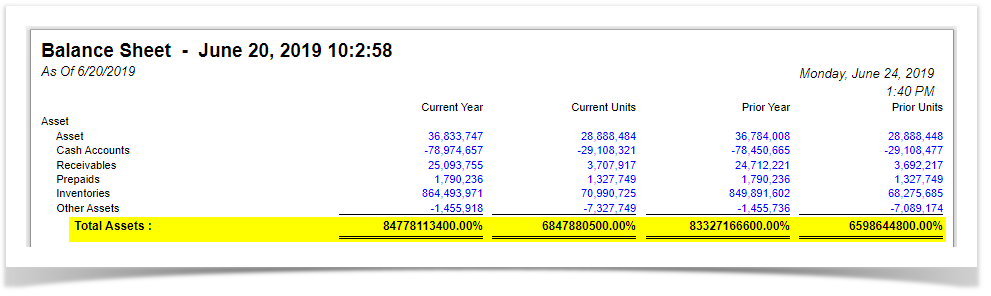
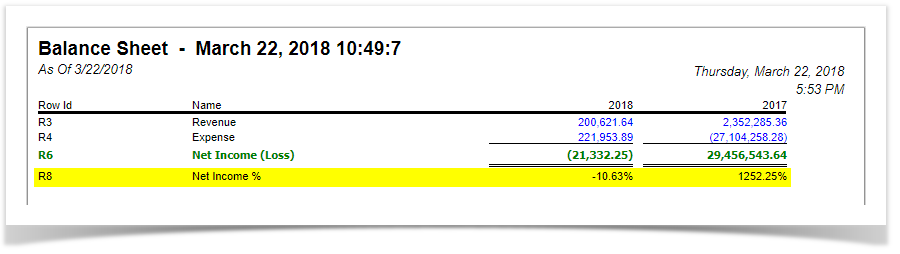
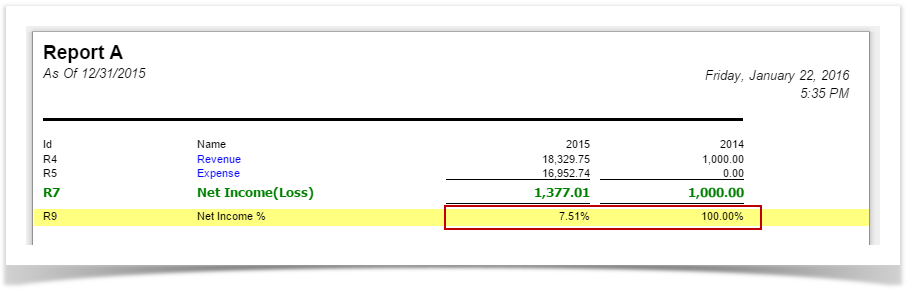
- Now print your financial report and you will see that the selected row masking is now showing the new format/mask.
It is on Column Designer screen where you setup amount or percentage format for your financial reports. But there will be some instances where you will want a specific row/s to show other format. This is where Override Column Mask is being used. As the name implies, it overrides the format of your report columns for the selected row/s.
If these are your columns that show amounts,
And you want a specific row in your report to have other format/mask, example for this highlighted row, instead of having the amount format as configured on the column designer (see screenshot above), you wanted this to show in percentage format. Follow the steps below.
- In the Row Designer record, select the row/s you want to change/override the masking and click Options button.
- The Row Options screen will open. In the Override Mask field, select the new format or mask.
- Click the Ok button to close the screen and apply the row masking.
- You will be back in the Row Designer screen. Save the record and click the Close button or the x button at the top right corner of the screen to close the screen.
- Now print your financial report and you will see that the selected row masking is now showing the new format/mask.
It is on Column Designer screen where you setup amount or percentage format for your financial reports. But there will be some instances where you will want a specific row/s to show other format. This is where Override Column Mask is being used. As the name implies, it overrides the format of your report columns for the selected row/s.
If these are your columns that show amounts,
And you want a specific row in your report to have other format/mask, example for this highlighted row, instead of having the amount format as configured on the column designer (see screenshot above), you wanted this to show in percentage format. Follow the steps below.
- In the Row Designer record, select the row/s you want to change/override the masking and click Options button.
- The Row Options screen will open. In the Override Mask field, select the new format or mask.
- Click the Ok button to close the screen and apply the row masking.
- You will be back in the Row Designer screen. Save the record and click the Close button or the x button at the top right corner of the screen to close the screen.
- Now print your financial report and you will see that the selected row masking is now showing the new format/mask.
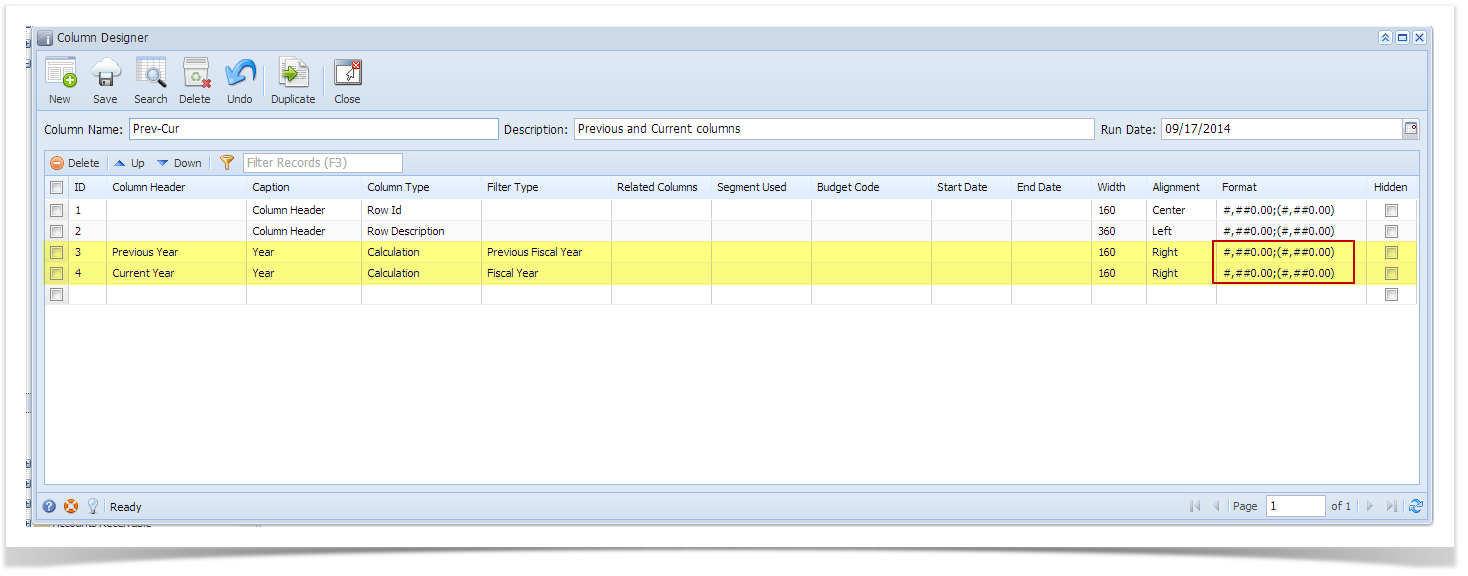
It is on Column Designer screen where you setup amount format for your financial reports. But there will be some instances where you will want a specific row/s to show other format. This is where Override Column Mask is being used. As the name implies, it overrides the format of your report columns for the selected row/s.
If these are your columns that show amounts,
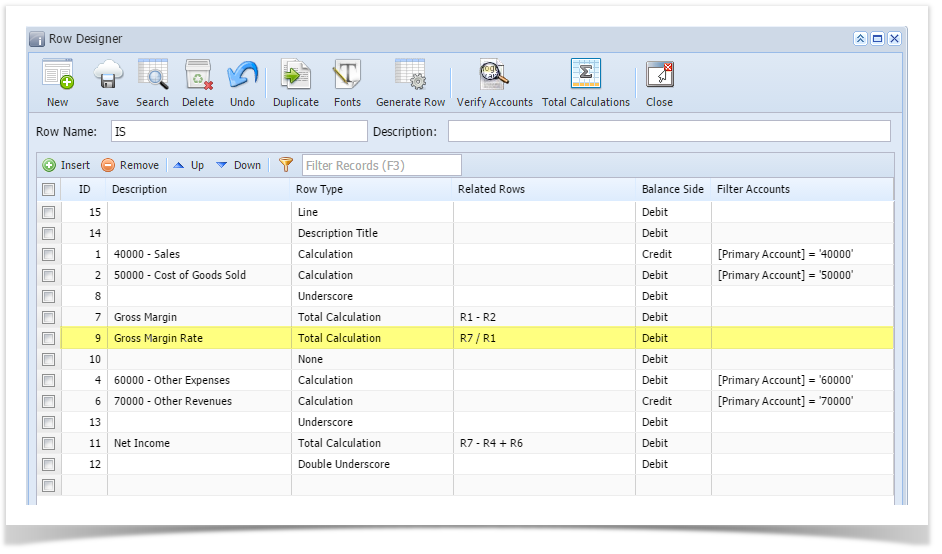
And you want a specific row in your report to have other format/mask, example for this highlighted row, instead of having the amount format as configured on the column designer (see screenshot above), you wanted this to show in percentage format. Follow the steps below.
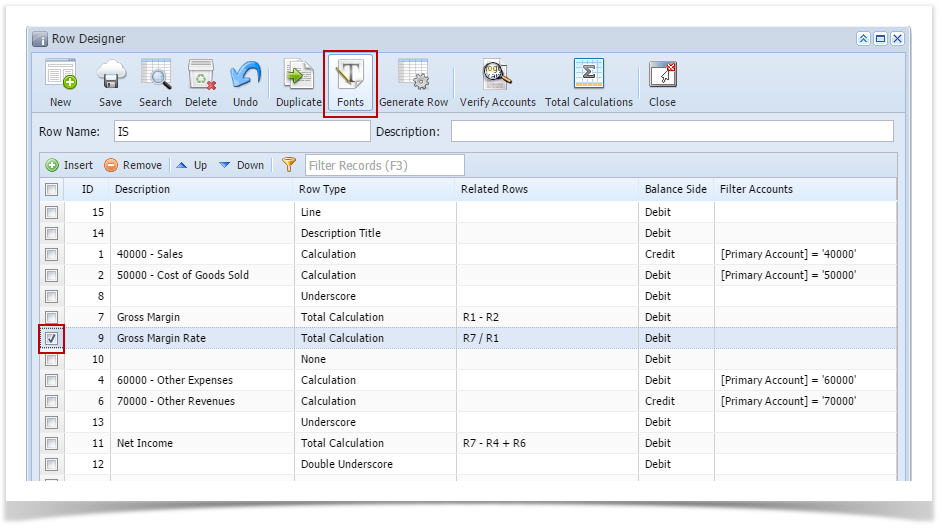
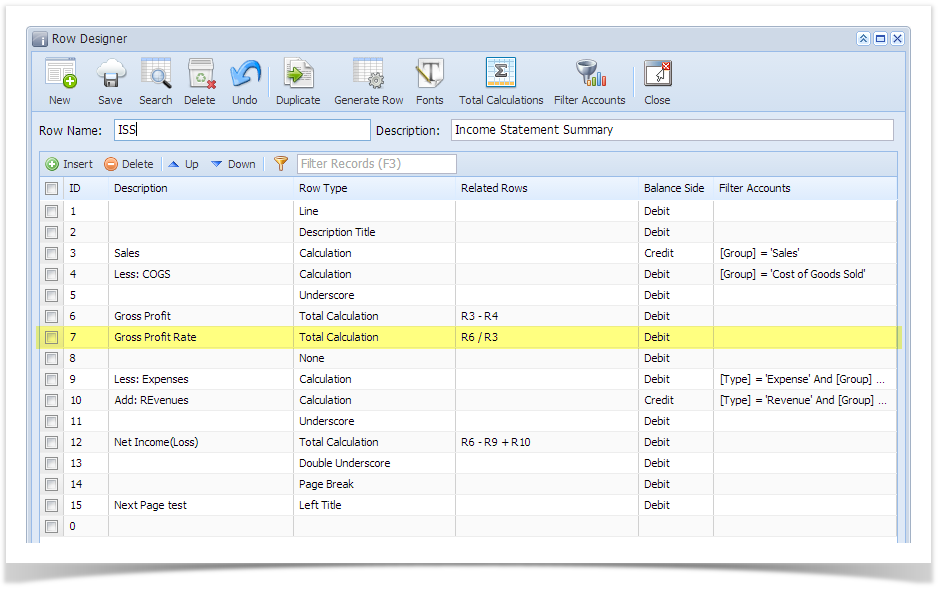
- In the Row Designer record, select the row you would want to change/override the masking and click Fonts toolbar button.
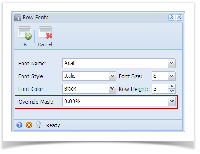
- The Row Fonts screen will open. In the Override Mask field, set the new format or mask.
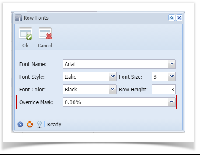
- Click the Ok toolbar button to close the screen and apply the row masking.
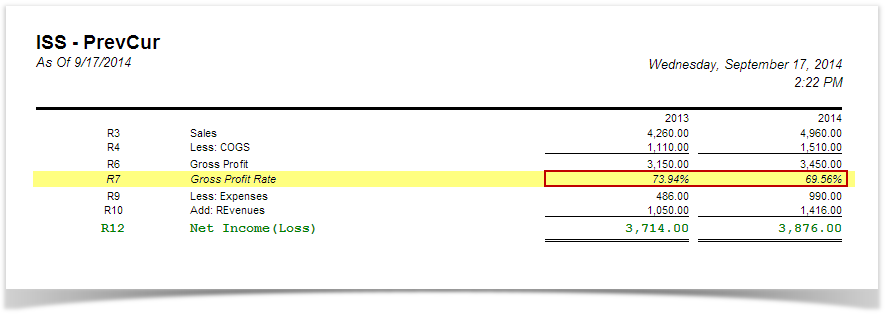
- You will be back in the Row Designer screen. Click the Close toolbar button or the x button at the top right corner of the screen to close the screen.
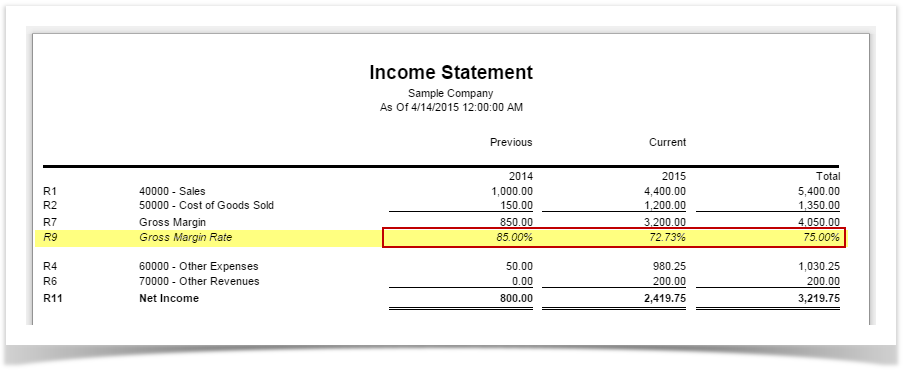
- Now print your financial report and you will see that the selected row masking is now showing the new format/mask.
It is on Column Designer screen where you setup amount format for your financial reports. But there will be some instances where you will want a specific row/s to show other format. This is where Override Column Mask is being used. As the name implies, it overrides the format of your report columns for the selected row/s.
If these are your columns that show amounts,
And you want a specific row in your report to have other format/mask, example for this highlighted row, instead of having the amount format as configured on the column designer (see screenshot above), you wanted this to show in percentage format. Follow the steps below.
- In the Row Designer record, select the row you would want to change/override the masking and click Fonts toolbar button.

- The Row Fonts screen will open. In the Override Mask field, set the new format or mask.
- Click the Ok toolbar button to close the screen and apply the row masking.
- You will be back in the Row Designer screen. Click the Close toolbar button or the x button at the top right corner of the screen to close the screen.
- Now print your financial report and you will see that the selected row masking is now showing the new format/mask.
Overview
Content Tools