Here are the steps on how to add a new customer:
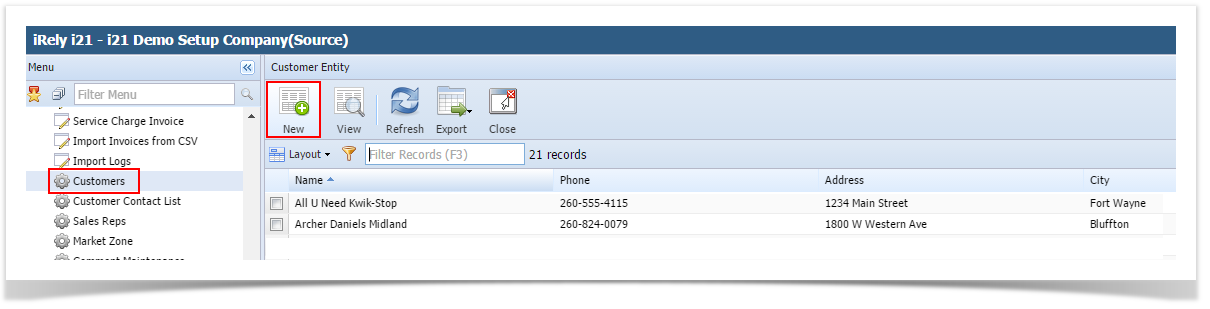
Click the Sales | menu and Click Customers menu. This will open the Create New Entity screen if there is no existing record yet. If not, click the New button on the integrated search grid.
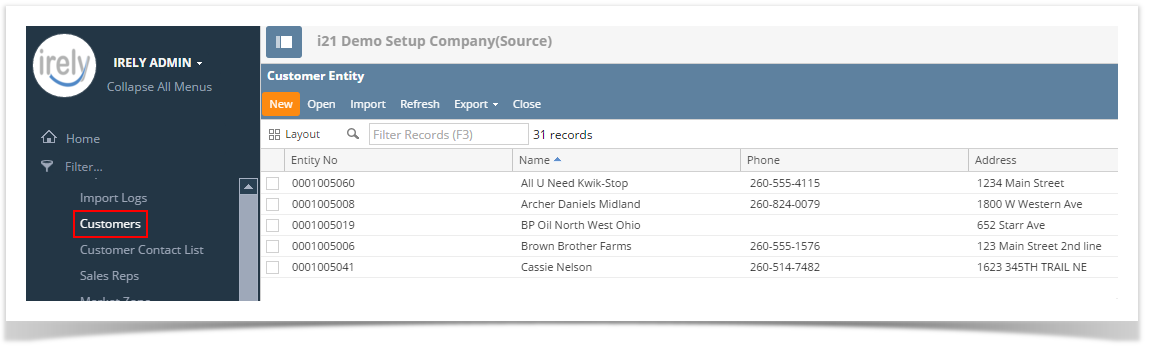 Image Removed
Note that the New button will open the Create New Entity screen. You can either fill out this screen, or simply close it and proceed with the succeeding steps.
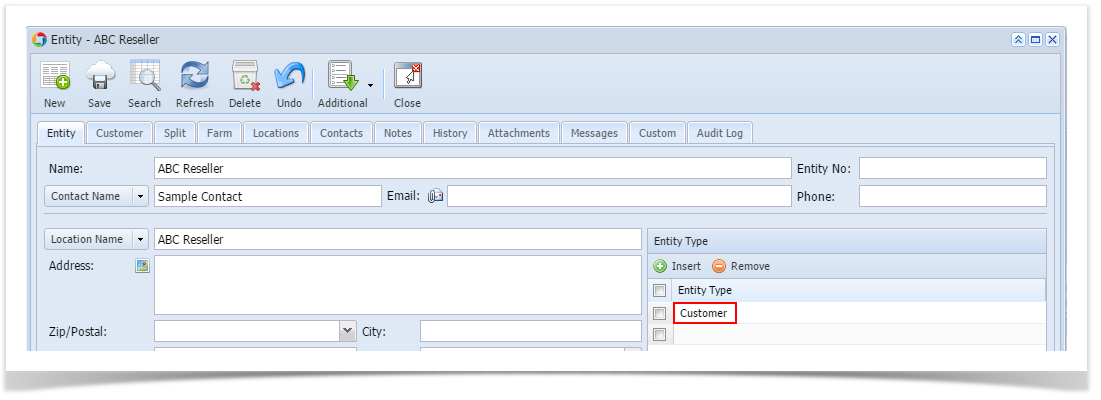
Fill out the Entity tab fields.
- Enter the Name, Contact Name, and Location Name. These are the required details on this tab.
- You can either enter the Entity No or let the system generate it for you upon saving the record.
- Make sure that the Entity Type is set to Customer.
 Image Removed
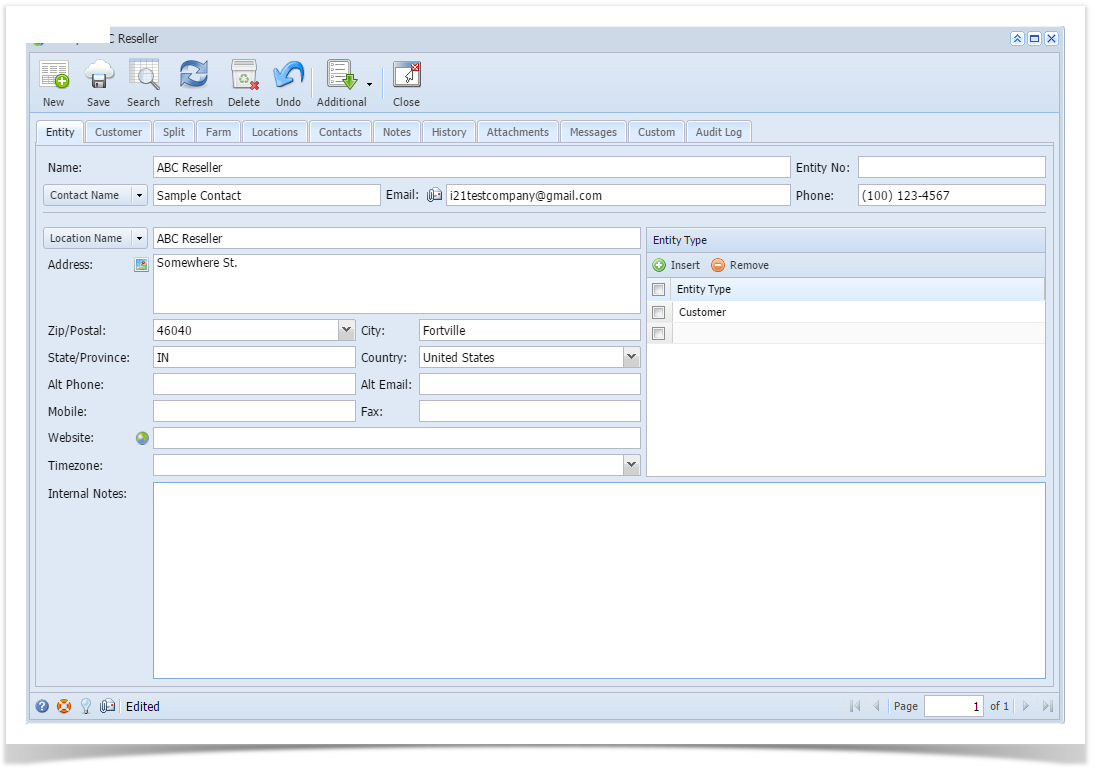
 - Fill out other details on Entity tab. You can be as detailed as you see necessary. Below is a sample record.
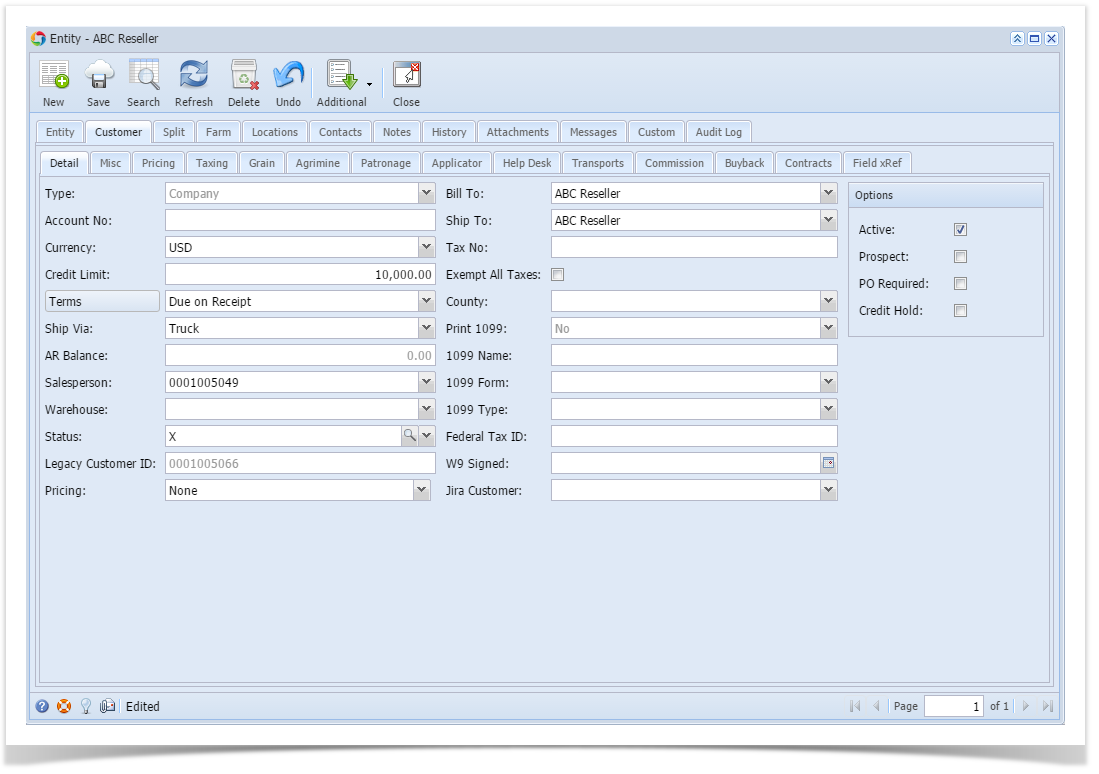
- Navigate to Customer tab | Detail tab and fill out the fields. Required detail on this tab is Terms. Refer to Customer Entity | Field Description | Detail tab to help you in filling out the fields. You can be as detailed as you see necessary.
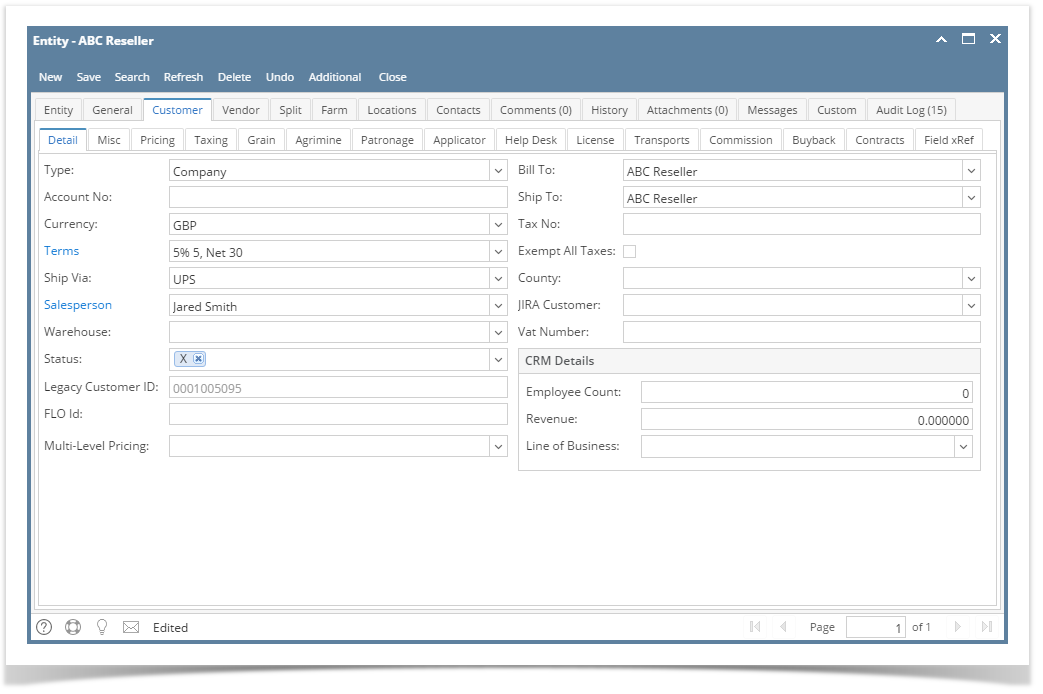 Image Removed
 - Navigate to Customer tab | Misc tab and fill out the necessary fields.
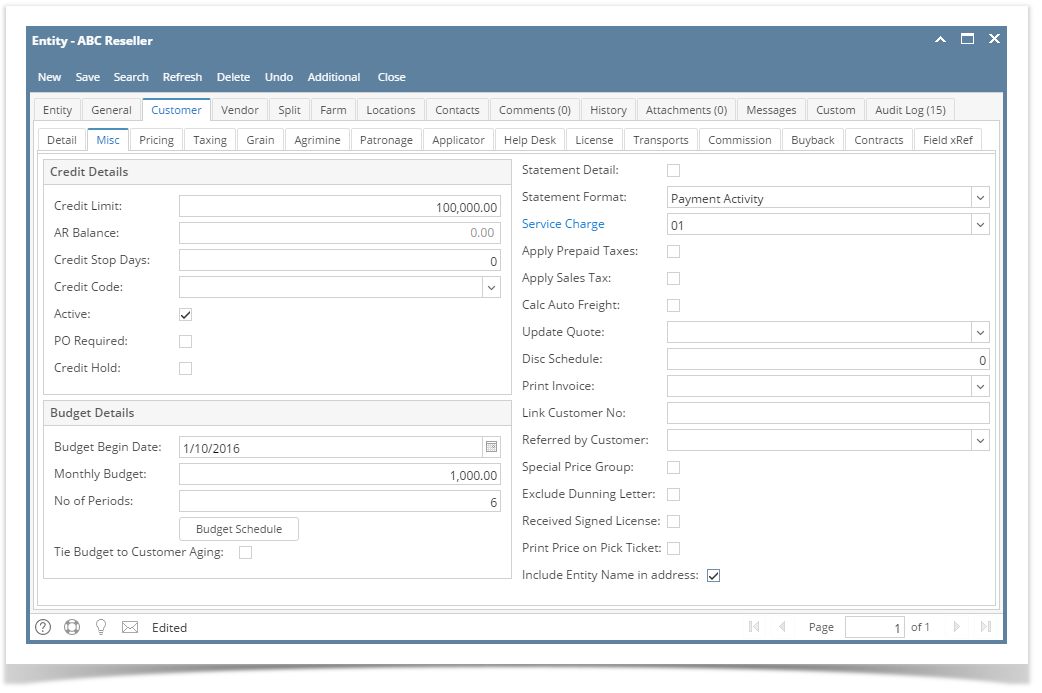 Image Removed
 - Click the Save button. The Entity No field will get disabled.
| Expand |
|---|
|
Here are the steps on how to add a new customer: Click the Sales | Customers menu. This will open the Create New Entity screen if there is no existing record yet. If not, click the New button on the integrated search grid.
Image Removed
Note that the New button will open the Create New Entity screen. You can either fill out this screen, or simply close it and proceed with the succeeding steps. Fill out the Entity tab fields. - Enter the Name, Contact Name, and Location Name. These are the required details on this tab.
- You can either enter the Entity No or let the system generate it for you upon saving the record.
- Make sure that the Entity Type is set to Customer.
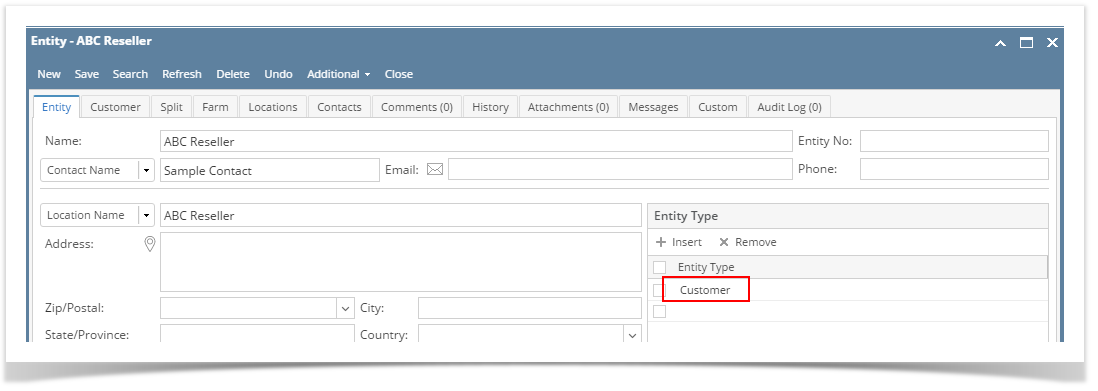 Image Removed Image Removed - Fill out other details on Entity tab. You can be as detailed as you see necessary. Below is a sample record.
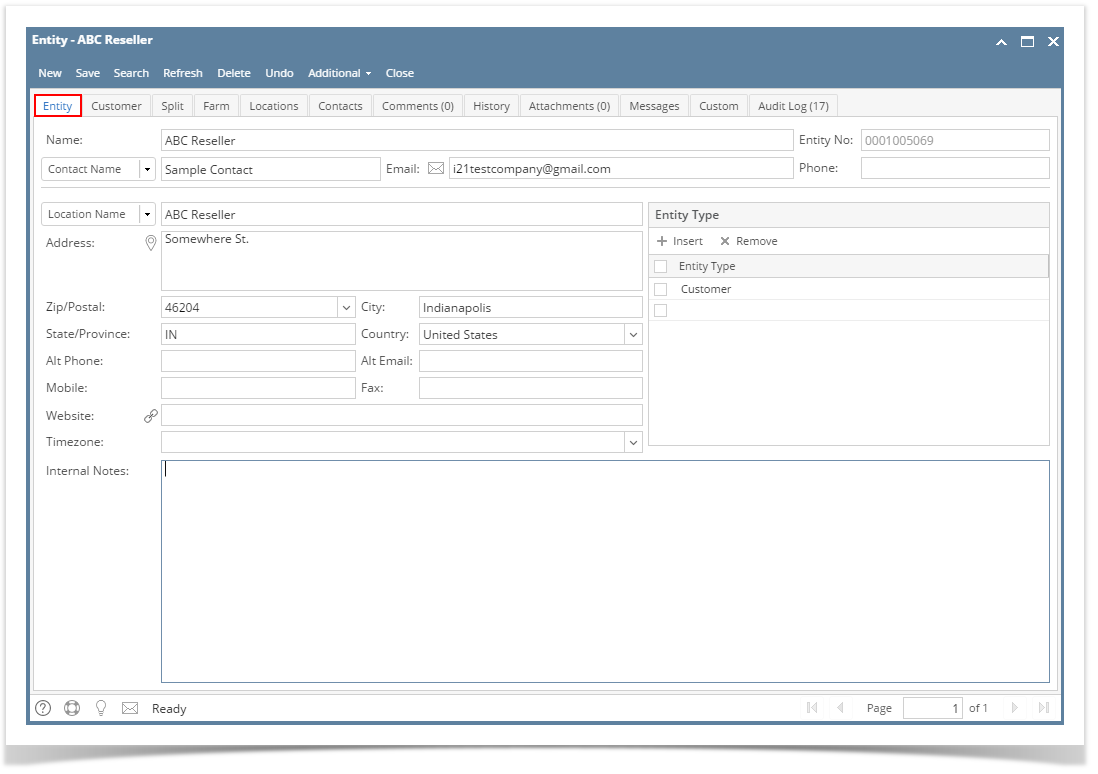 Image Removed Image Removed
- Navigate to Customer tab | Detail tab and fill out the fields. Required detail on this tab is Terms. Refer to Customer Entity | Field Description | Detail tab to help you in filling out the fields. You can be as detailed as you see necessary.
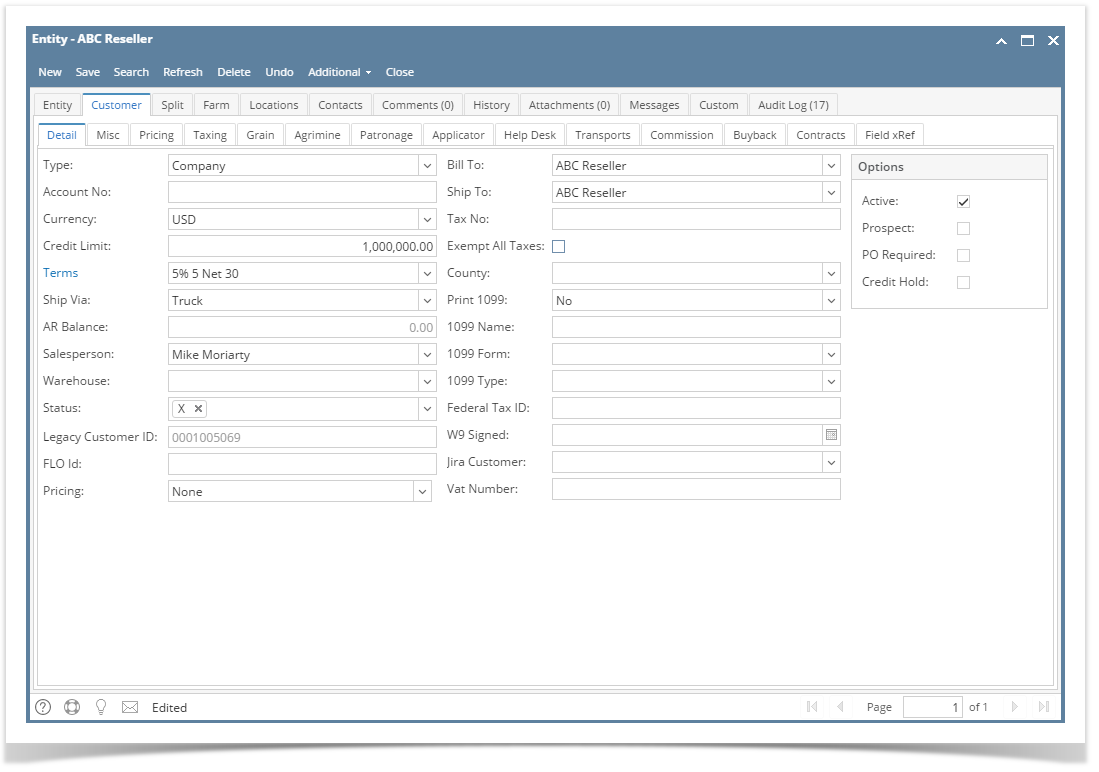 Image Removed Image Removed - Click the Save button. The Entity No field will get disabled.
|
| Expand |
|---|
|
Here are the steps on how to add a new customer: - From the Sales folder, click the Customers menu. If there is no existing record yet, it will open a new Entity (Customer) screen. The Customer Entity search grid will be docked at the center panel.
- On search grid, click the New toolbar button to open a new Entity (Customer) screen.
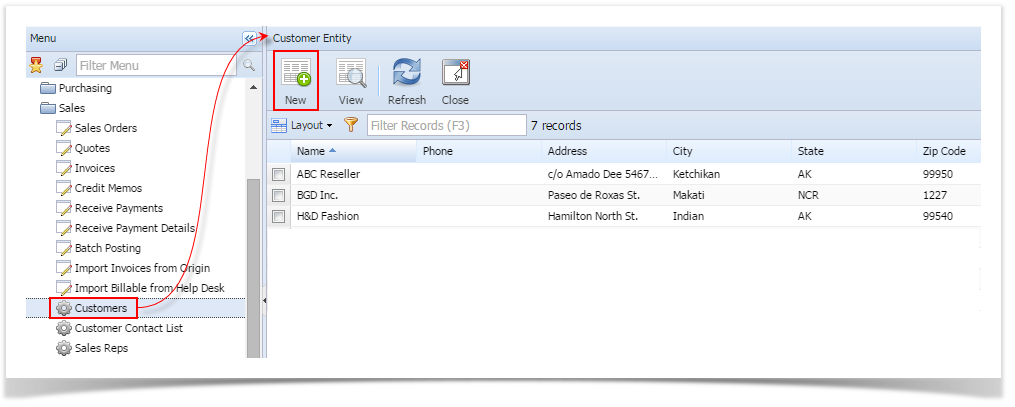 Image Removed Image Removed Fill out the Entity tab fields. - Enter the Name, Contact Name, and Location Name. These are the required fields on this tab.
- You can either enter the Entity No or let the system generate it for you upon saving the record.
- Make sure that the Entity Type is set to Customer.
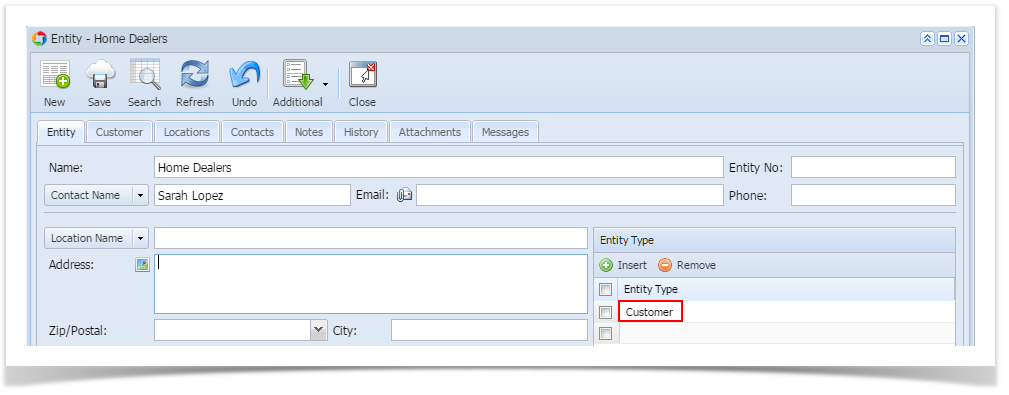 Image Removed Image Removed - Fill out other details on Entity tab. Below is a sample record.
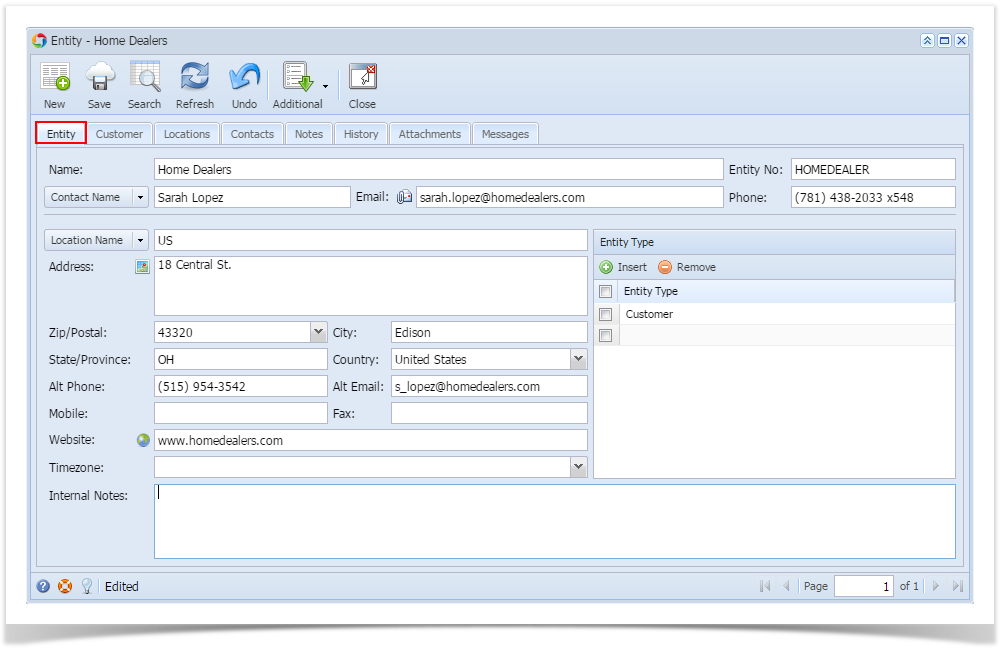 Image Removed Image Removed
Navigate to Customer tab and fill out the necessary fields. You can be as detailed as you like. The required field on this tab is Terms. Refer to Customer Entity for the description of each field.
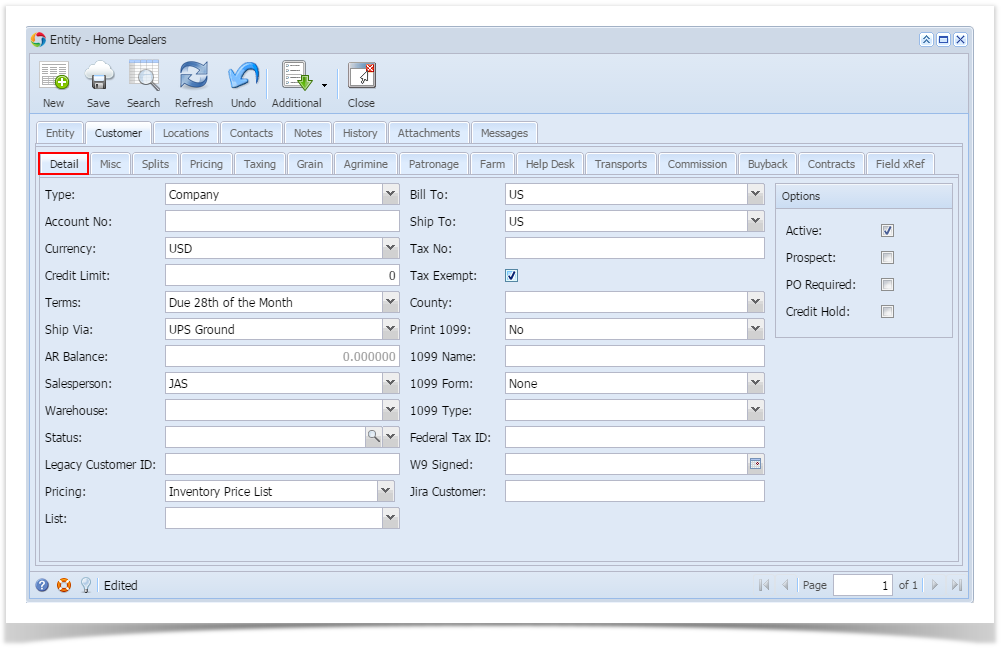 Image Removed Image Removed The Contact Name, Email, Phone, Alt Phone, Alt Email, Mobile, Fax, and Timezone fields will be treated and saved as part of the Entity Contact details. 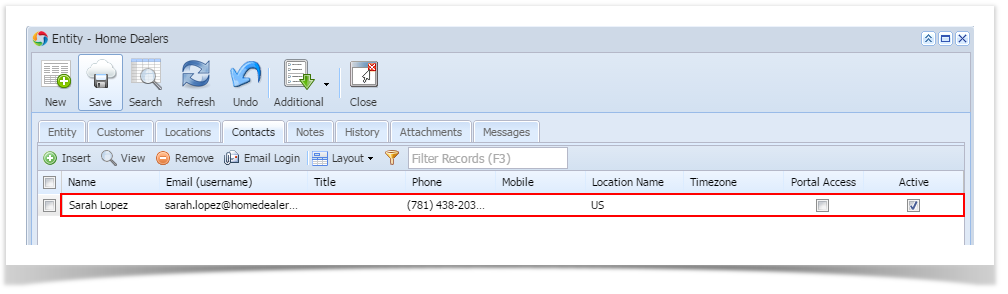 Image Removed Image Removed
While the Locations Name, Address, Zip/Postal, City, State/Province, Country, Ship Via, Terms, and Warehouse fields will be considered as Entity Locations details. 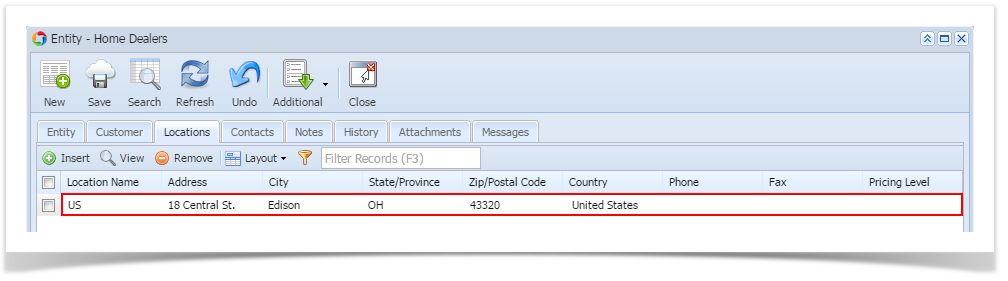 Image Removed Image Removed
- Click the Save toolbar button. The Entity No field will get disabled.
|
...
Here are the steps on how to add a new customer:
...
Enter the necessary details. You can be as detailed as you like. The required fields are Customer No, Name, Contact, Locations, Terms. Refer to Customer Entity for the description of each field.
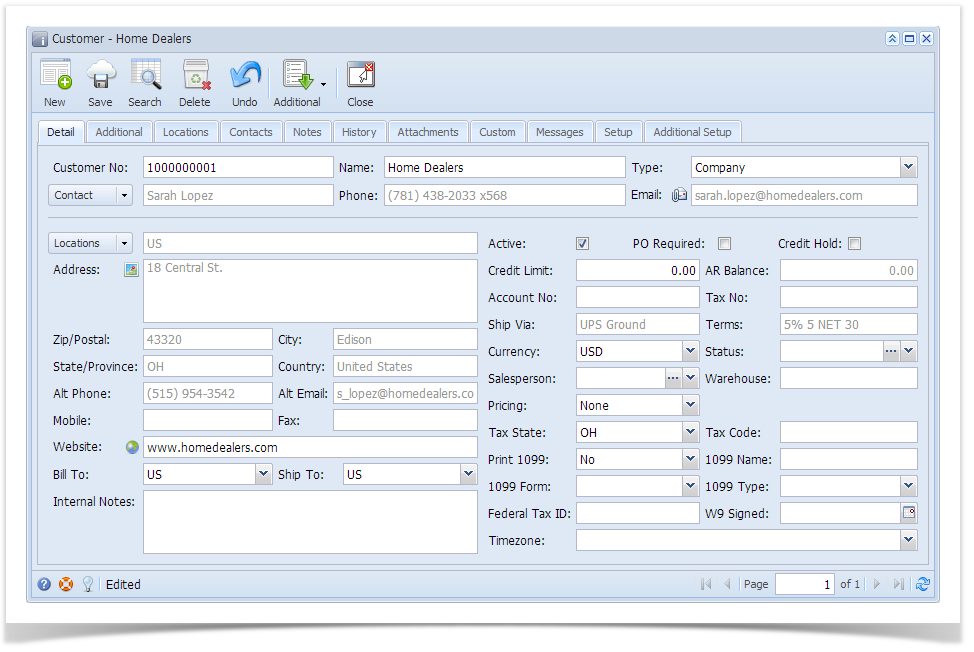 Image Removed
The Contact, Phone, Email, Mobile, Fax, Alt Phone, and Alt Email fields will be treated and saved as part of the Customer Contact details.
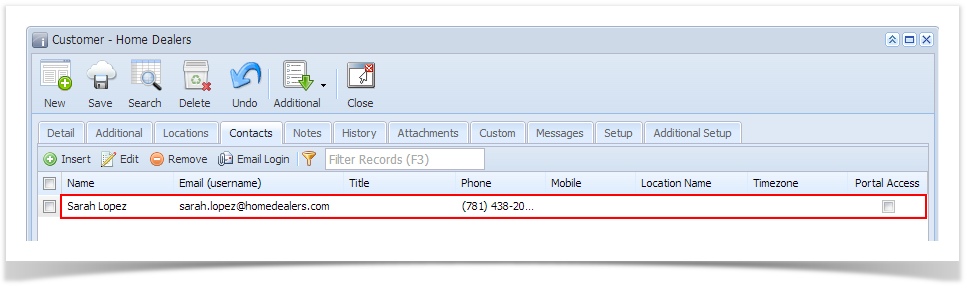 Image Removed
While the Locations, Address, Zip/Postal, City, State/Province, Country, Ship Via, Terms, Warehouse, and Tax Code fields will be considered as Customer Locations details.
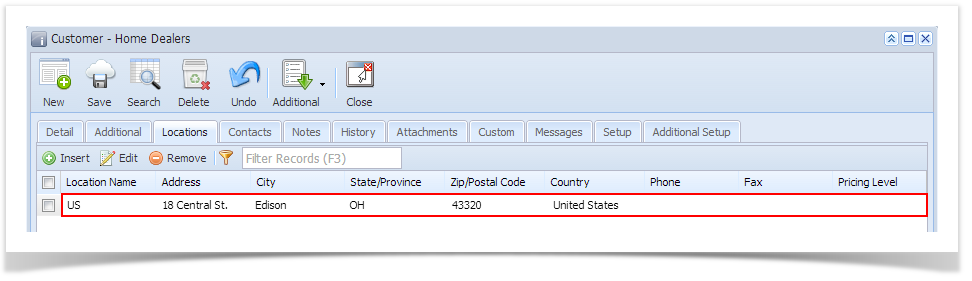 Image Removed
...
Customer Search screen.
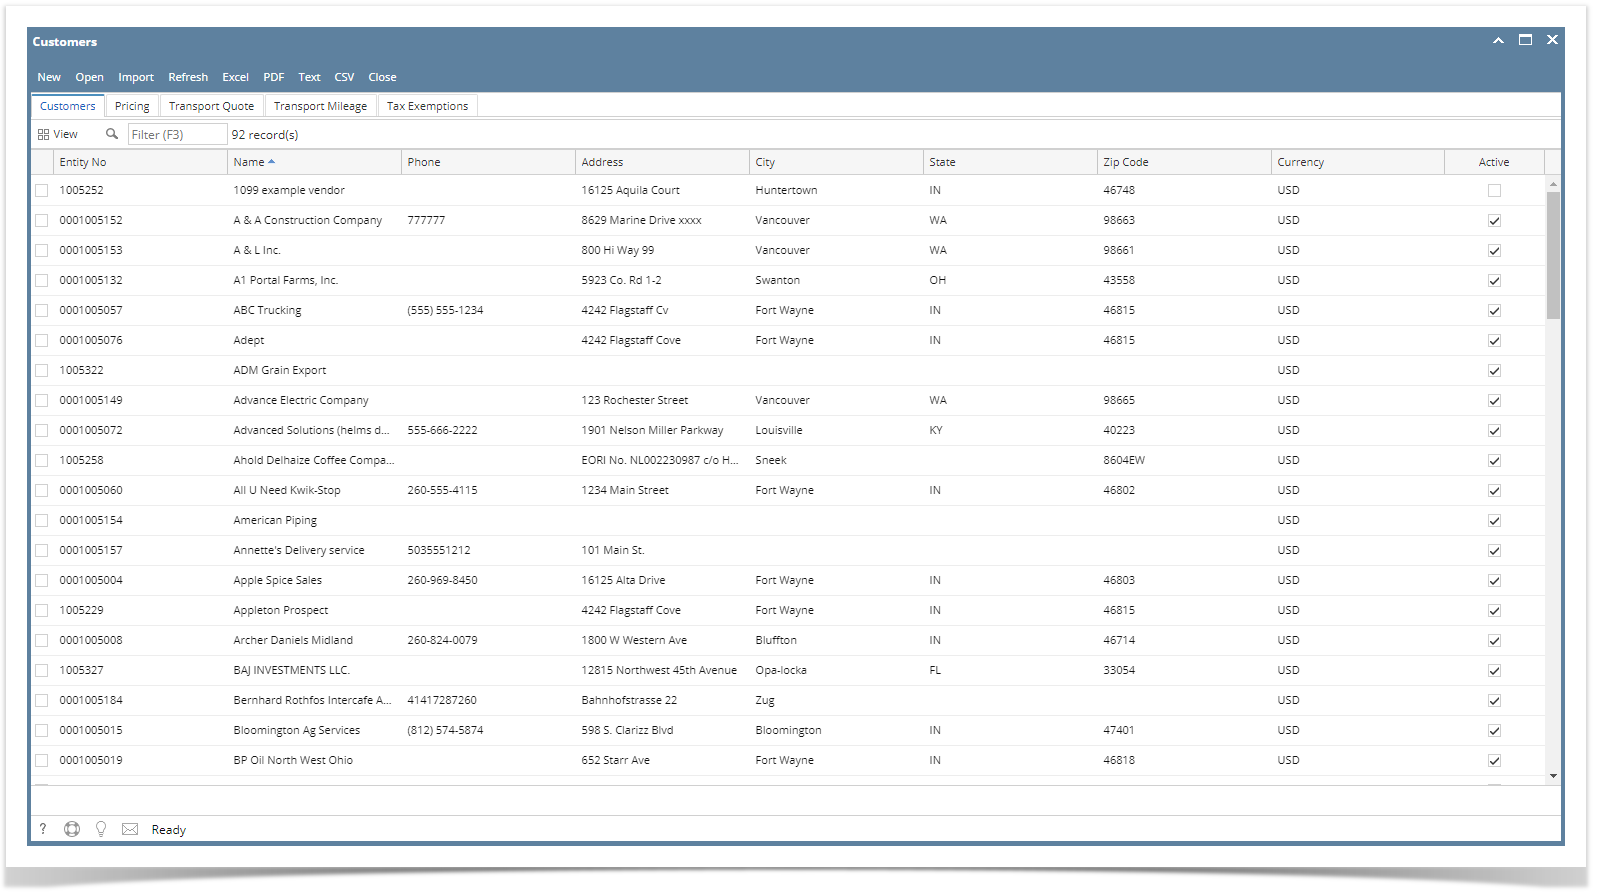 Image Added
Select Customer and click open toolbar button.
- Navigate to Customer tab | Misc tab
- Under Credit Cards, click add button and this will open Add Credit Card Screen and fill out the required fields.
- Click Save Card
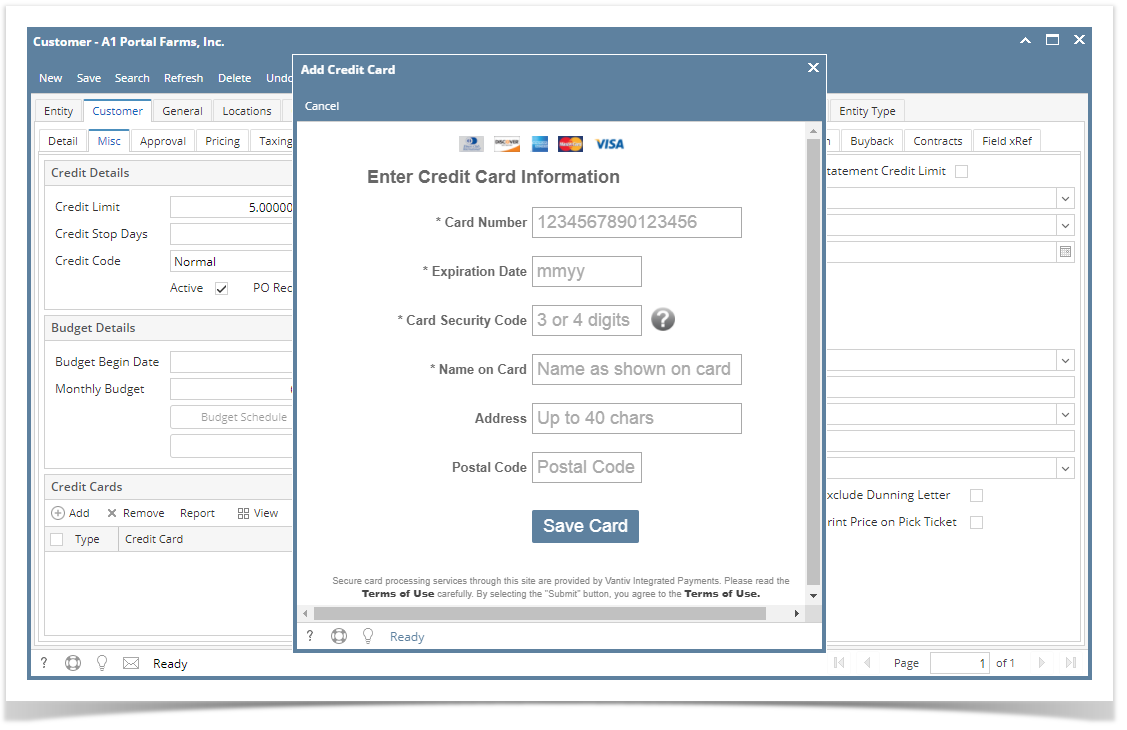 Image Added
...