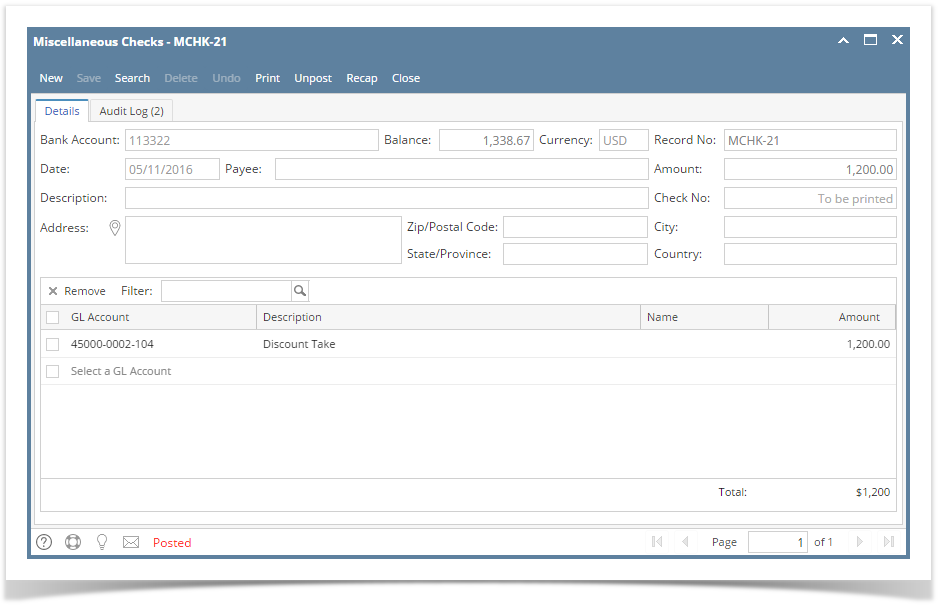
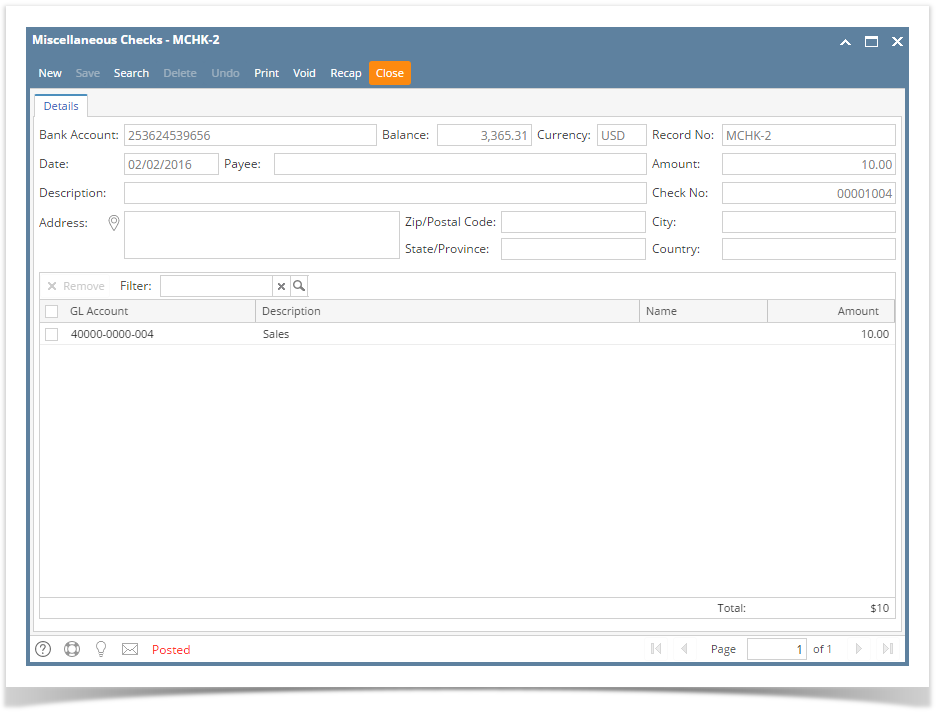
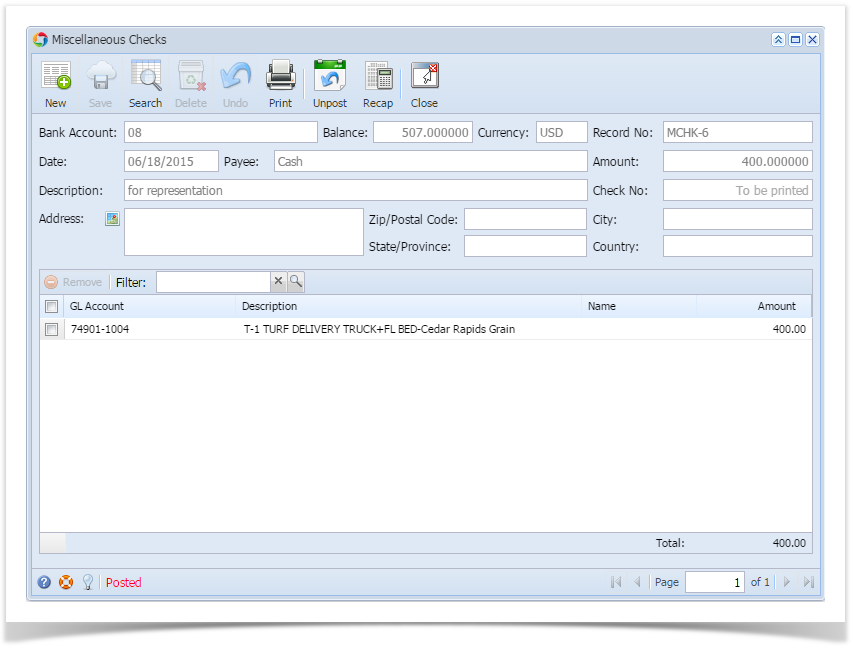
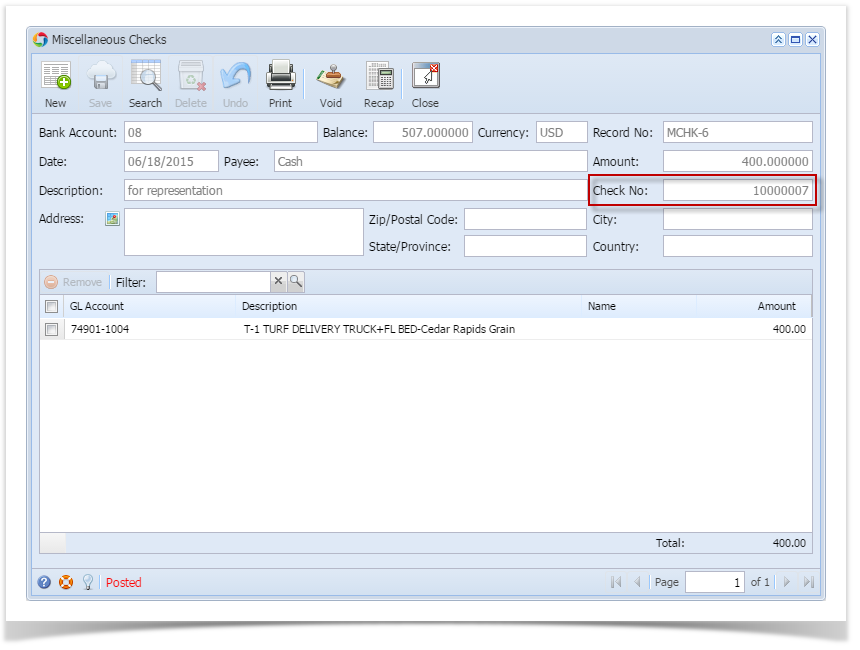
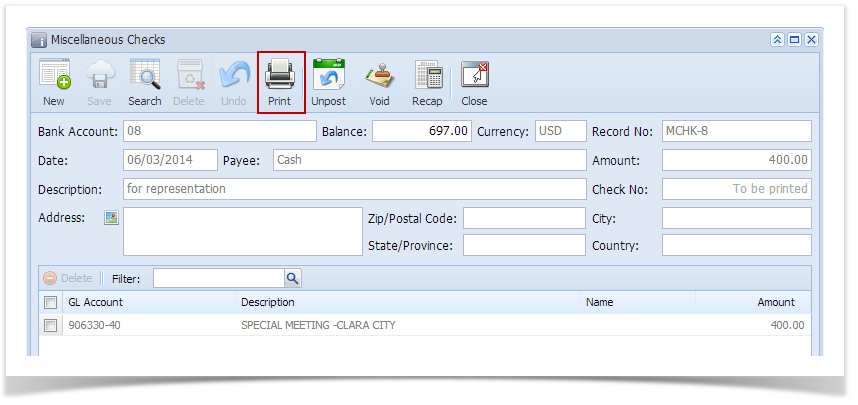
Select the miscellaneous check you want to print. Click Print toolbar button.
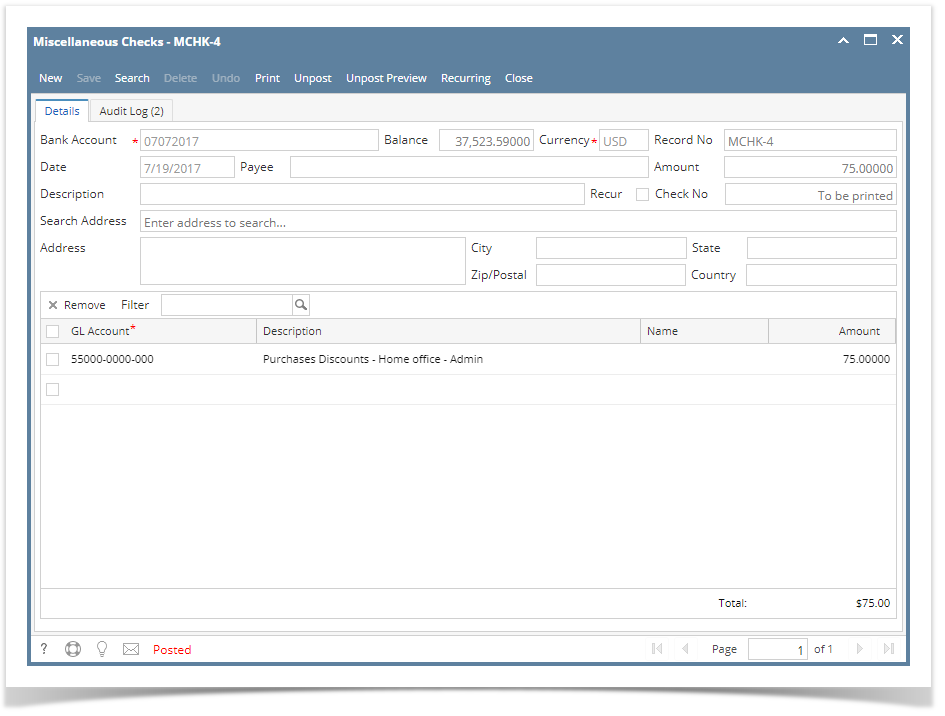
If the transaction is to be printed right away, you may skip posting it. Instead, click Print toolbar button and it will post and print the transaction. See How to Post Miscellaneous Check.
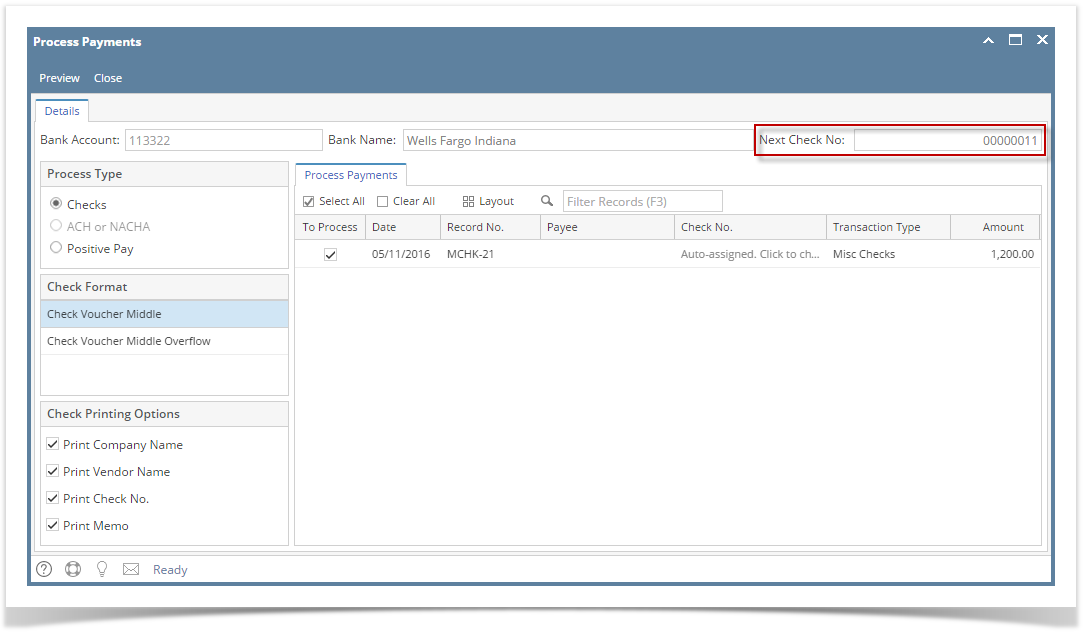
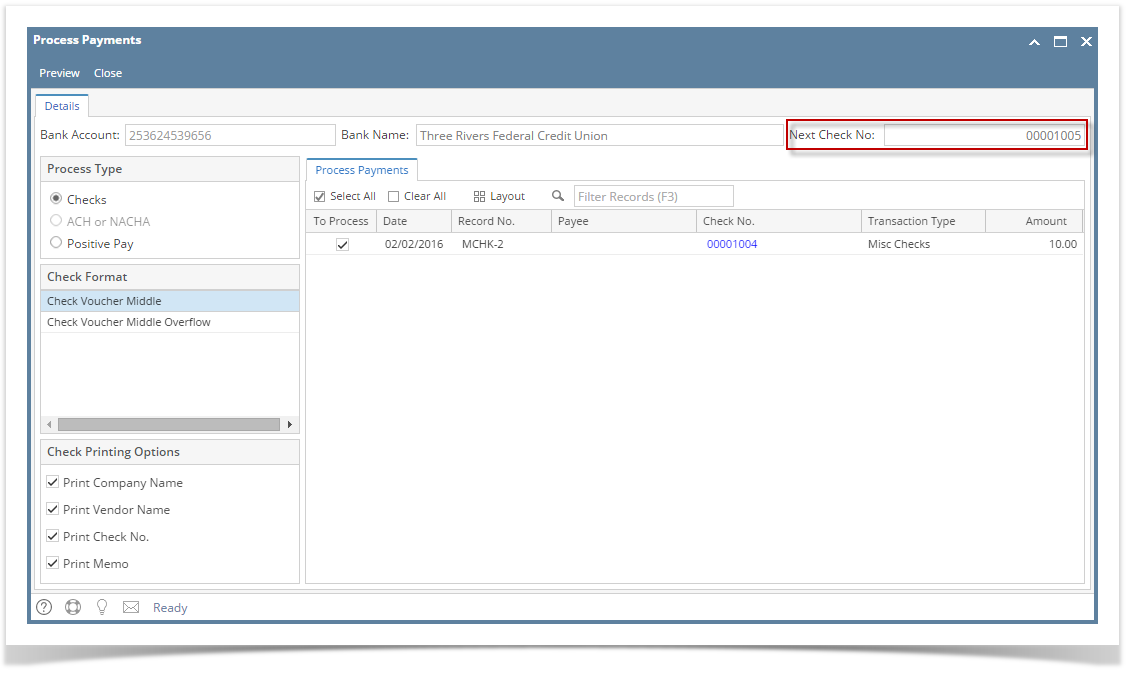
- The Process Payments screen opens.
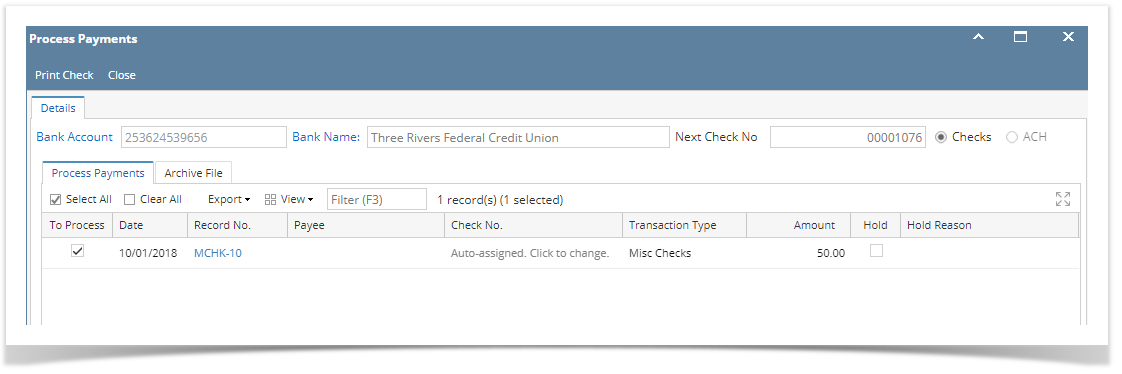
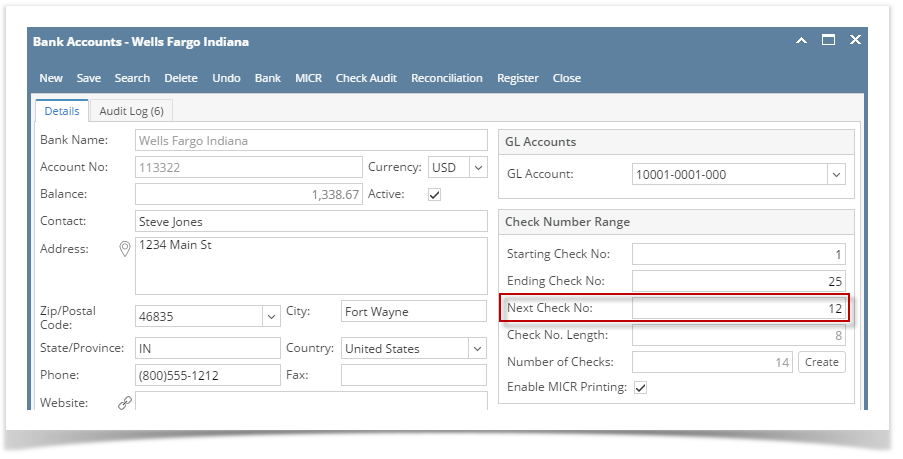
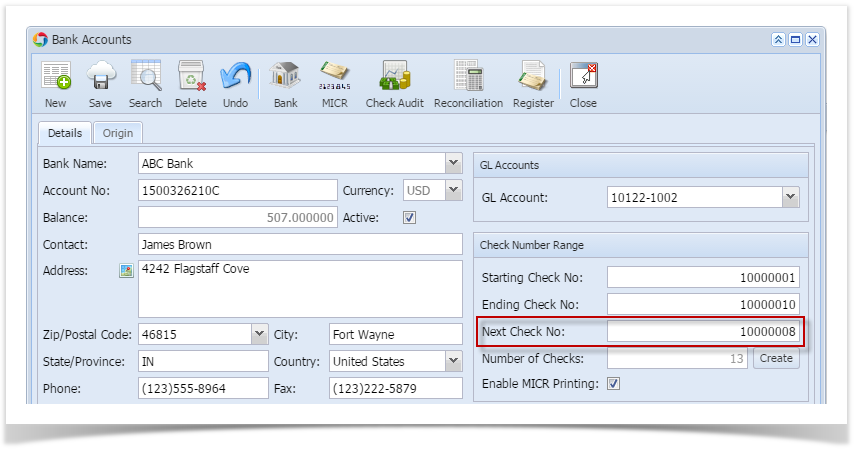
If you have setup Check Number Range for the bank account used for the Miscellaneous Check, the Next Check No field in the Print Checks screen will show the Next Check No setup in the Bank Accounts screen > Check Number Range panel > Next Check No field.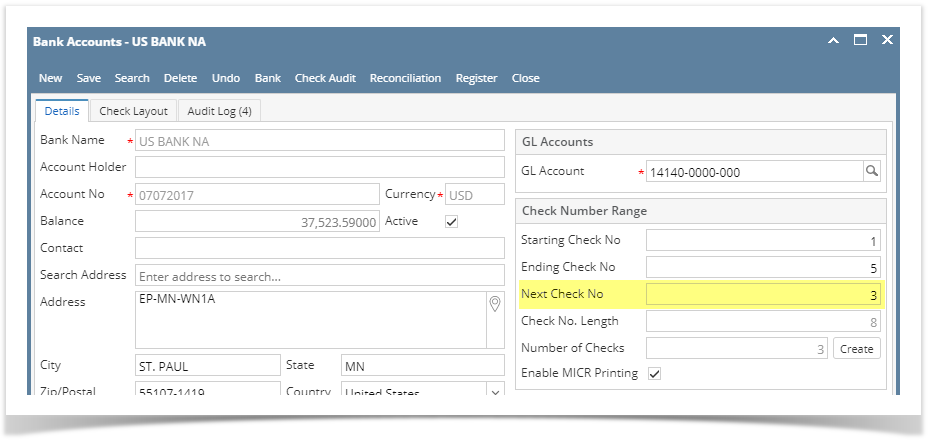
- Click Print Check.
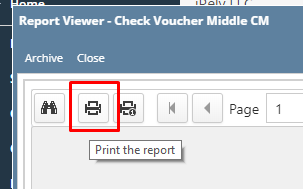
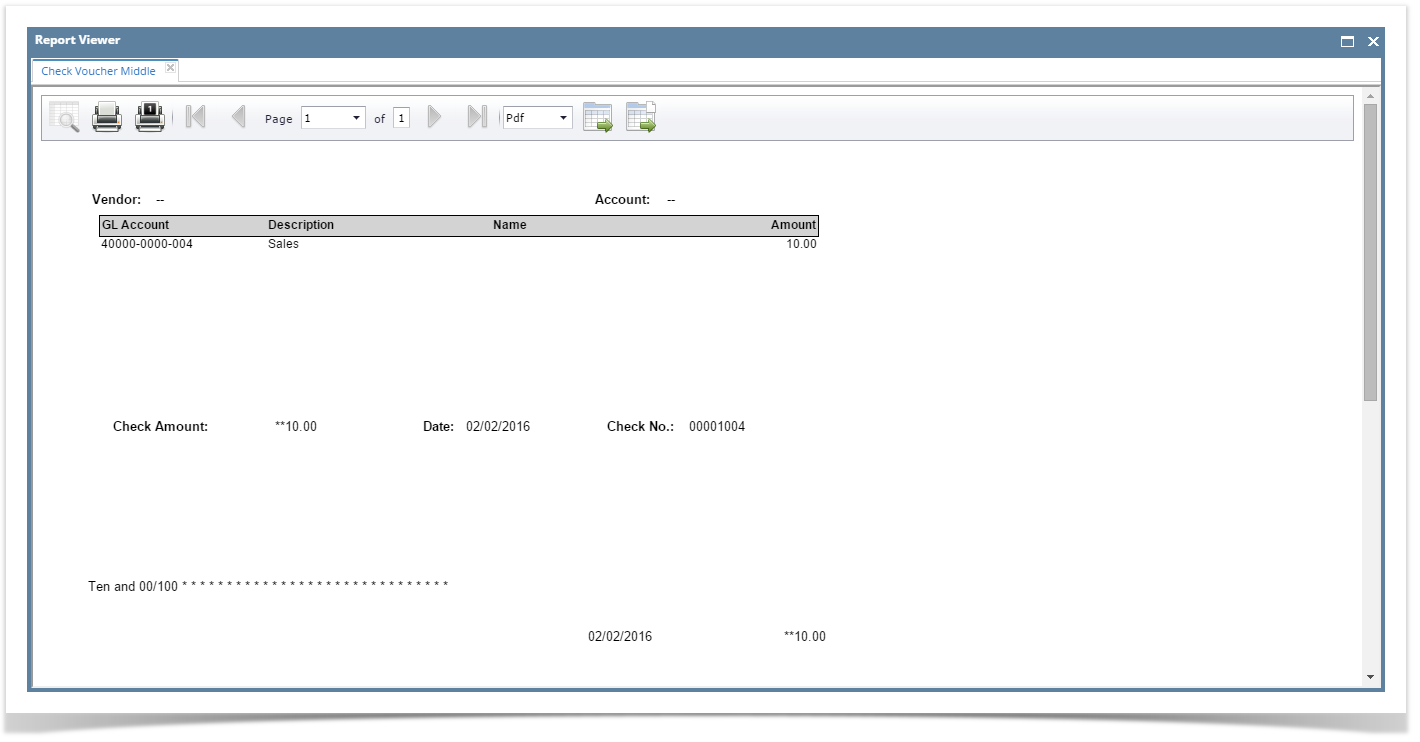
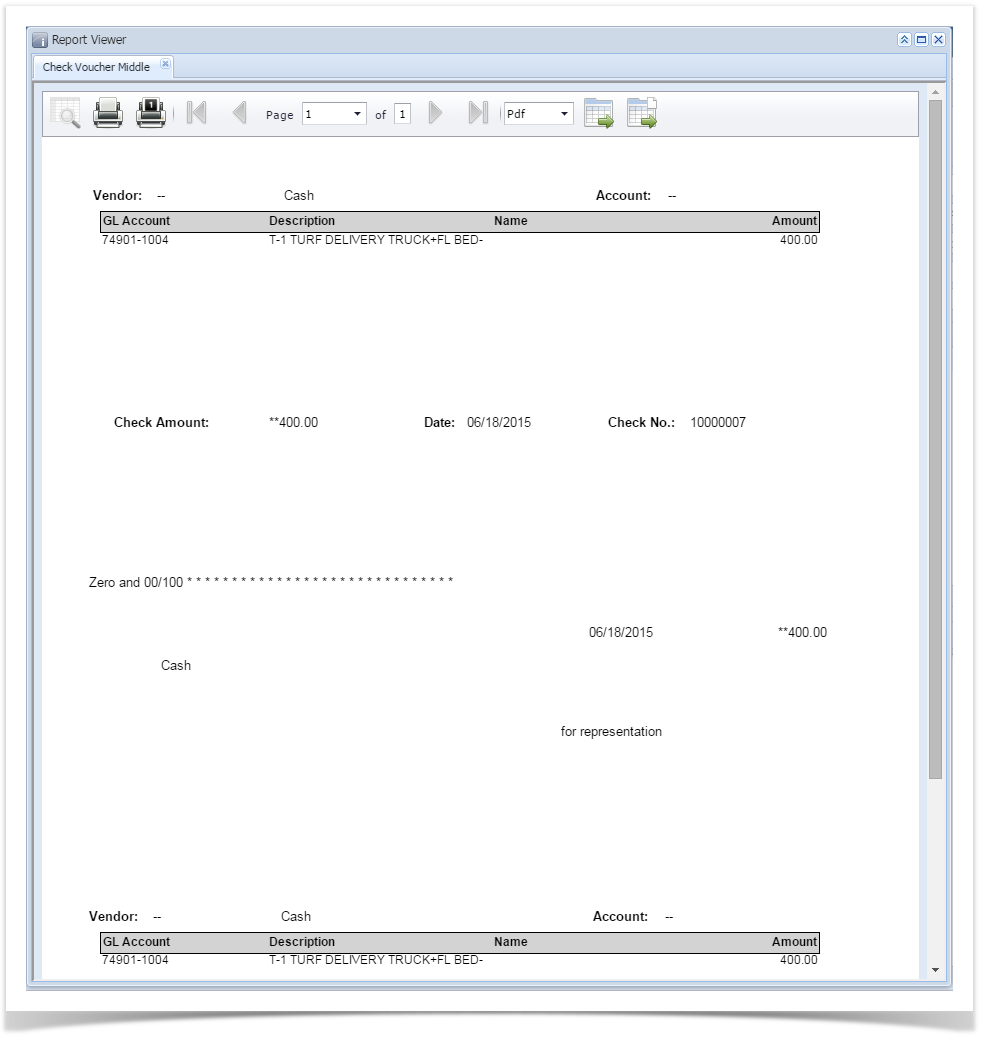
- The Report Viewer will open showing the Check Voucher Middle report.
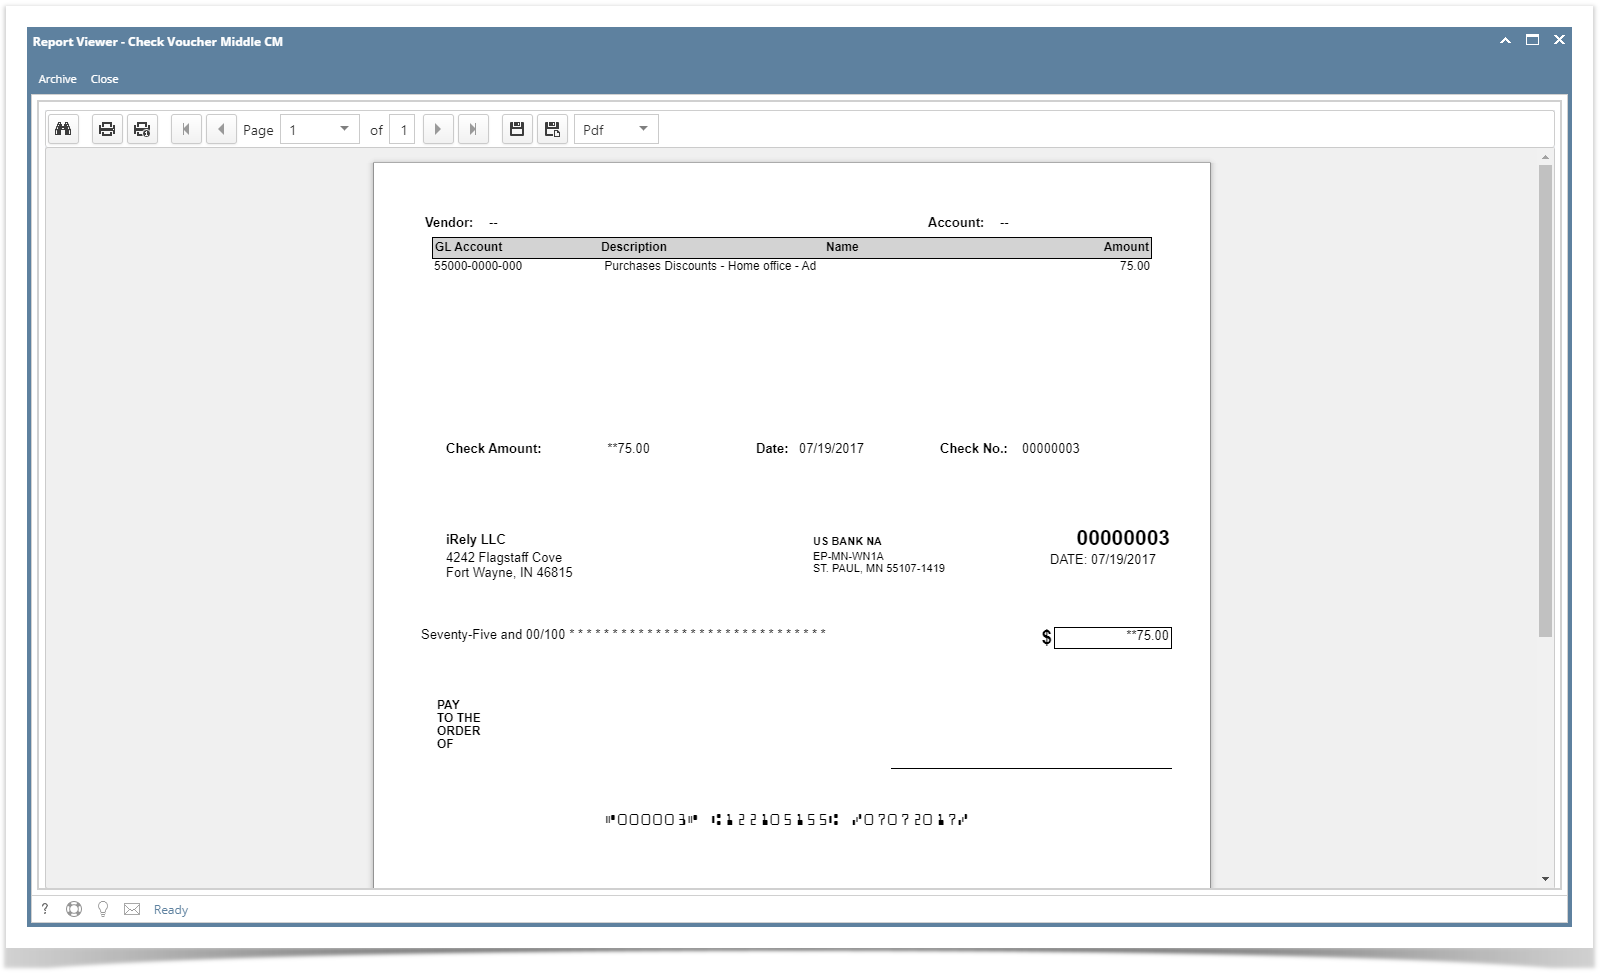
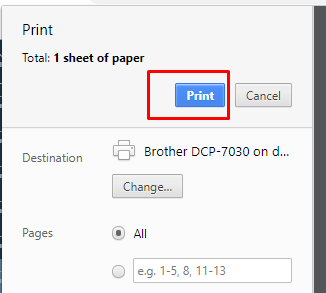
- Click Print button to actually print the check.
- Click Print button to actually print the check.
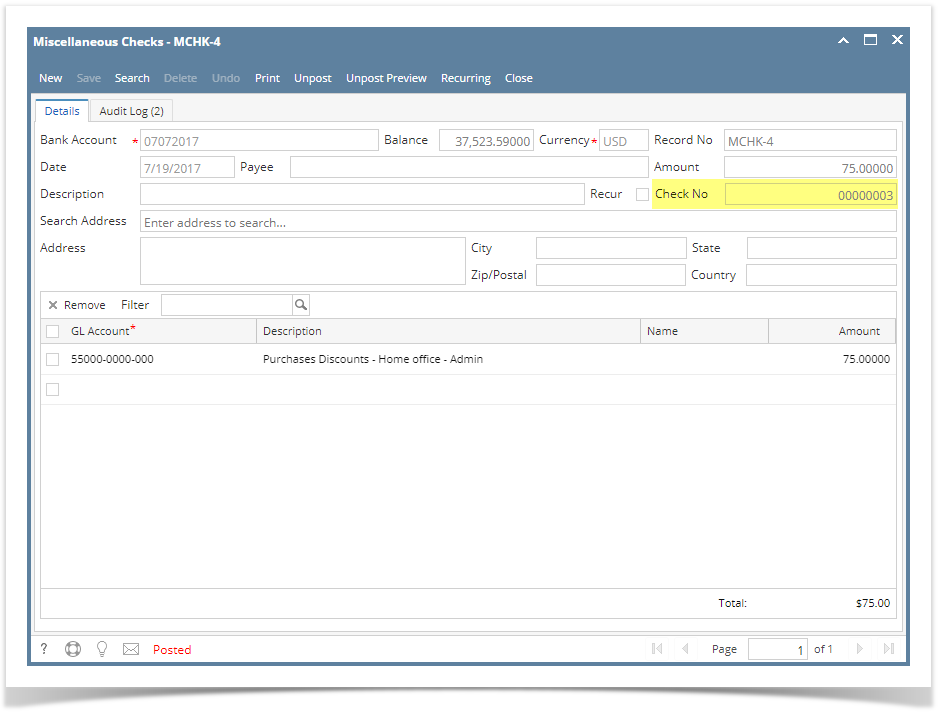
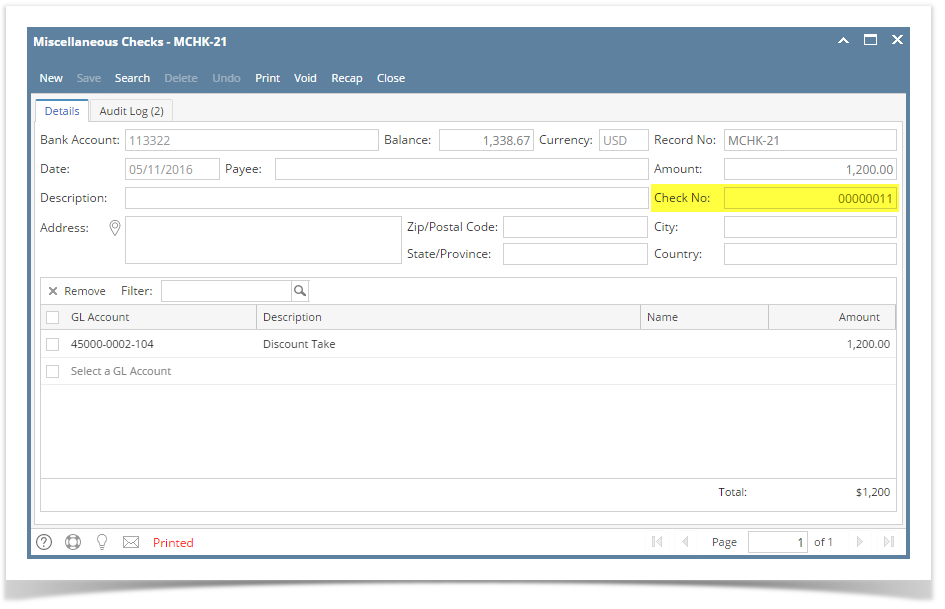
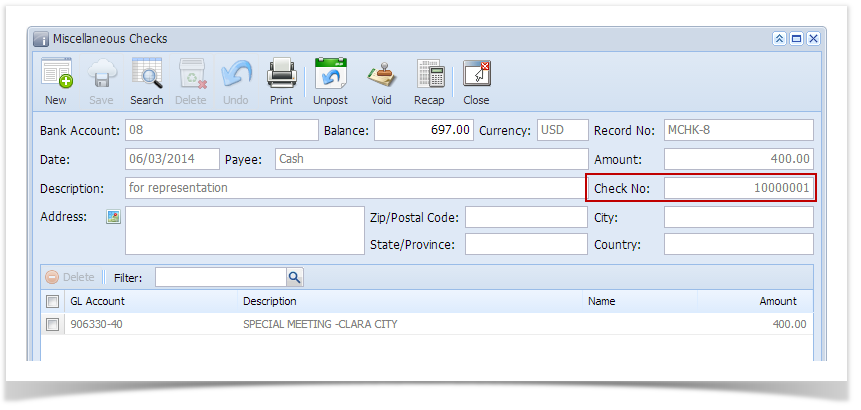
- Re-open the Miscellaneous Check and the Check Number field will be updated by the check number setup in the Bank Account screen > Check Number Range panel > Next Check Number.
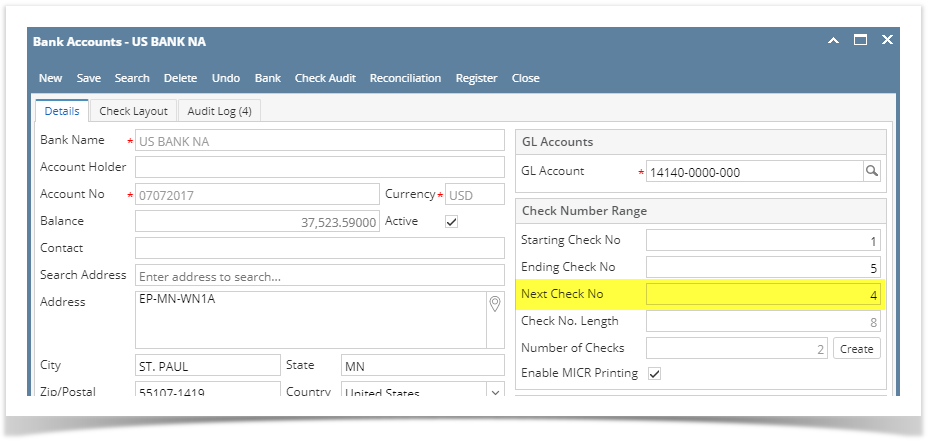
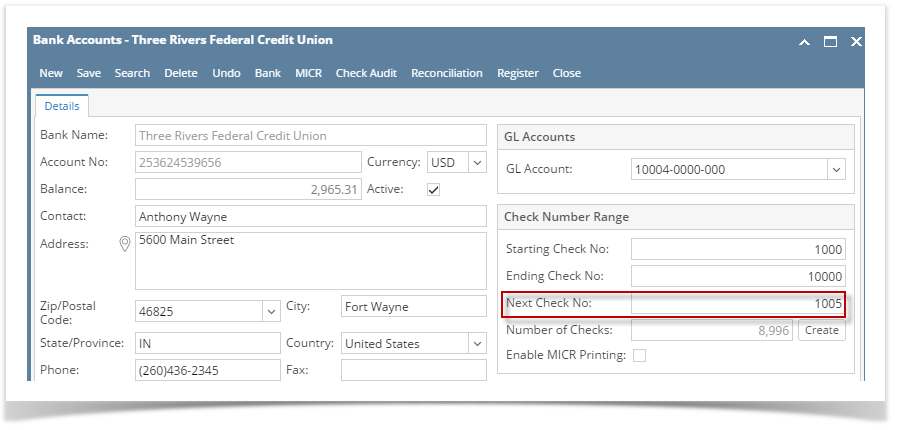
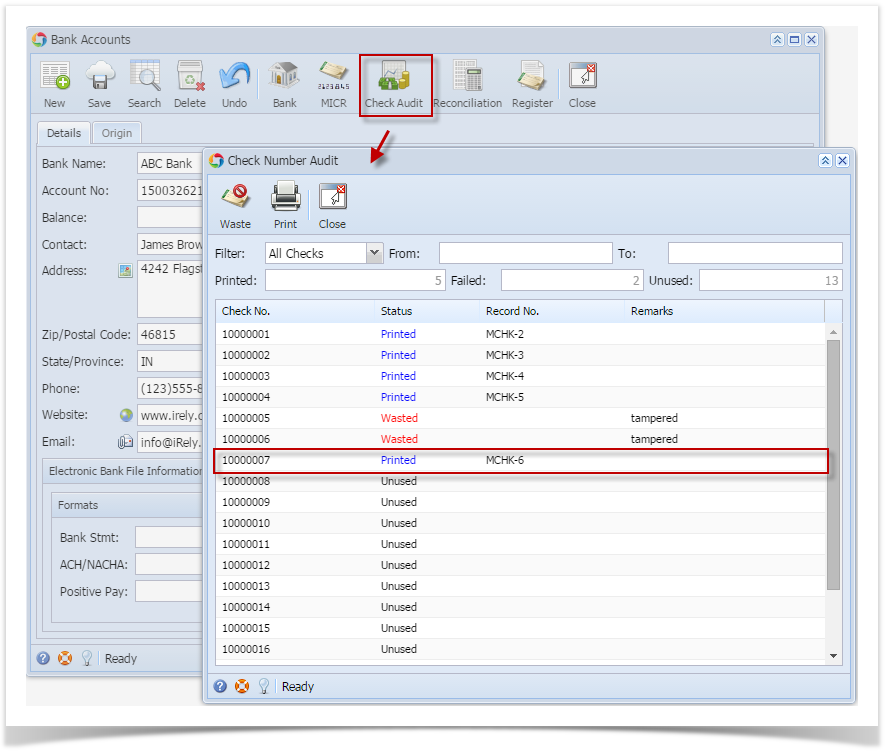
- Open Bank Account screen from Cash Management module > Maintenance folder > Bank Accounts and select the bank account used in the miscellaneous check. The Next Check No field is now updated with the next available check number.
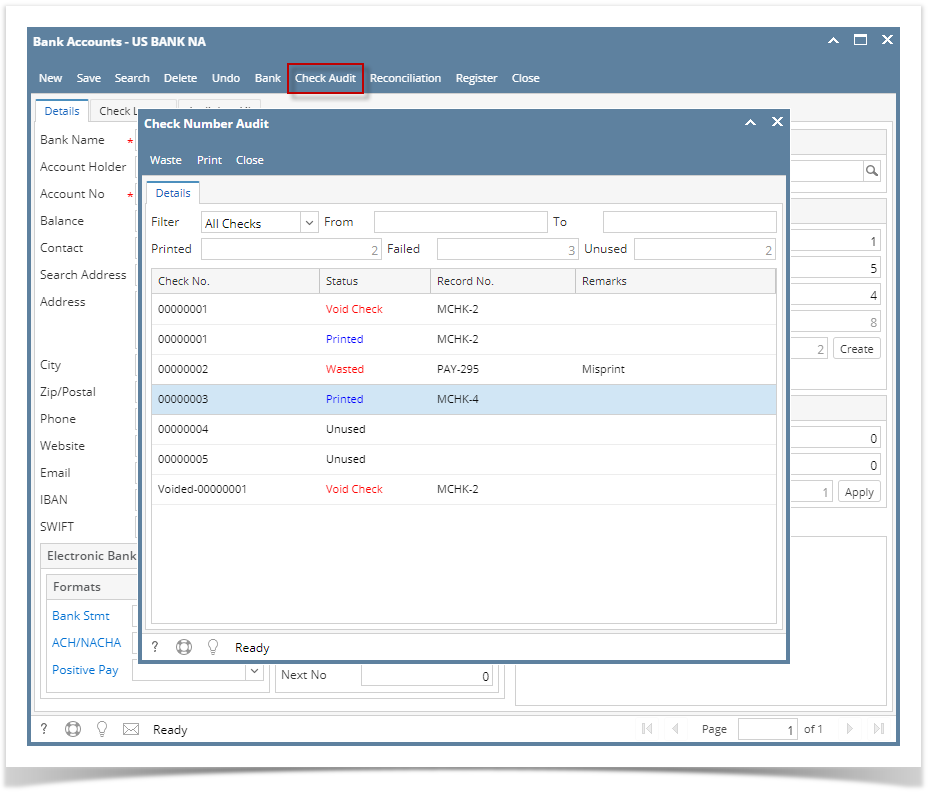
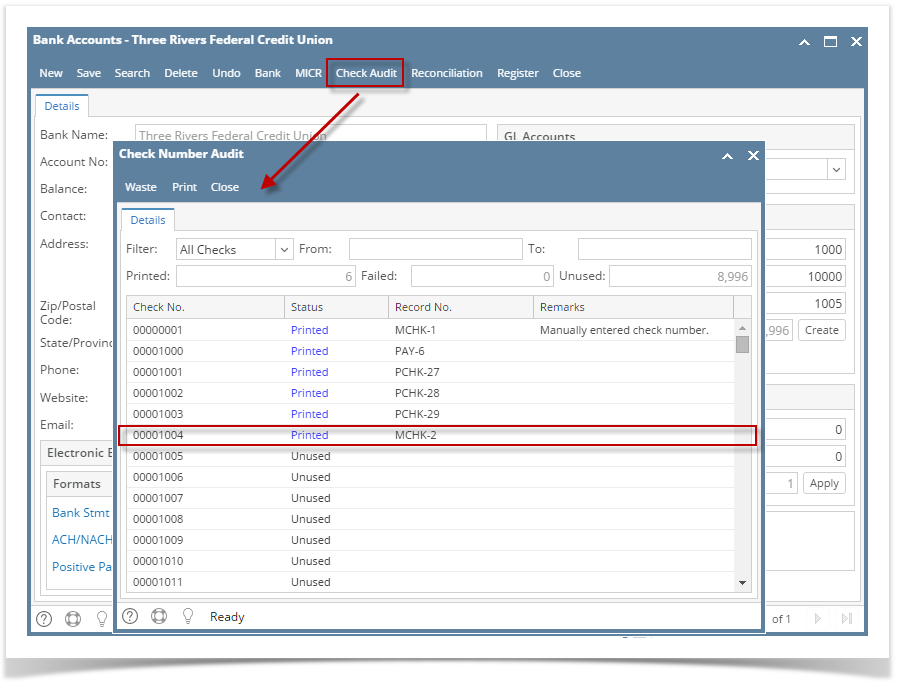
- Click Check Audit toolbar button to open the Check Number Audit screen where listing of checks is maintained and status of each check number is shown based on result of check printing, which is on this example, successfully printed. Thus Status shows Printed.
Select the miscellaneous check you want to print. Click Print toolbar button.
If the transaction is to be printed right away, you may skip posting it. Instead, click Print toolbar button and it will post and print the transaction. See How to Post Miscellaneous Check.
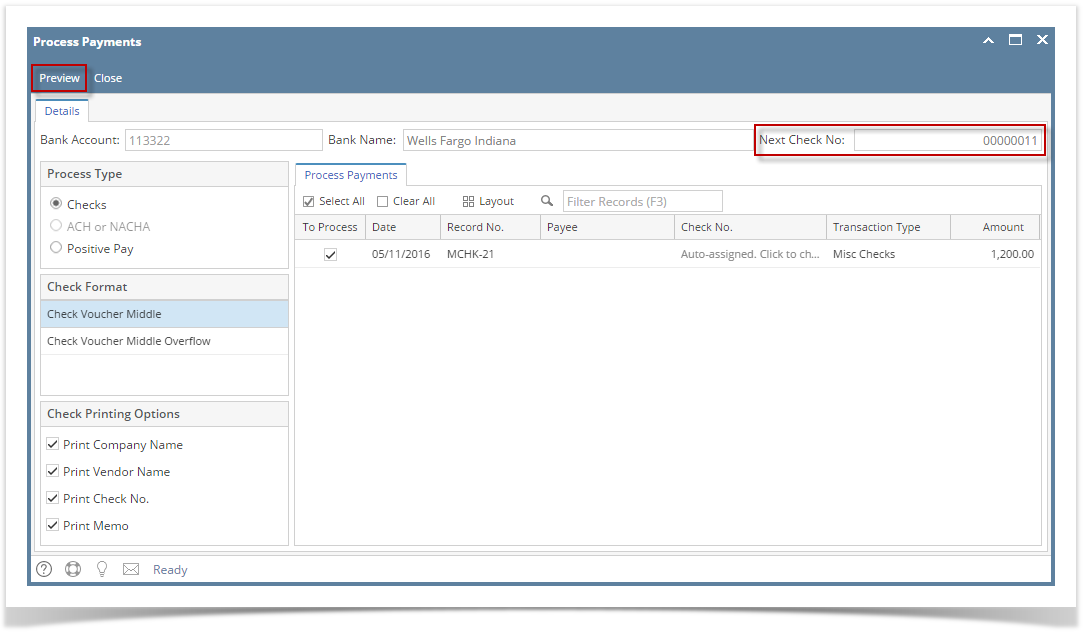
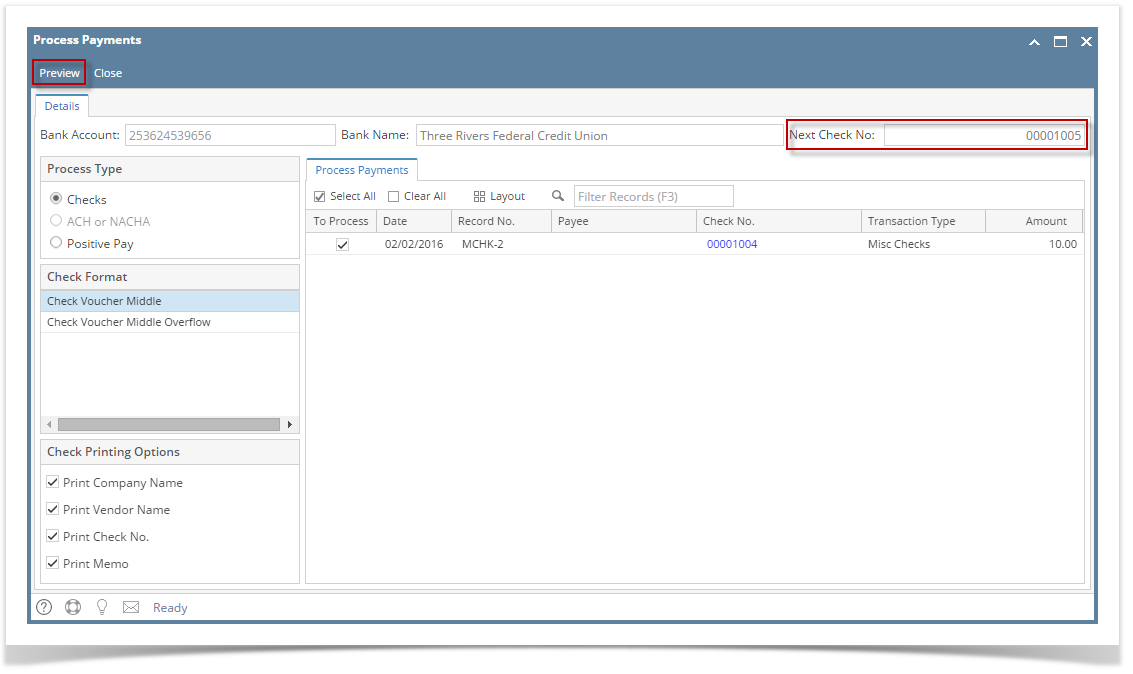
- The Process Payments screen opens.
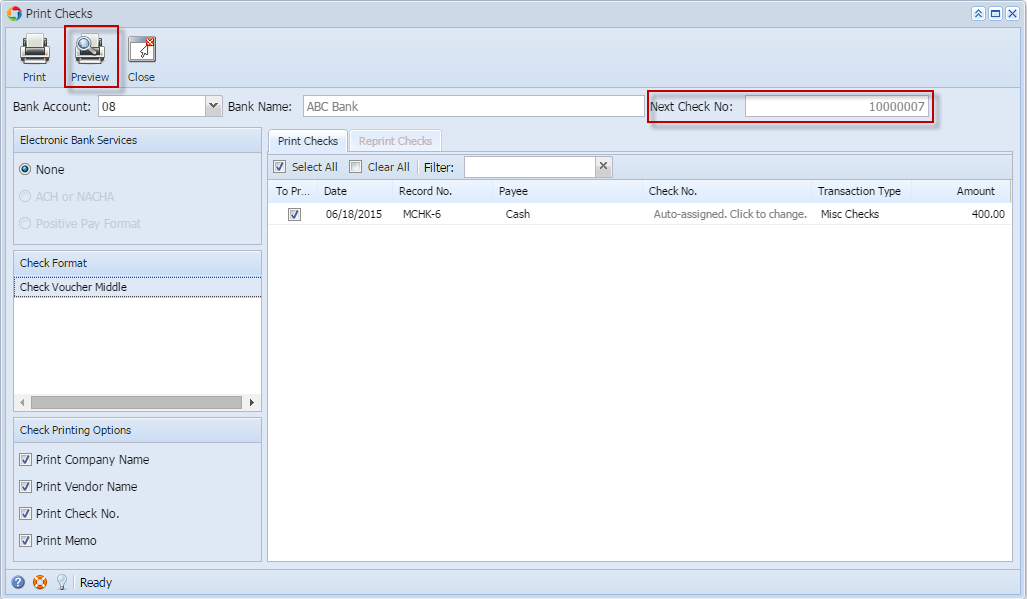
If you have setup Check Number Range for the bank account used for the Miscellaneous Check, the Next Check No field in the Print Checks screen will show the Next Check No setup in the Bank Accounts screen > Check Number Range panel > Next Check No field.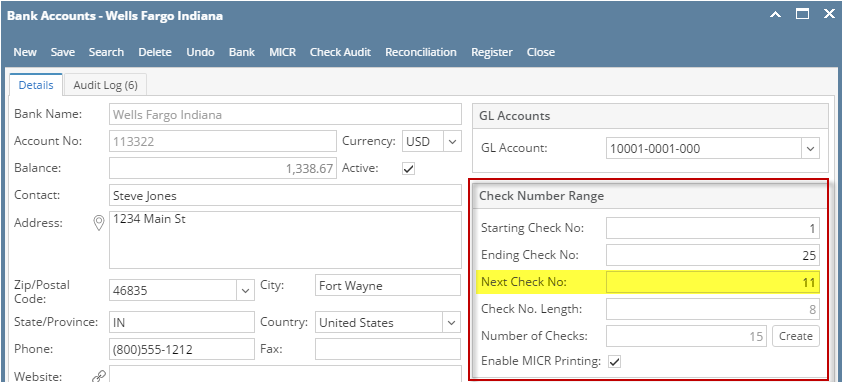
- Click Preview toolbar button.
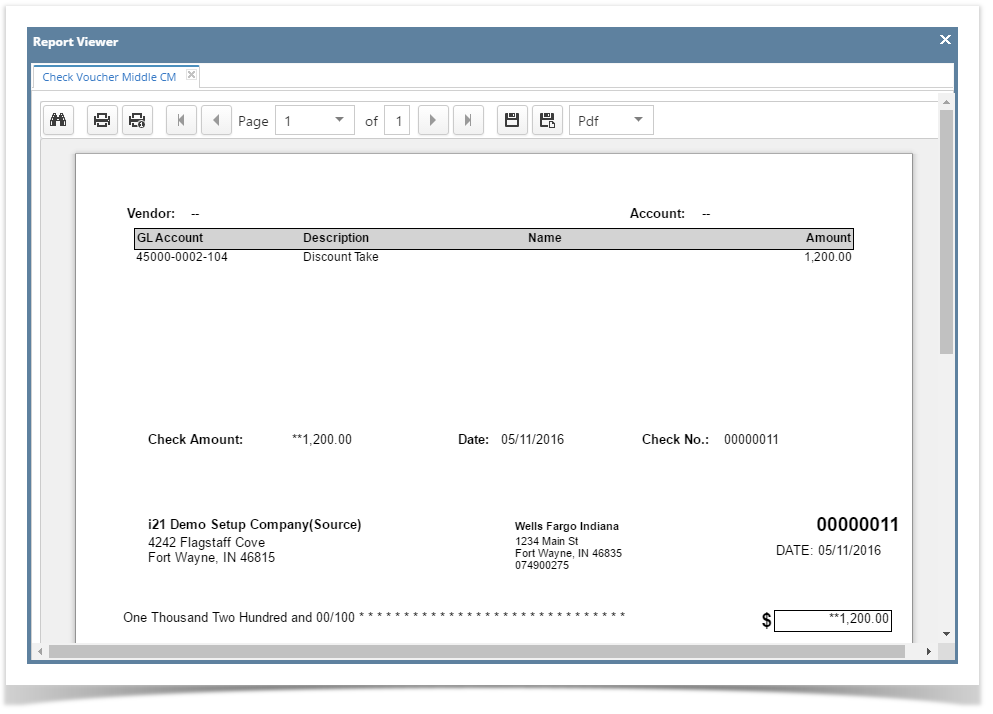
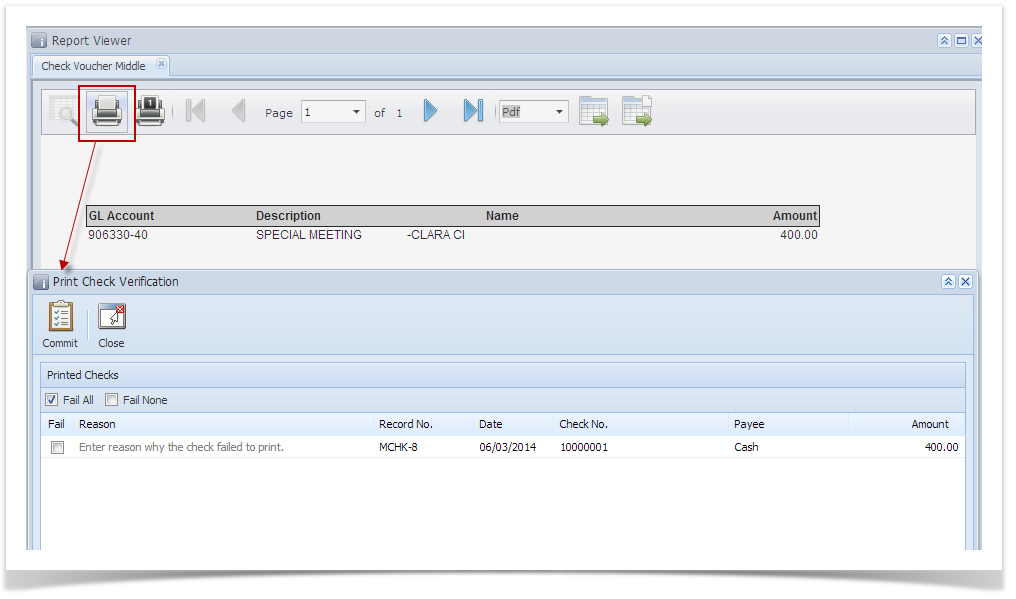
- The Report Viewer will open showing the Check Voucher Middle report.
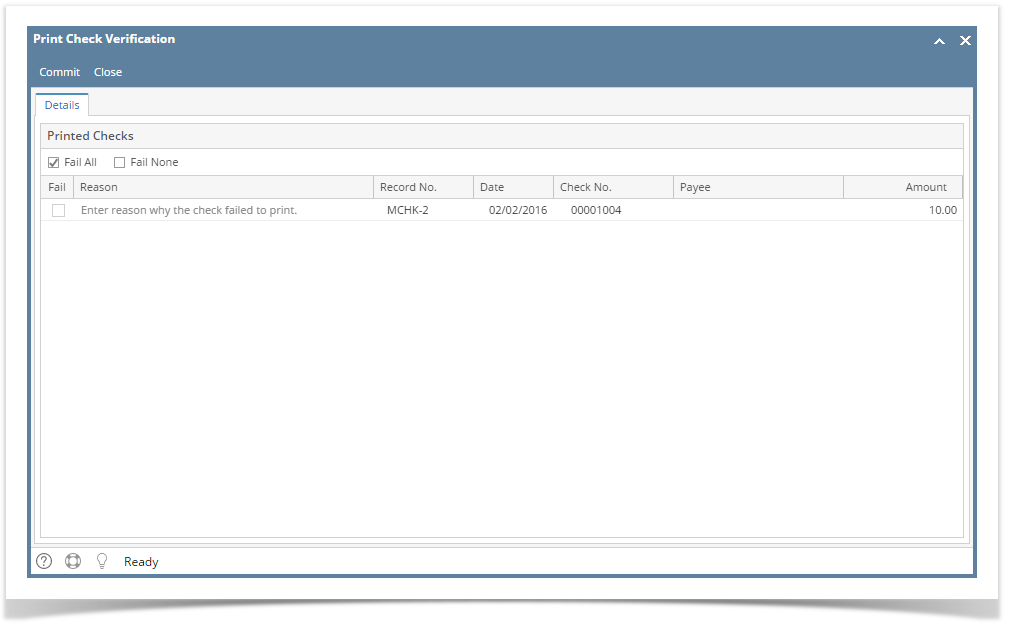
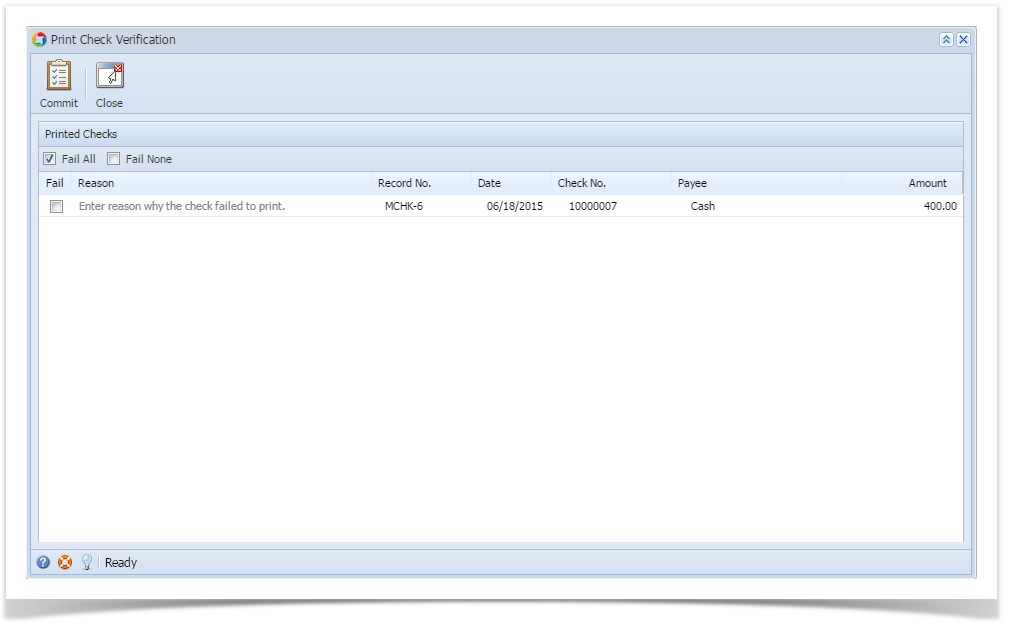
- Click Print button to actually print the check. The Print Check Verification screen opens.
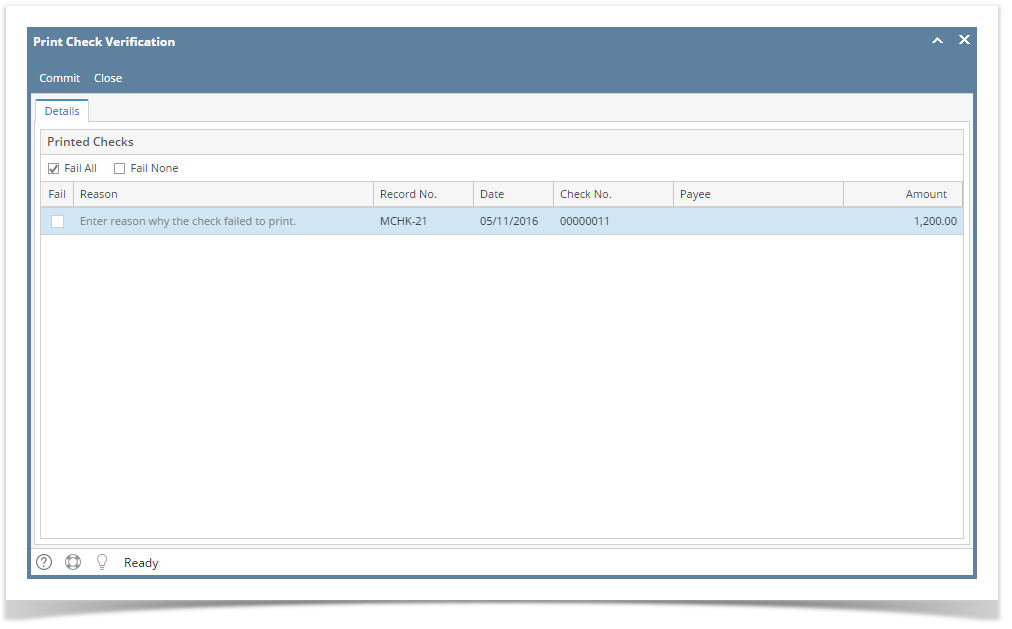
In the Print Check Verification screen, you will have to specify whether the printing of check was a success or it failed.- If the check printing was a success, see Printing of Check is successful.
- If the check printing failed, see Printing of Check failed.
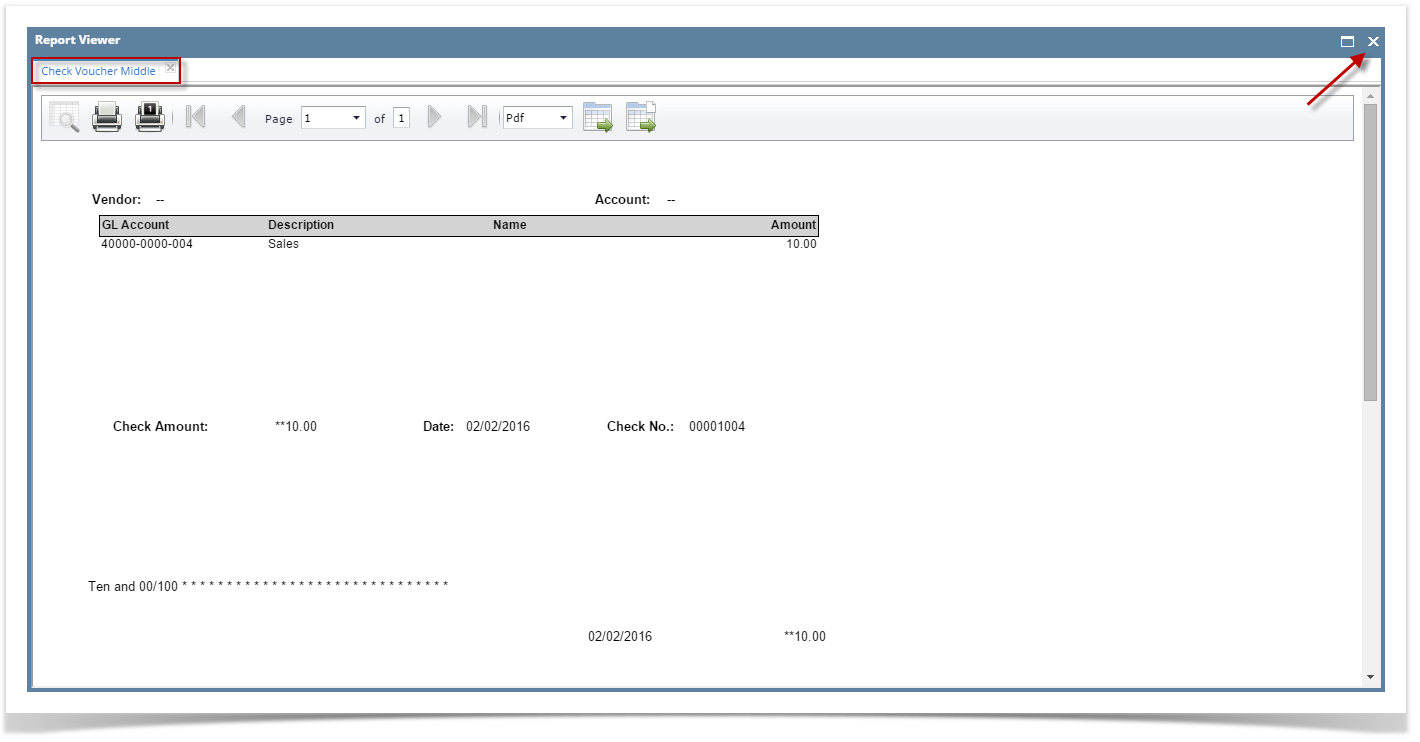
- Close the Check Voucher Middle report by clicking the x button on the Check Voucher Middle tab to close the said report or click the X button at the top right corner of the Report Viewer to close all reports.
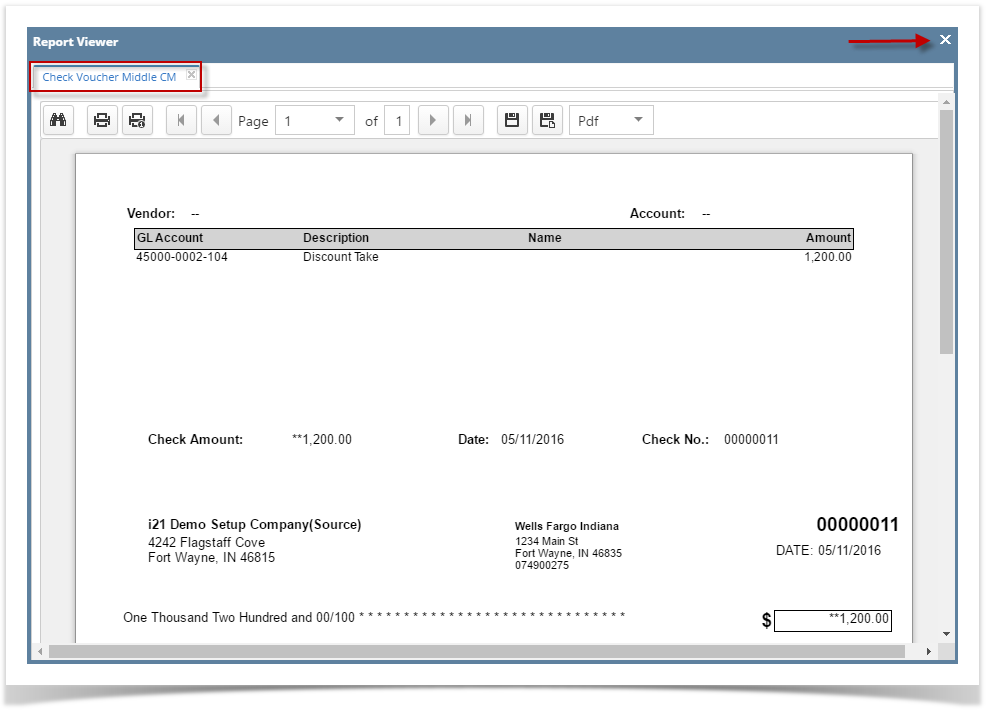
- Once the Report Viewer is closed, it will also close the Miscellaneous Check.
- Re-open the Miscellaneous Check and the Check Number field will be updated by the check number setup in the Bank Account screen > Check Number Range panel > Next Check Number.
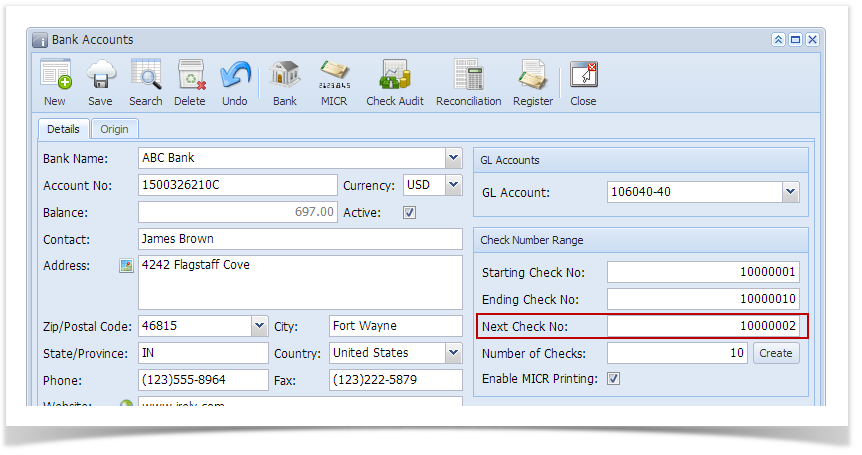
- Open Bank Account screen from Cash Management module > Maintenance folder > Bank Accounts and select the bank account used in the miscellaneous check. The Next Check No field is now updated with the next available check number.
- Click Check Audit toolbar button to open the Check Number Audit screen where listing of checks is maintained and status of each check number is shown based on result of check printing, which is on this example, successfully printed. Thus Status shows Printed.

Select the miscellaneous check you want to print. Click Print toolbar button.
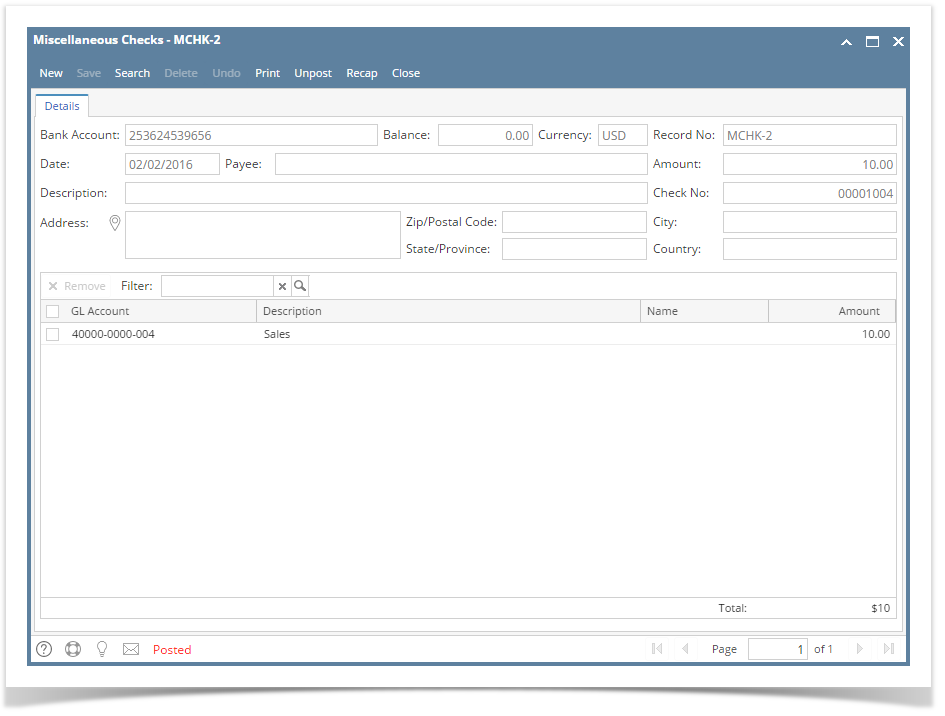
If the transaction is to be printed right away, you may skip posting it. Instead, click Print toolbar button and it will post and print the transaction. See How to Post Miscellaneous Check.
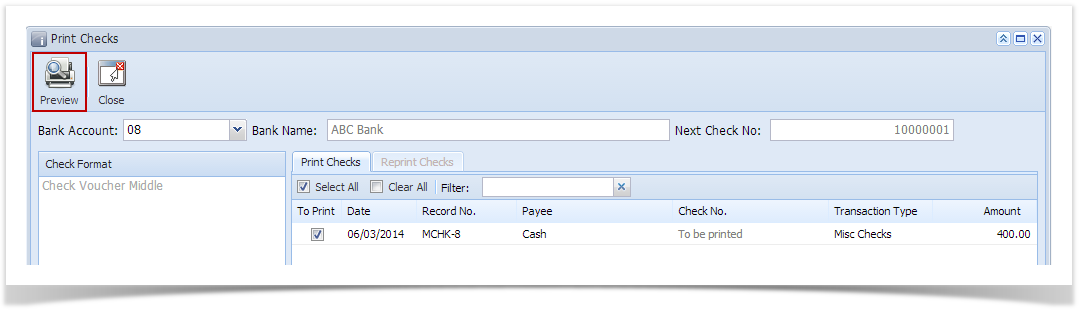
- The Print Checks screen opens.
If you have setup Check Number Range for the bank account used for the Miscellaneous Check, the Next Check No field in the Print Checks screen will show the Next Check No setup in the Bank Accounts screen > Check Number Range panel > Next Check No field.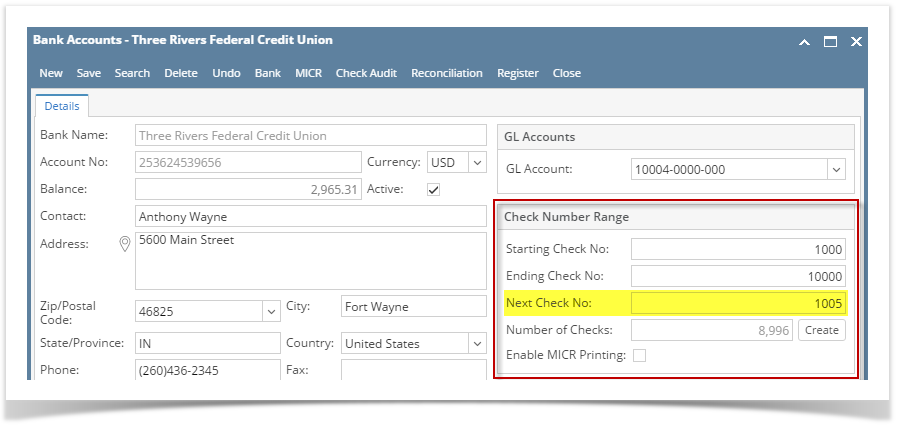
- Click Preview toolbar button.
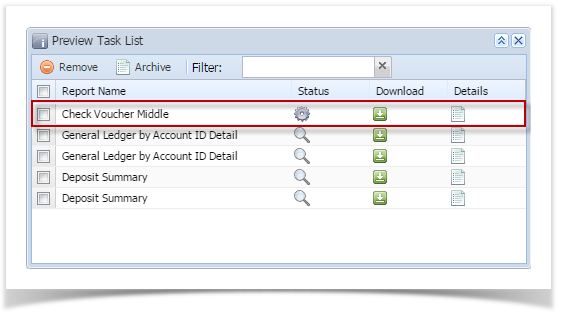
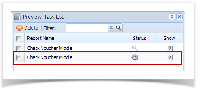
- The Preview Task List screen opens.
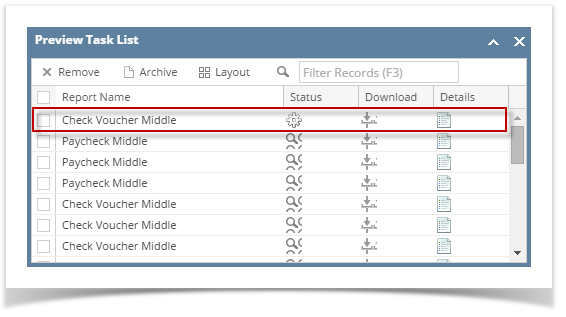
- The Tools button in the Check Voucher Middle report > Status field signifies that i21 is in the process of generating the report.
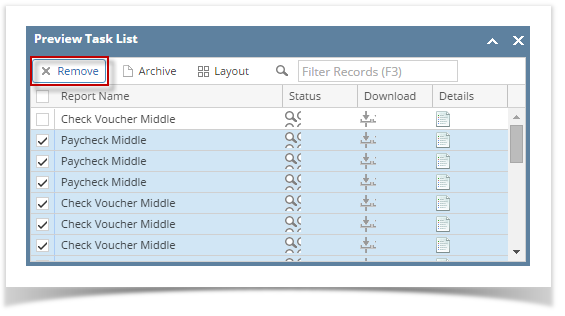
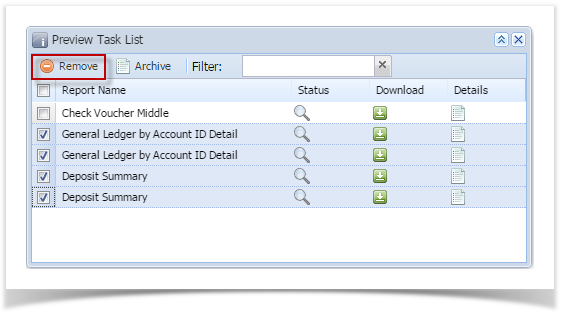
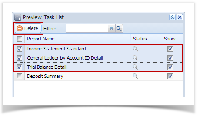
- This screen stores previous reports previewed/printed. If you would like to clear this screen, select report/s to delete and click Remove button.
- You can also preview report that is existing on this list by clicking the Magnifying glass button in the Status field for the selected report.
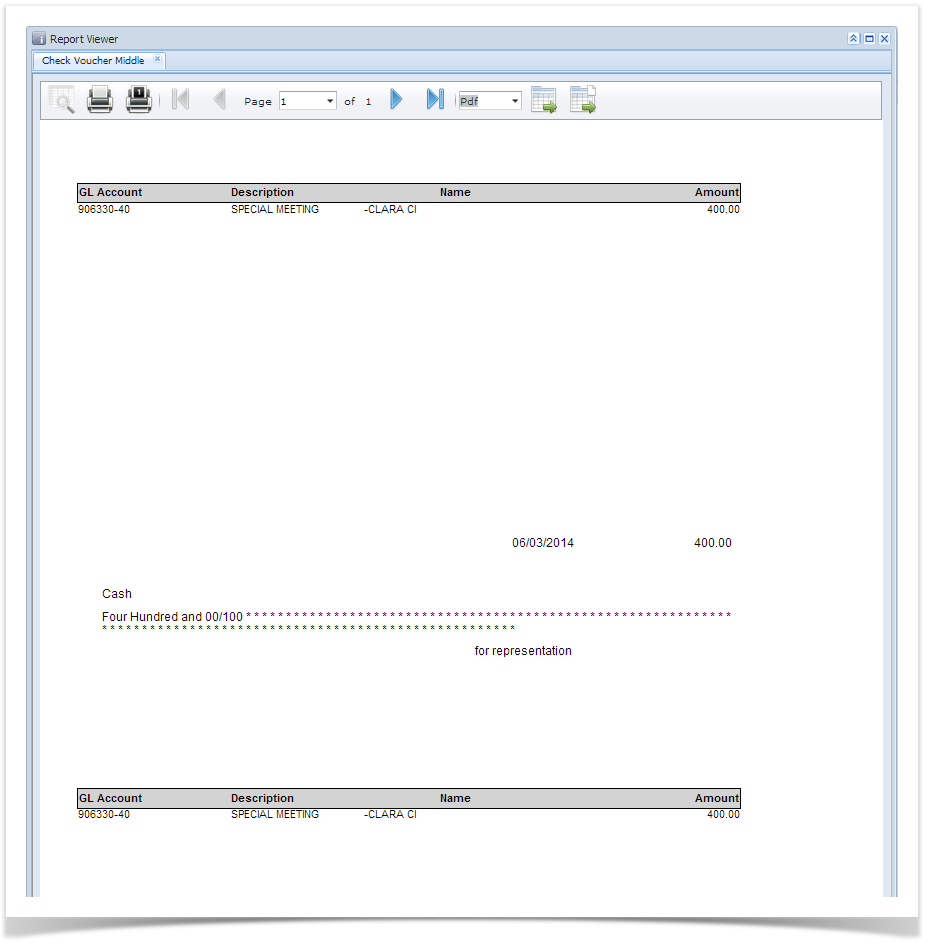
- The Report Viewer will open showing the Check Voucher Middle report.
- Click Print button to actually print the check. The Print Check Verification screen opens.
In the Print Check Verification screen, you will have to specify whether the printing of check was a success or it failed.- If the check printing was a success, see Printing of Check is successful.
- If the check printing failed, see Printing of Check failed.
- Close the Check Voucher Middle report by clicking the x button on the Check Voucher Middle tab to close the said report or click the X button at the top right corner of the Report Viewer to close all reports.
- Once the Report Viewer is closed, it will also close the Miscellaneous Check.
- Re-open the Miscellaneous Check and the Check Number field will be updated by the check number setup in the Bank Account screen > Check Number Range panel > Next Check Number.
- Open Bank Account screen from Cash Management module > Maintenance folder > Bank Accounts and select the bank account used in the miscellaneous check. The Next Check No field is now updated with the next available check number.
- Click Check Audit toolbar button to open the Check Number Audit screen where listing of checks is maintained and status of each check number is shown based on result of check printing, which is on this example, successfully printed. Thus Status shows Printed.
Select the miscellaneous check you want to print. Click Print toolbar button.
If the transaction is to be printed right away, you may skip posting it. Instead, click Print toolbar button and it will post and print the transaction. See How to Post Miscellaneous Check.
- The Print Checks screen opens.
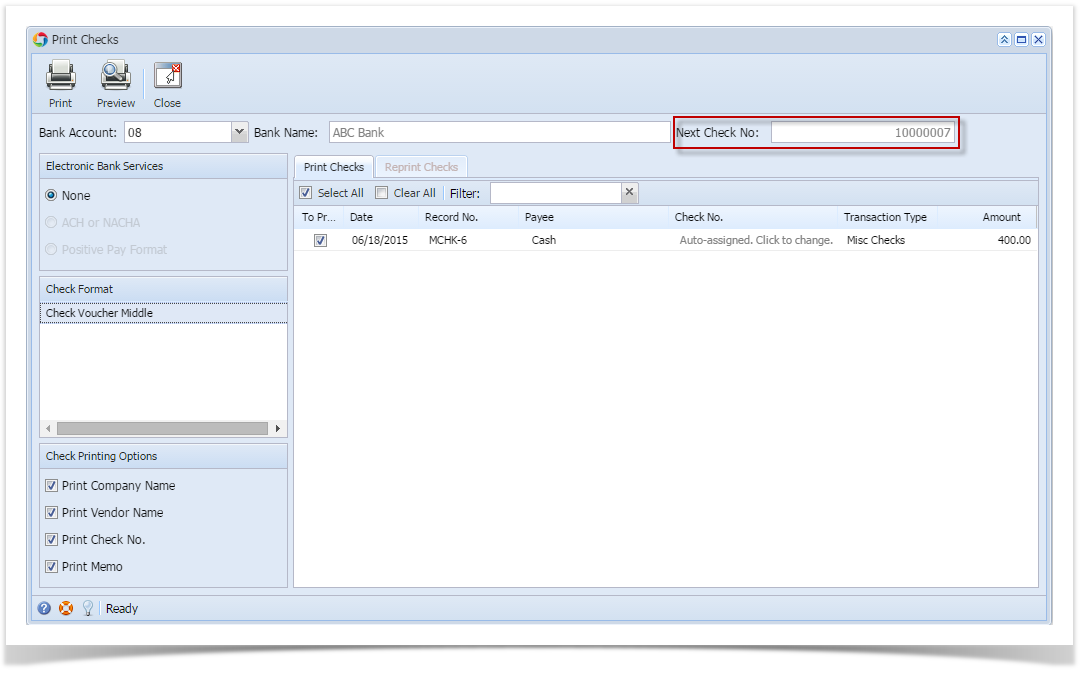
If you have setup Check Number Range for the bank account used for the Miscellaneous Check, the Next Check No field in the Print Checks screen will show the Next Check No setup in the Bank Accounts screen > Check Number Range panel > Next Check No field.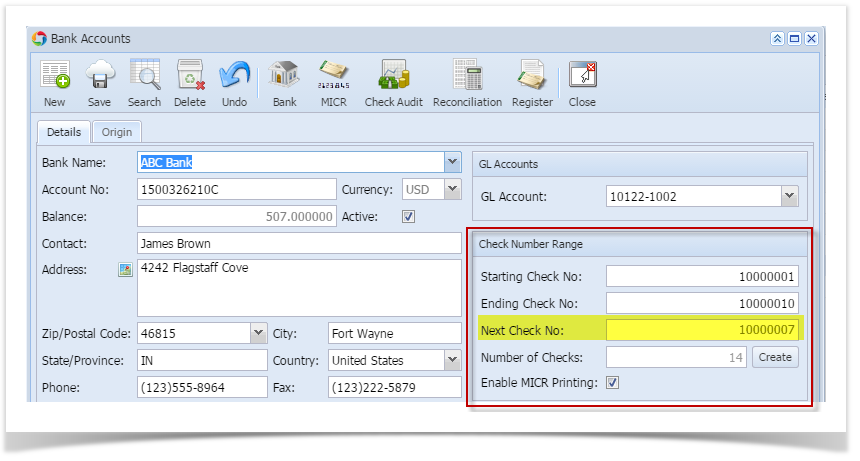
- Click Preview toolbar button.
- The Preview Task List screen opens.
- The Tools button in the Check Voucher Middle report > Status field signifies that i21 is in the process of generating the report.
- This screen stores previous reports previewed/printed. If you would like to clear this screen, select report/s to delete and click Remove button.
- You can also preview report that is existing on this list by clicking the Magnifying glass button in the Status field for the selected report.
- The Report Viewer will open showing the Check Voucher Middle report.
- Click Print button to actually print the check. The Print Check Verification screen opens.
In the Print Check Verification screen, you will have to specify whether the printing of check was a success or it failed.- If the check printing was a success, see Printing of Check is successful.
- If the check printing failed, see Printing of Check failed.
- Close the Check Voucher Middle report by clicking the x button on the Check Voucher Middle tab to close the said report or click the X button at the top right corner of the Report Viewer to close all reports.

- Once the Report Viewer is closed, it will also close the Miscellaneous Check.
- Re-open the Miscellaneous Check and the Check Number field will be updated by the check number setup in the Bank Account screen > Check Number Range panel > Next Check Number.
- Open Bank Account screen from Cash Management module > Maintenance folder > Bank Accounts and select the bank account used in the miscellaneous check. The Next Check No field is now updated with the next available check number.
- Click Check Audit toolbar button to open the Check Number Audit screen where listing of checks is maintained and status of each check number is shown based on result of check printing, which is on this example, successfully printed. Thus Status shows Printed.
Select the miscellaneous check you want to print. Click Print toolbar button.
If the transaction is to be printed right away, you may skip posting it. Instead, click Print toolbar button and it will post and print the transaction. See How to Post Miscellaneous Check.
- The Print Checks screen opens.
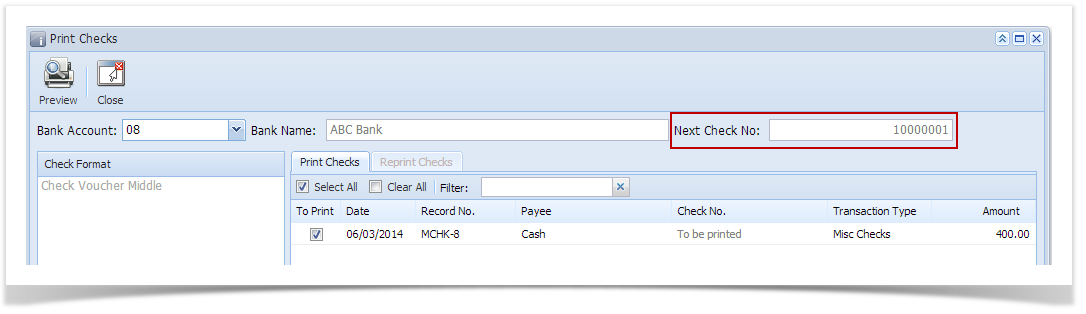
If you have setup Check Number Range for the bank account used for the Miscellaneous Check, the Next Check No field in the Print Checks screen will show the Next Check No setup in the Bank Accounts screen > Check Number Range panel > Next Check No field.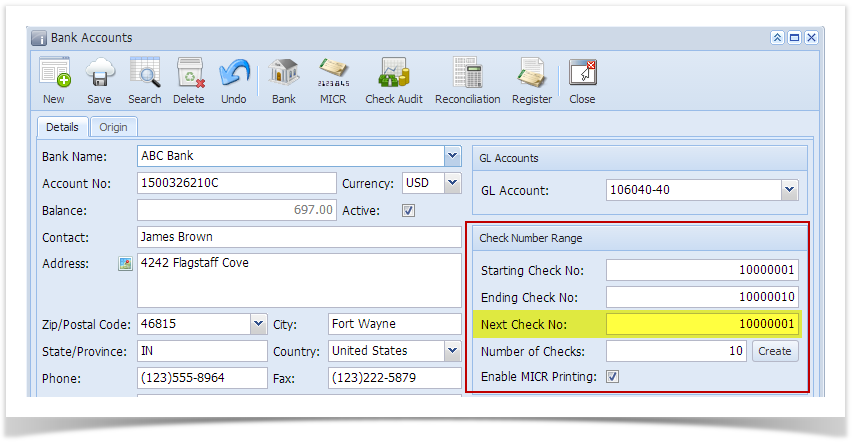
- Click Preview toolbar button.
- The Preview Task List screen opens.
- The Tools button in the Check Voucher Middle report > Status field signifies that i21 is in the process of generating the report.
- This screen stores previous reports previewed/printed. If you would like to clear this screen, select report/s to delete and click Delete button.
- You can also preview report that is existing on this list by clicking the Magnifying glass button in the Status field for the selected report.
- The Report Viewer will open showing the Check Voucher Middle report.
- Click Print button to actually print the check. The Print Check Verification screen opens.
In the Print Check Verification screen, you will have to specify whether the printing of check was a success or it failed.- If the check printing was a success, see Printing of Check is successful.
- If the check printing failed, see Printing of Check failed.
- Close the Check Voucher Middle report by clicking the x button on the Check Voucher Middle tab to close the said report or click the X button at the top right corner of the Report Viewer to close all reports.

You will then be asked to archive the report.- If you will want to archive the report, see How to Archive a report.
- If you will not archive the report, click No button on the message box.
- Once the Report Viewer is closed, it will also close the Miscellaneous Check.
- Re-open the Miscellaneous Check and the Check Number field will be updated by the check number setup in the Bank Account screen > Check Number Range panel > Next Check Number.
- Open Bank Account screen from Cash Management module > Maintenance folder > Bank Accounts and select the bank account used in the miscellaneous check. The Next Check No field is now updated with the next available check number.
- Click Check Audit toolbar button to open the Check Number Audit screen where listing of checks is maintained and status of each check number is shown based on result of check printing, which is on this example, successfully printed. Thus Status shows Printed.

Overview
Content Tools