- Click Paychecks from Payroll module.
- Select paycheck from the grid.
- Click Open toolbar button.
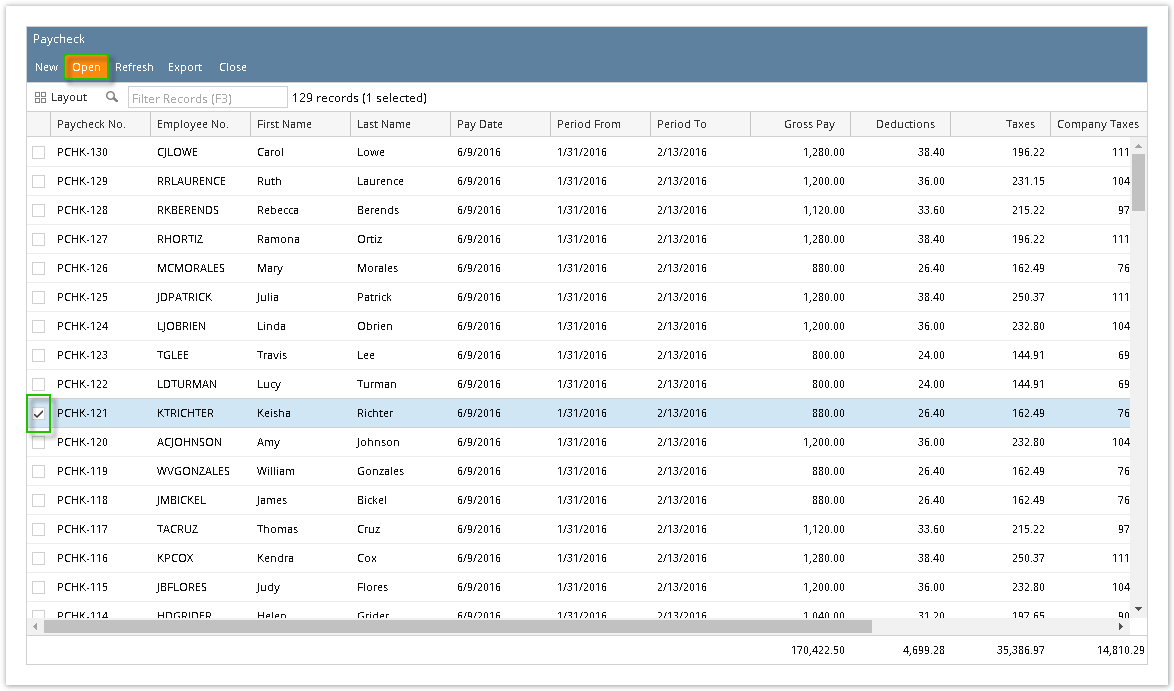
- Selected paycheck's screen will be opened.
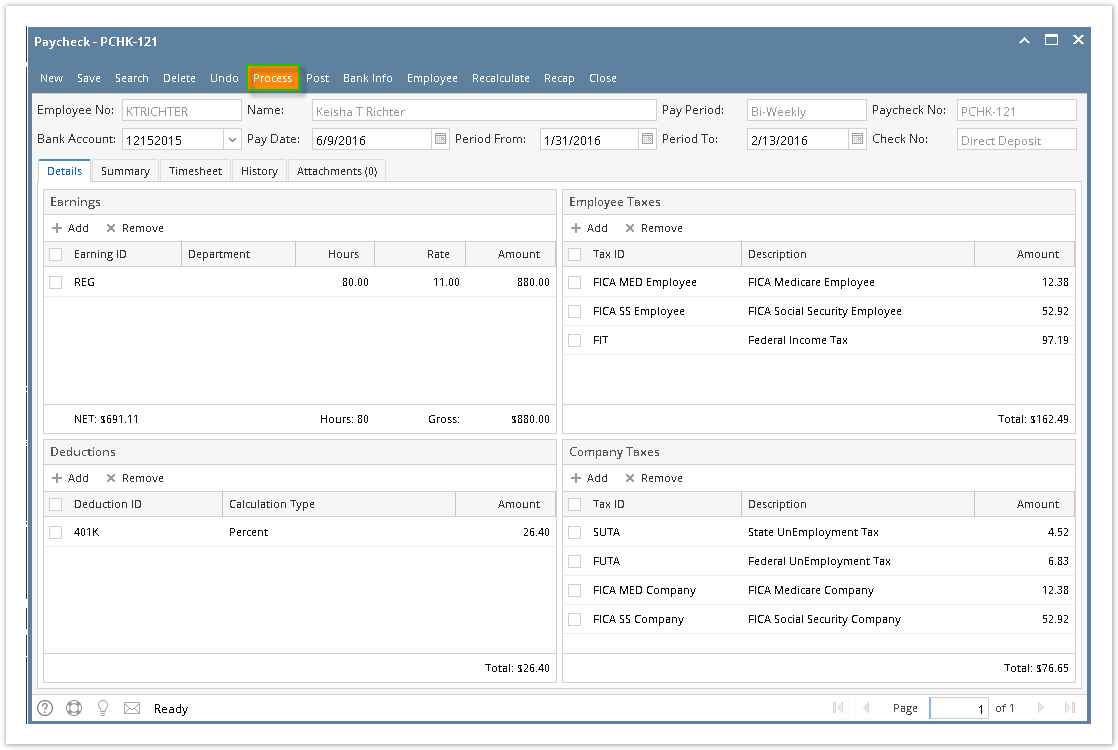
Click Process toolbar button.
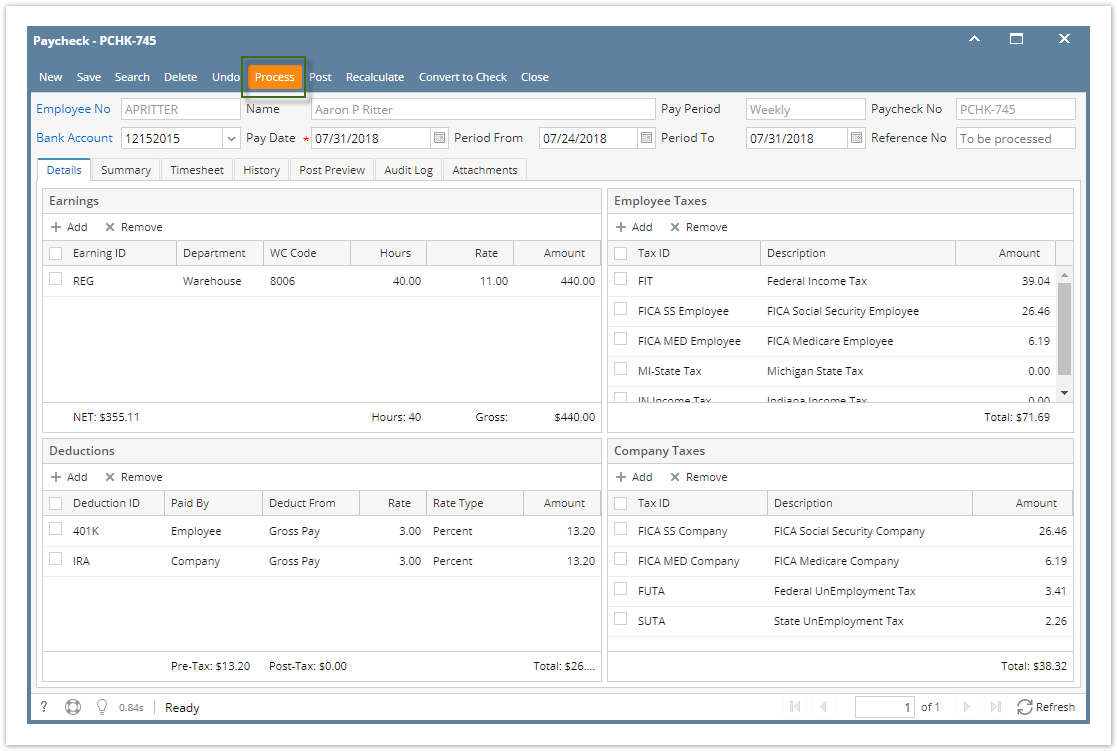
Unposted paychecks will automatically be posted when Process toolbar button is clicked before proceeding into printing it.
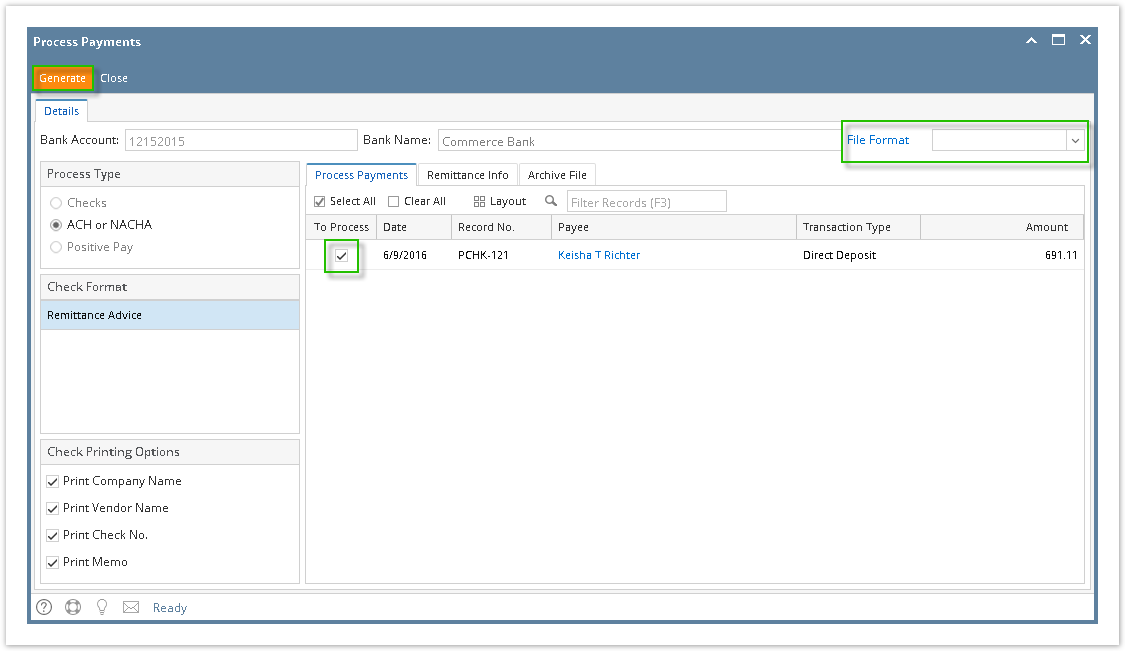
Process Payments screen will be displayed.
Select File Format and click Generate toolbar button.
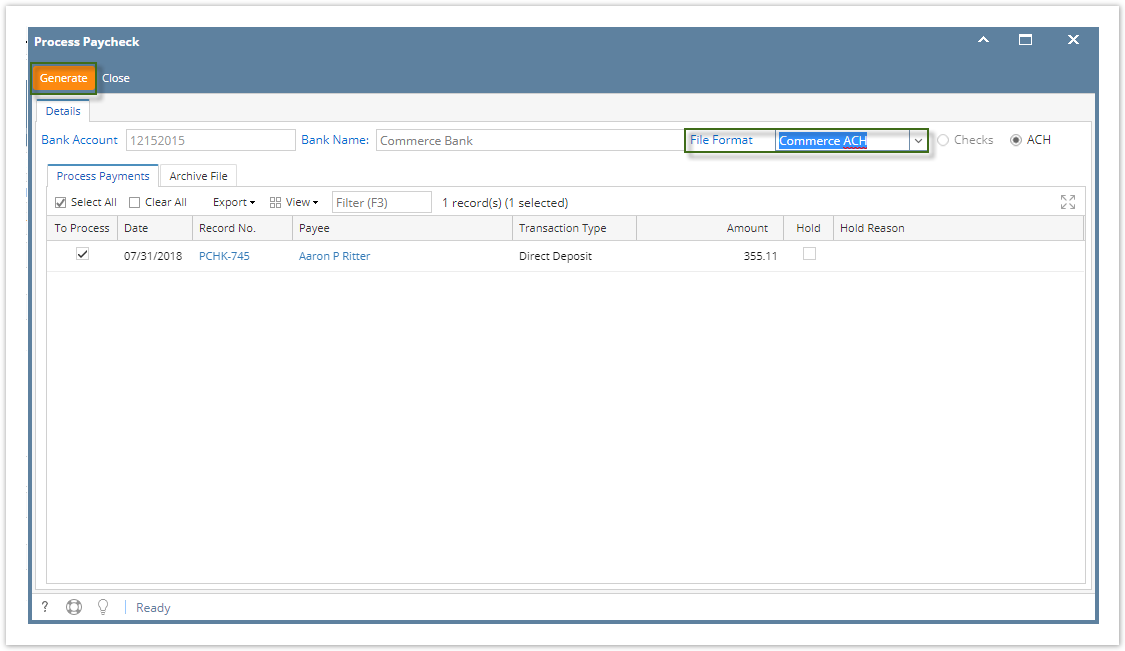
The record displayed in the screen should be the selected paycheck only.
The checkbox of the selected paycheck is automatically checked.
File Format will be required if the bank used by the paycheck has no default ACH file.
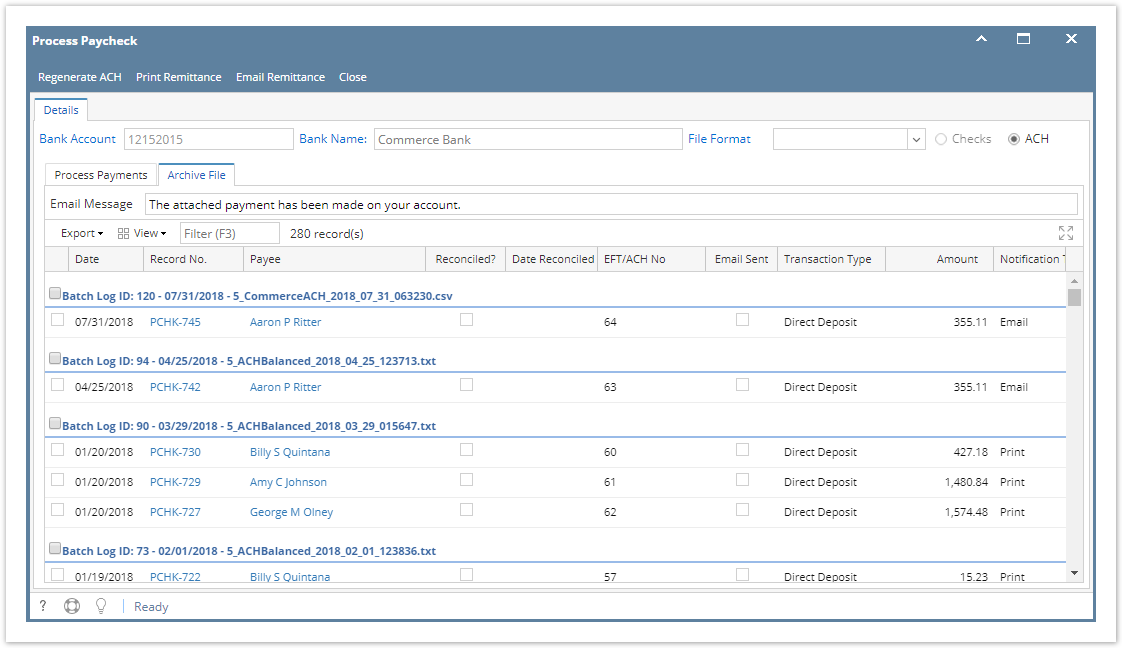
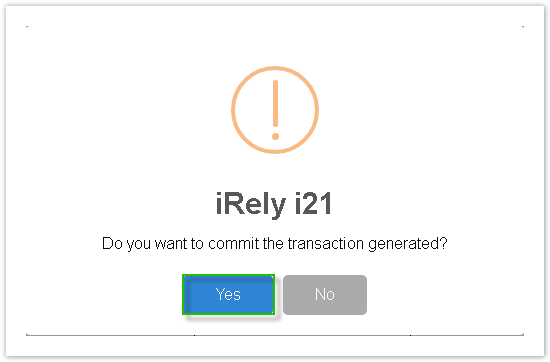
Bank file is generated and commit paycheck
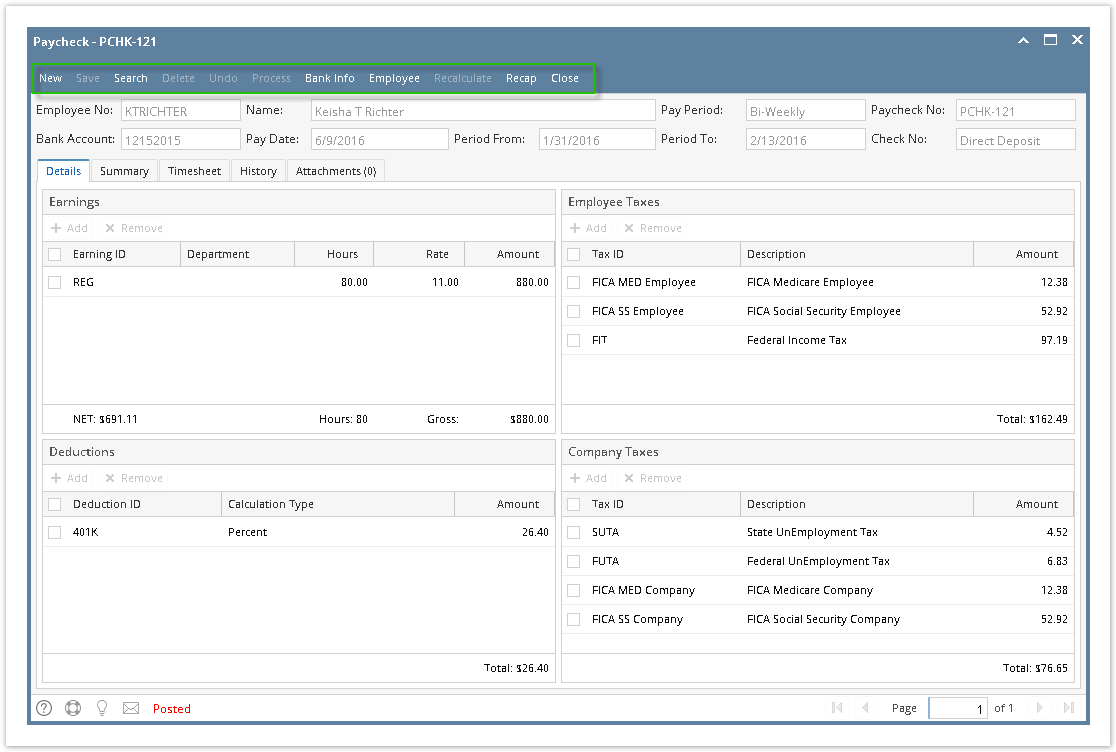
- Paychecks are displayed in Archive tab
- Click Paychecks from Payroll module.
- Select paycheck from the grid.
- Click Open toolbar button.
- Selected paycheck's screen will be opened.
Click Process toolbar button.
Unposted paychecks will automatically be posted when Process toolbar button is clicked before proceeding into printing it.
Process Payments screen will be displayed.
Click Generate toolbar button.
The record displayed in the screen should be the selected paycheck only.
The checkbox of the selected paycheck is automatically checked.
File Format will be required if the bank used by the paycheck has no default ACH file.
- Report Preview screen will be displayed.
- A prompt to save ACH Bank file will be displayed.
- Proceed to save bank file.
- A confirmation message will be displayed.
- Click Yes button.
Remittance Advice will be sent in employee's email.
Click the Print icon
 .
.- Proceed on printing the paycheck/s.
Other buttons will be disabled.
From the Employee Paycheck screen which is not yet posted, click the Print toolbar button.
Print Checks screen will be shown.
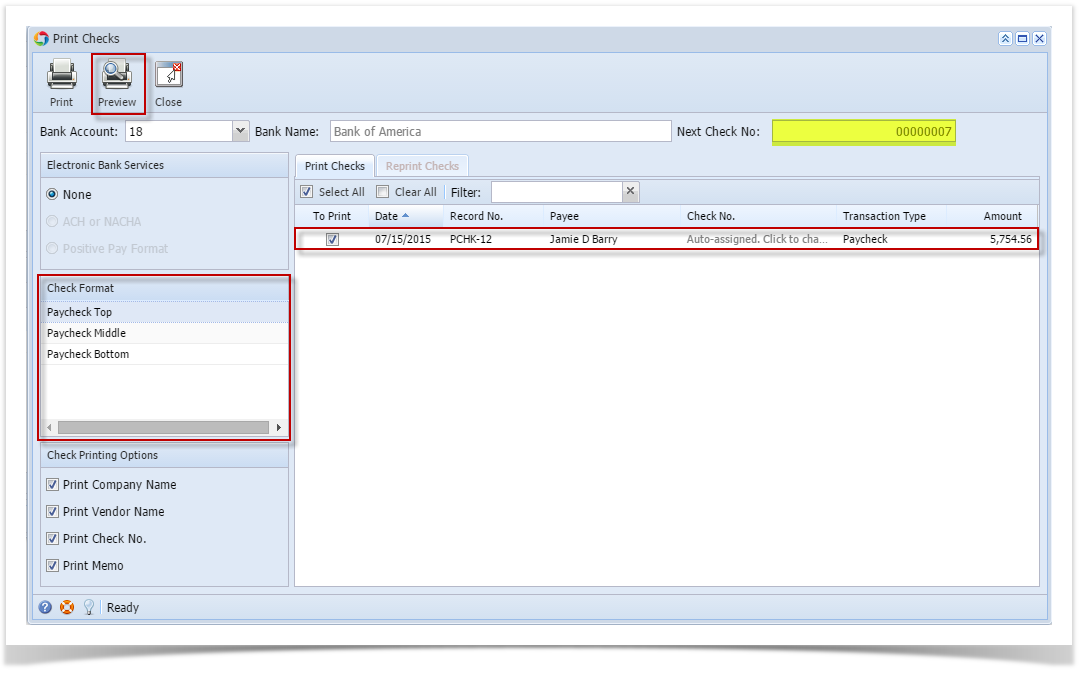
- Select the Paycheck transaction to be printed
- Select the report from the Check format section
- The Paycheck Check No. to be generated should be coming from the Next Check No field.
- Click the Preview toolbar button to preview the paycheck report
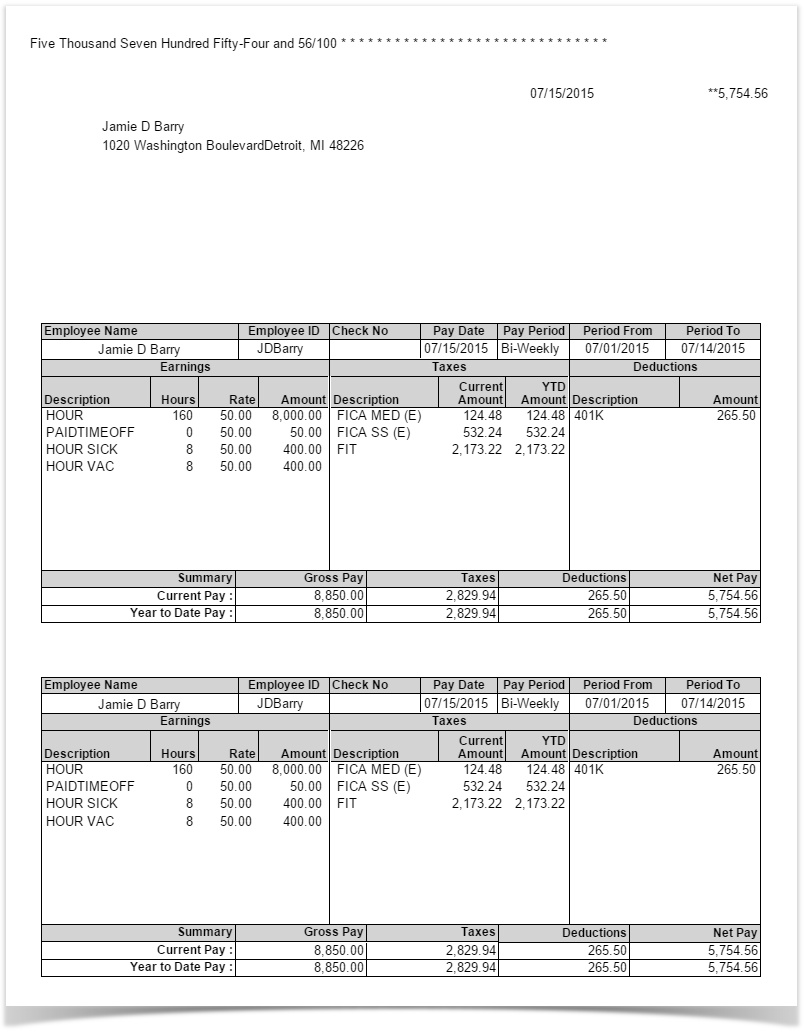
- The paycheck report will be displayed in the Report Viewer screen showing the Paycheck Details.
- Click the Print the report or Print the current page button to print the paycheck report.
- Once it printed, the Print Check Verification screen will be shown.
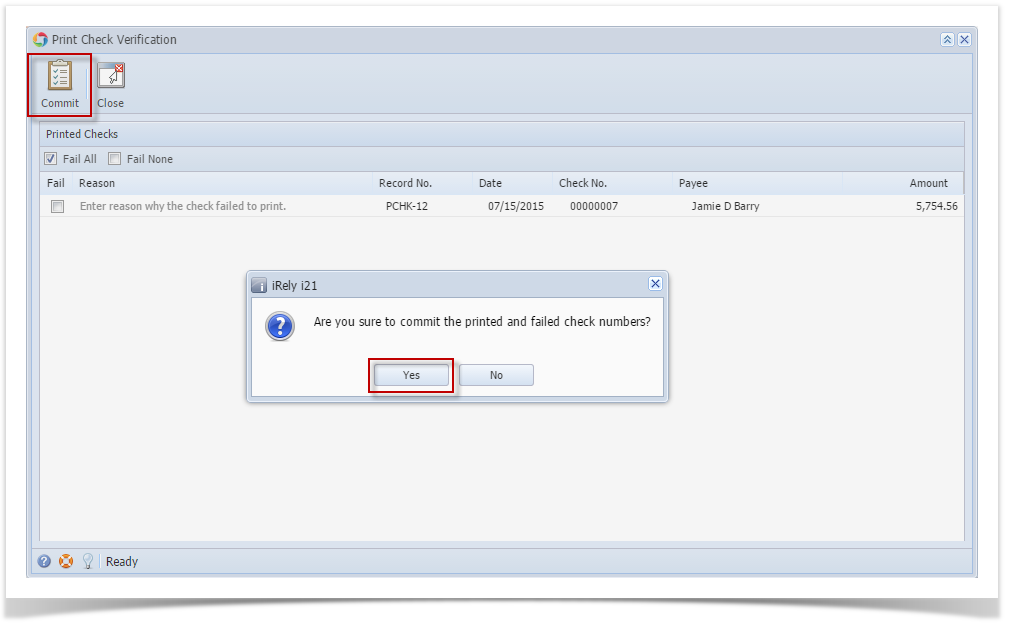
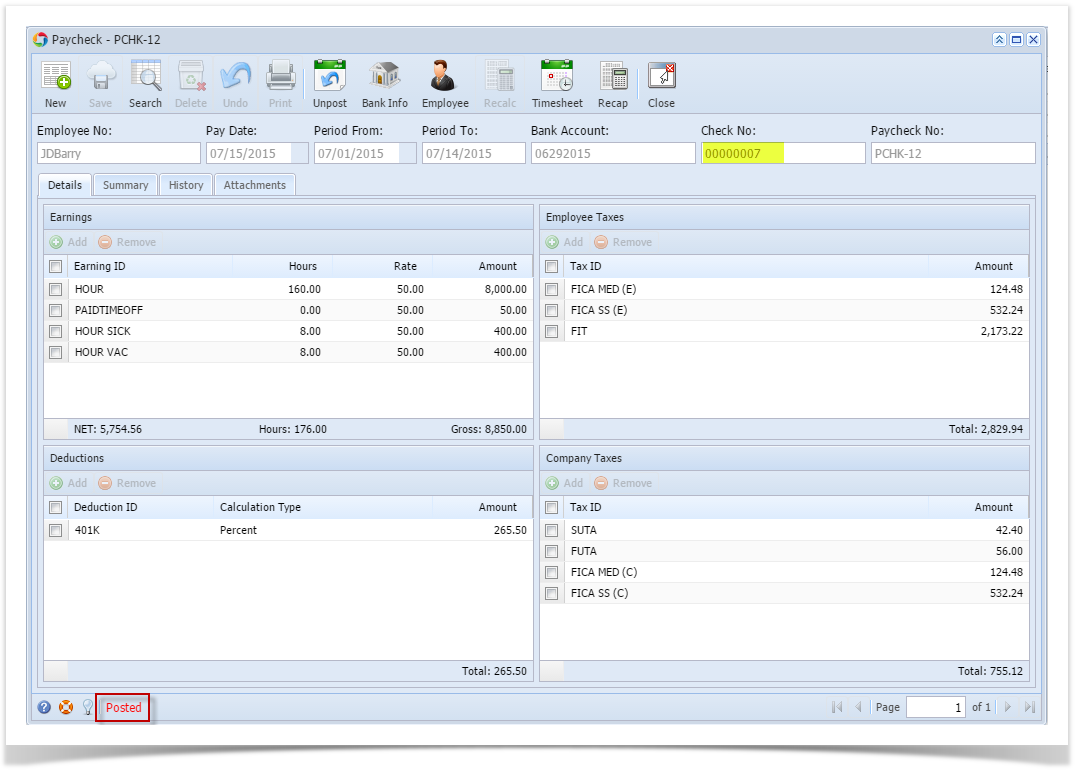
- Click the Yes button to commit the printed paycheck. In the paycheck screen, it showed the generated Check No. and it will automatically posted.
Overview
Content Tools