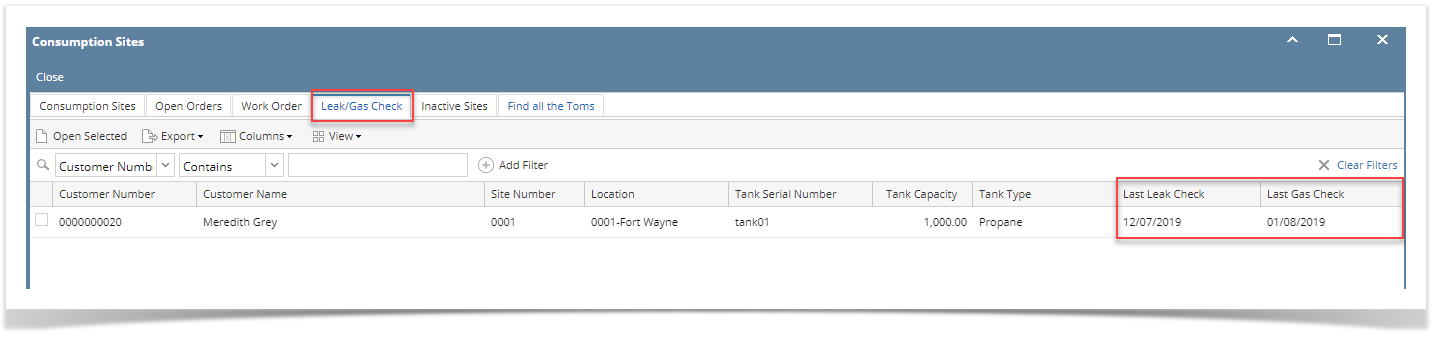
Consumption Site Search screen > Leak/Gas Check Tab displays the list of Consumption Sites and its tank/s that has or has no Leak/Gas Check date. With this, the user will have a clear overview of which tank/s need Leak/ Gas checking.
Here is how to view the leak check / gas check details.
- Open the Consumption Site Search screen and navigate to Leak/Gas Check tab. Customer details as well as dates for leak check and gas check will be listed.
- Filter specific records using the Advance Filter (magnifying glass icon) to list the records needed for the report.

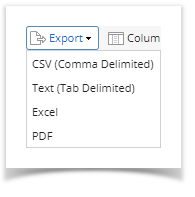
- Select the record on grid and click Export button. The report can be exported and viewed via CSV, Text, Excel or PDF file.
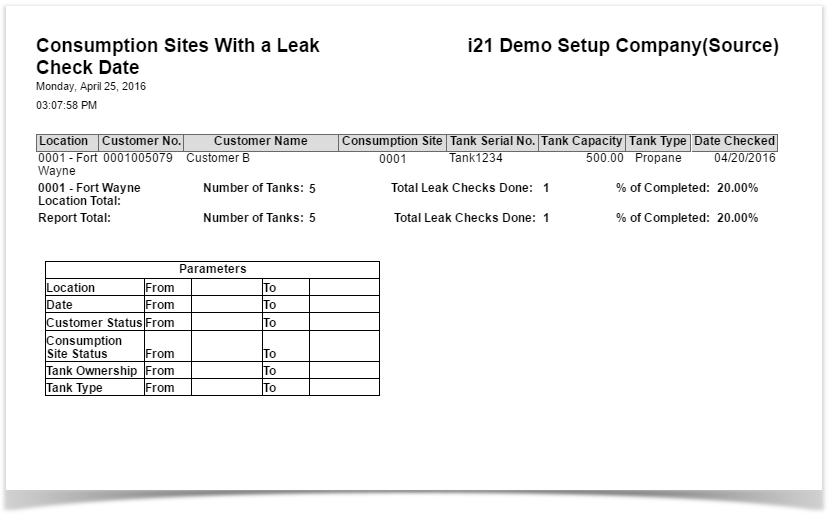
Below is the preview of the report as exported via PDF:

This report has been simplified and was removed under the Reports menu in version 17.1. Leak Check/Gas Check has been moved to Consumption Site Search screen > Leak/Gas Check Tab.
This report will show a list of Consumption Sites and its tank/s which have or does not have Leak Check date. With this, the user will have a clear overview of which tank/s need Leak/ Gas checking. The report will include tanks that have already been deployed to a consumption site.
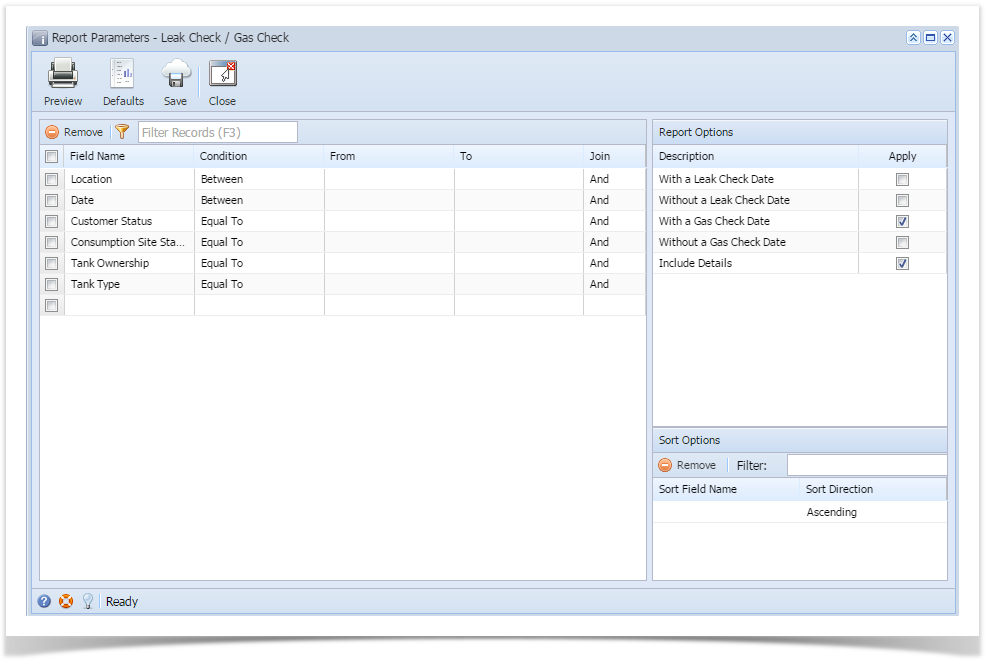
Here is how to use and preview this report.- Open Report Parameters screen of Leak Check/ Gas Check report.
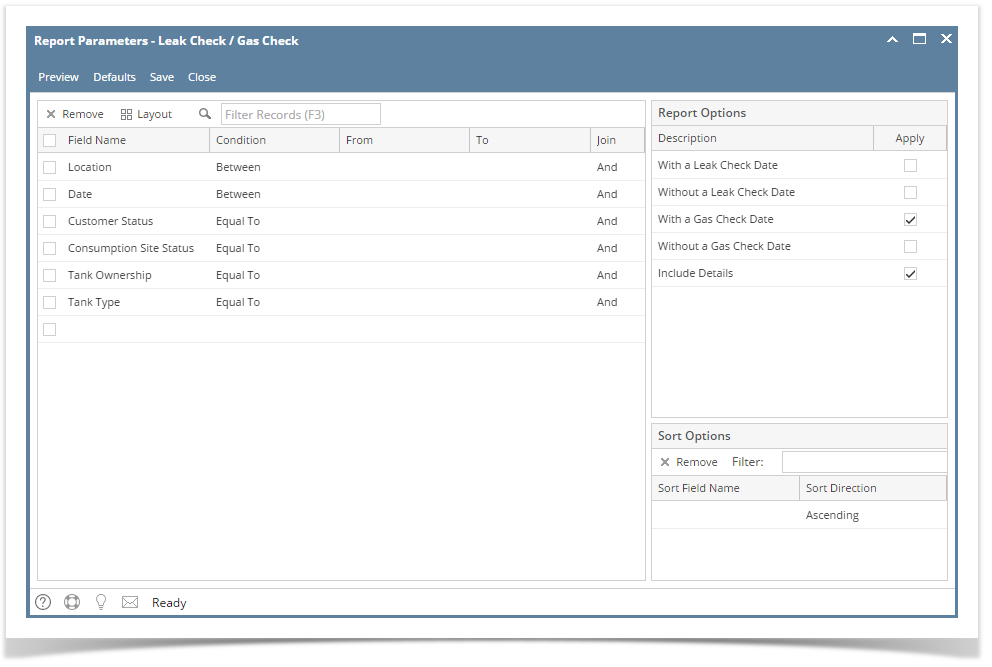
- Fill out Selection Criteria section of Report Parameters screen. Below are the available criteria.
- Location - This is the Consumption Sites location. You can manually type a location, or select from the combo box list.
- Date - The report will include records within the range. You can select a date from the date picker, or type one in.
- Customer Status - The available values are 'Active' and 'Inactive'. If left blank, the report will display both active and inactive Customer.
- Consumption Site Status - The available values are 'Active' and 'Inactive'. If left blank, the report will display both active and inactive sites.
- Tank Ownership - This is the Ownership specified in the device's record. You can manually type the device ownership, or select from the combo box list.
- Tank Type - This is the Tank Type specified in the device's record. You can manually type the tank type, or select from the combo box list.
- Select or deselect option from Report Options section. Note that you can only select one option at a time.
- With a Leak Check Date - report will include Consumption Sites having a Leak Check Date.
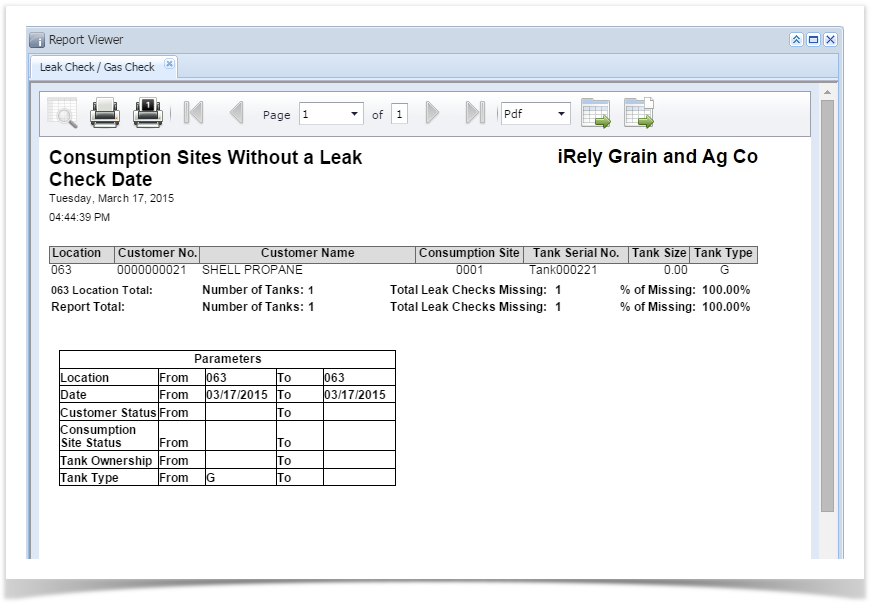
- Without a Leak Check Date - report will include Consumption Sites missing a Leak Check Date.
- With a Gas Check Date - report will include Consumption Sites having a Gas Check Date.
- Without a Gas Check Date - report will include Consumption Sites missing a Gas Check Date.
- Include Details - if selected, the report includes each Consumption Site record, Location Total line, and Report Total line. Otherwise, a Consumption site record will not be displayed.
If 'Without a Leak Check Date' or 'Without a Gas Check Date' option is checked, then the Date Checked column, found next to Tank Type column, will not be displayed.
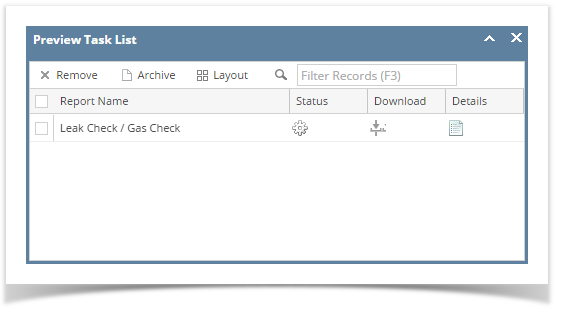
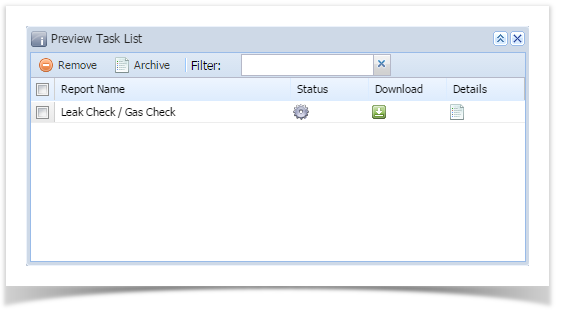
- Click Preview toolbar button. Preview Task List will display followed by the report.
'With a Gas Check Date' option creates the same report with regards to business logic and format as with 'With Leak Check Date', except it would be based on Gas Check Event. Same applies to 'Without a Gas Check Date'.
This report will show a list of Consumption Sites and its tank/s which have or does not have Leak Check date. With this, the user will have a clear overview of which tank/s need Leak/ Gas checking. The report will include tanks that have already been deployed to a consumption site.
Here is how to use and preview this report.- Open Report Parameters screen of Leak Check/ Gas Check report.
- Fill out Selection Criteria section of Report Parameters screen. Below are the available criteria.
- Location - This is the Consumption Sites location. You can manually type a location, or select from the combo box list.
- Date - The report will include records within the range. You can select a date from the date picker, or type one in.
- Customer Status - The available values are 'Active' and 'Inactive'. If left blank, the report will display both active and inactive Customer.
- Consumption Site Status - The available values are 'Active' and 'Inactive'. If left blank, the report will display both active and inactive sites.
- Tank Ownership - This is the Ownership specified in the device's record. You can manually type the device ownership, or select from the combo box list.
- Tank Type - This is the Tank Type specified in the device's record. You can manually type the tank type, or select from the combo box list.
- Select or deselect option from Report Options section. Note that you can only select one option at a time.
- With a Leak Check Date - report will include Consumption Sites having a Leak Check Date.
- Without a Leak Check Date - report will include Consumption Sites missing a Leak Check Date.
- With a Gas Check Date - report will include Consumption Sites having a Gas Check Date.
- Without a Gas Check Date - report will include Consumption Sites missing a Gas Check Date.
- Include Details - if selected, the report includes each Consumption Site record, Location Total line, and Report Total line. Otherwise, a Consumption site record will not be displayed.
If 'Without a Leak Check Date' or 'Without a Gas Check Date' option is checked, then the Date Checked column, found next to Tank Type column, will not be displayed.
- Click Preview toolbar button. Preview Task List will display followed by the report.
'With a Gas Check Date' option creates the same report with regards to business logic and format as with 'With Leak Check Date', except it would be based on Gas Check Event. Same applies to 'Without a Gas Check Date'.
- Open Report Parameters screen of Leak Check/ Gas Check report.
Overview
Content Tools