- Log in as Admin user
- On user’s menu panel, go to System Manager folder then click Custom Fields
From Search Custom Field screen, click New toolbar button to open a new Custom Fields screen
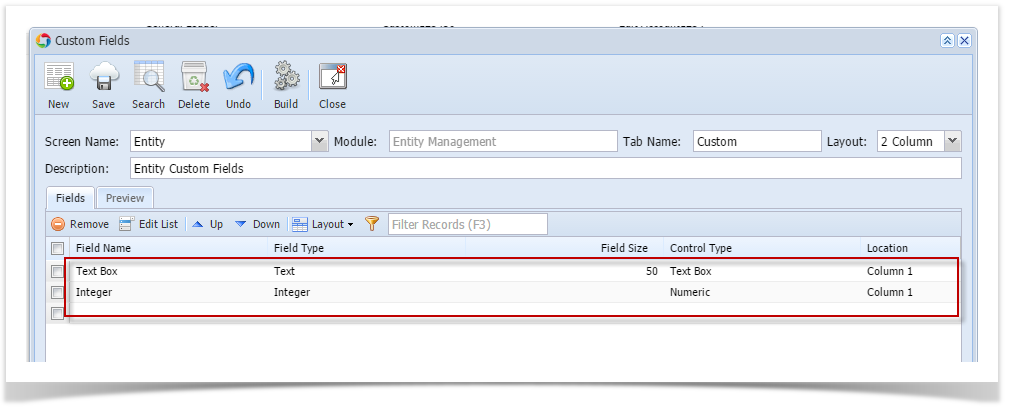
- Select values on the header fields (Screen Name, Tab Name, Layout, Description)
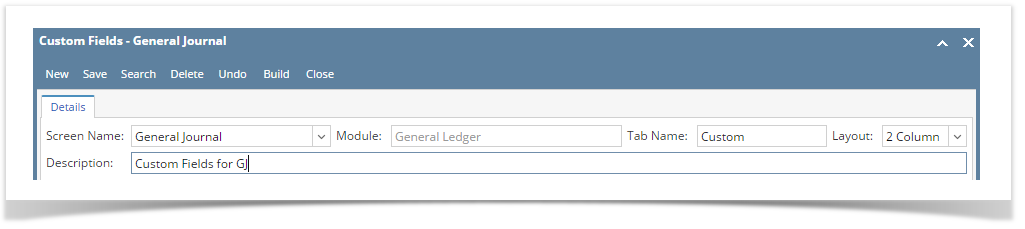
 Module field is automatically filled with the module parent of the selected Screen Name.
 - Select/enter details on the grid (Field Name, Field Type, Field Size, Control Type, and Location)

Field Types can be any of the following: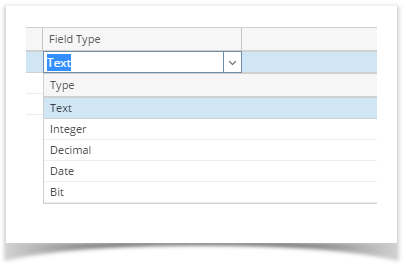 Control Type is automatically filled when a Field Type is selected. A Text type can be a Text Box, Text Area, or a Combo box.
 - Click Save toolbar button once done
Users can preview how the fields will look by going to the Preview tab
- Log in as Admin user
- On user’s menu panel, go to System Manager folder then click Custom Fields
From Search Custom Field screen, click New toolbar button to open a new Custom Fields screen
- Select values on the header fields (Screen Name, Tab Name, Layout, Description)
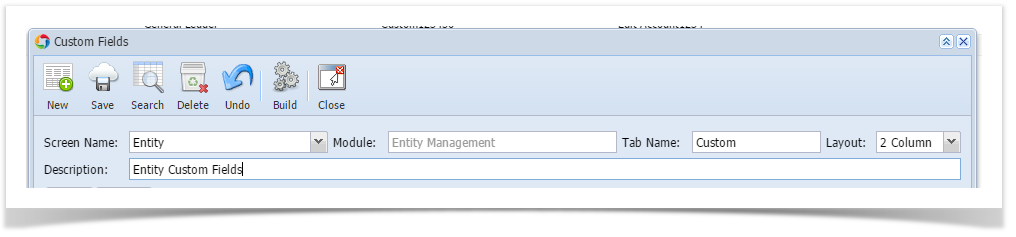 Module field is automatically filled with the module of the selected Screen Name.
 - Select/enter details on the grid (Field Name, Field Type, Field Size, Control Type, and Location)

Field Types can be any of the following: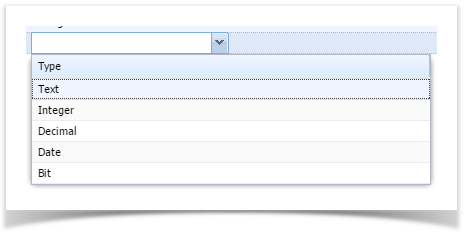 Control Type is automatically filled when a Field Type is selected. A Text type can be a Text Box, Text Area, or a Combo box.
 - Click Save toolbar button once done
- Log in as Admin user
- On user’s menu panel, go to System Manager folder then click Custom Fields
From Search Custom Field screen, click New toolbar button to open a new Custom Fields screen
- Select values on the header fields (Screen Name, Tab Name, Layout, Description) Module field is automatically filled with the module of the selected Screen Name.
- Select/enter details on the grid (Field Name, Field Type, Field Size, Control Type, and Location)
Field Types can be any of the following: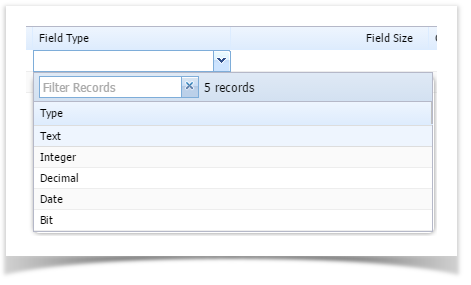 Control Type is automatically filled when a Field Type is selected. A Text type can be a Text Box, Text Area, or a Combo box.
 - Click Save toolbar button once done
Overview
Content Tools